
2D Tech Art Chronicles: Gradient Mapping

Gradient Mapping
With an Atlas Texture - Unreal
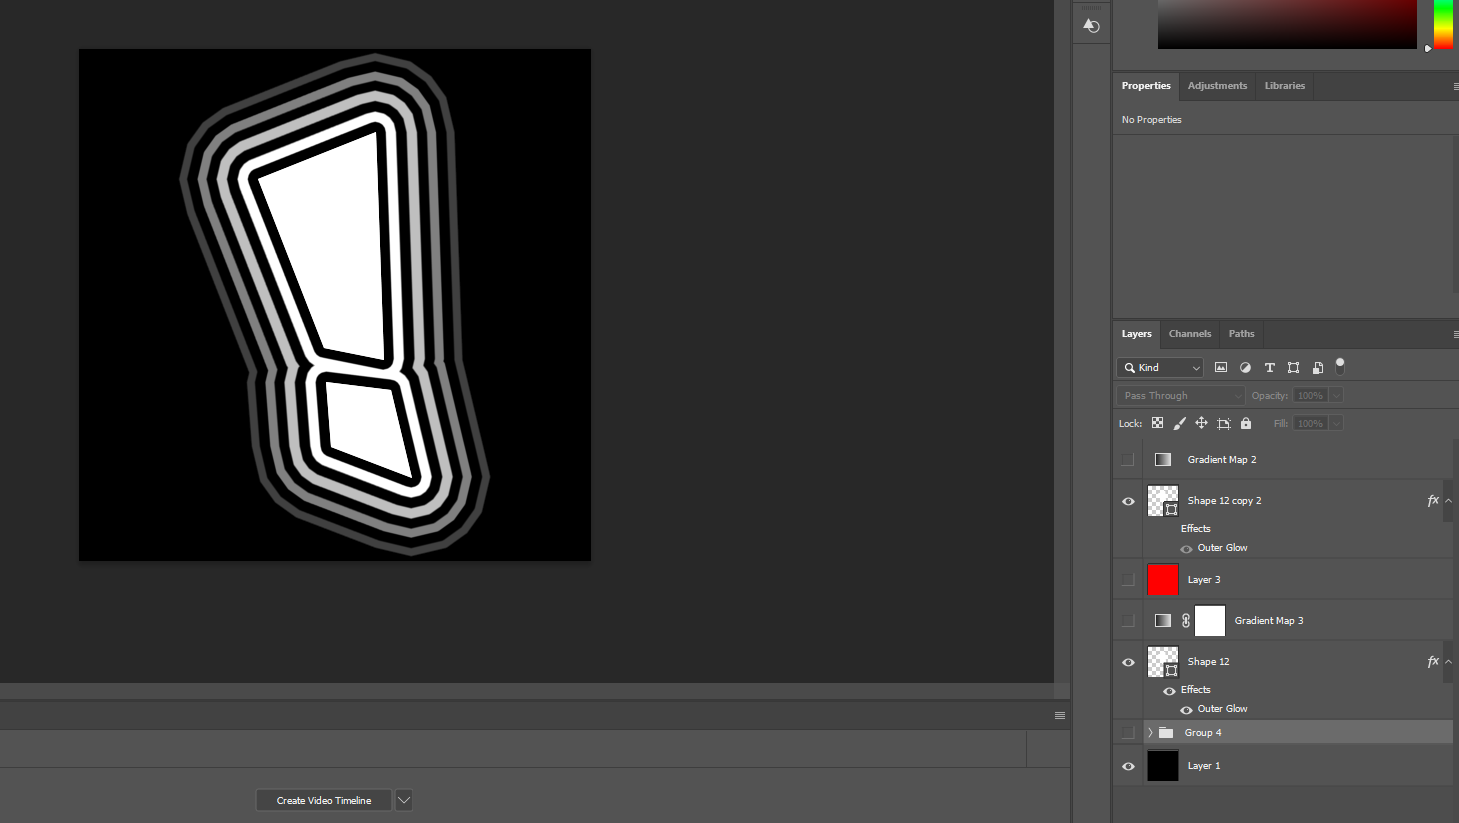
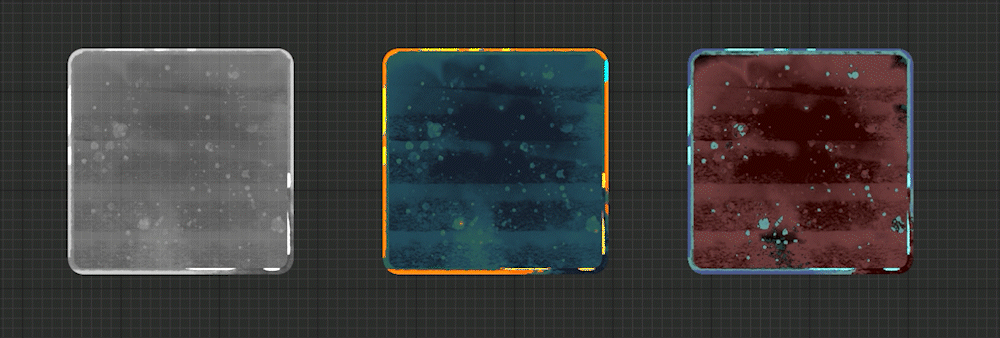
First I want to explain the difference between a gradient map and say a tinting a color on a grayscale texture.
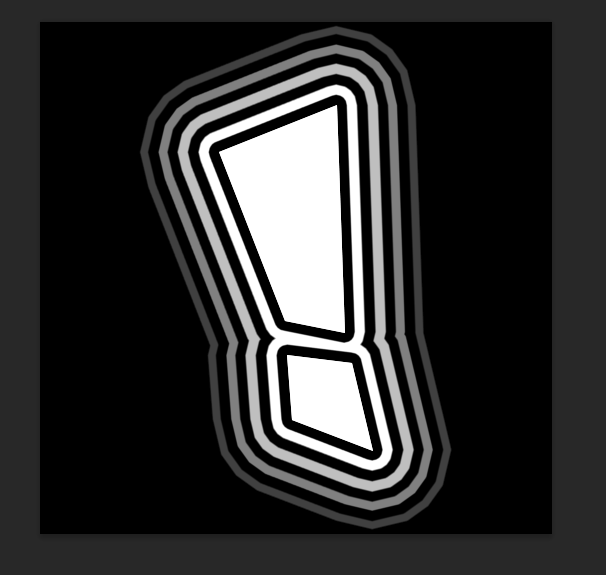
This pretty easy to show with photoshop or any image editing software, therefore I made myself a photoshop shape vector and put a unique glow around it that makes these nice lines.
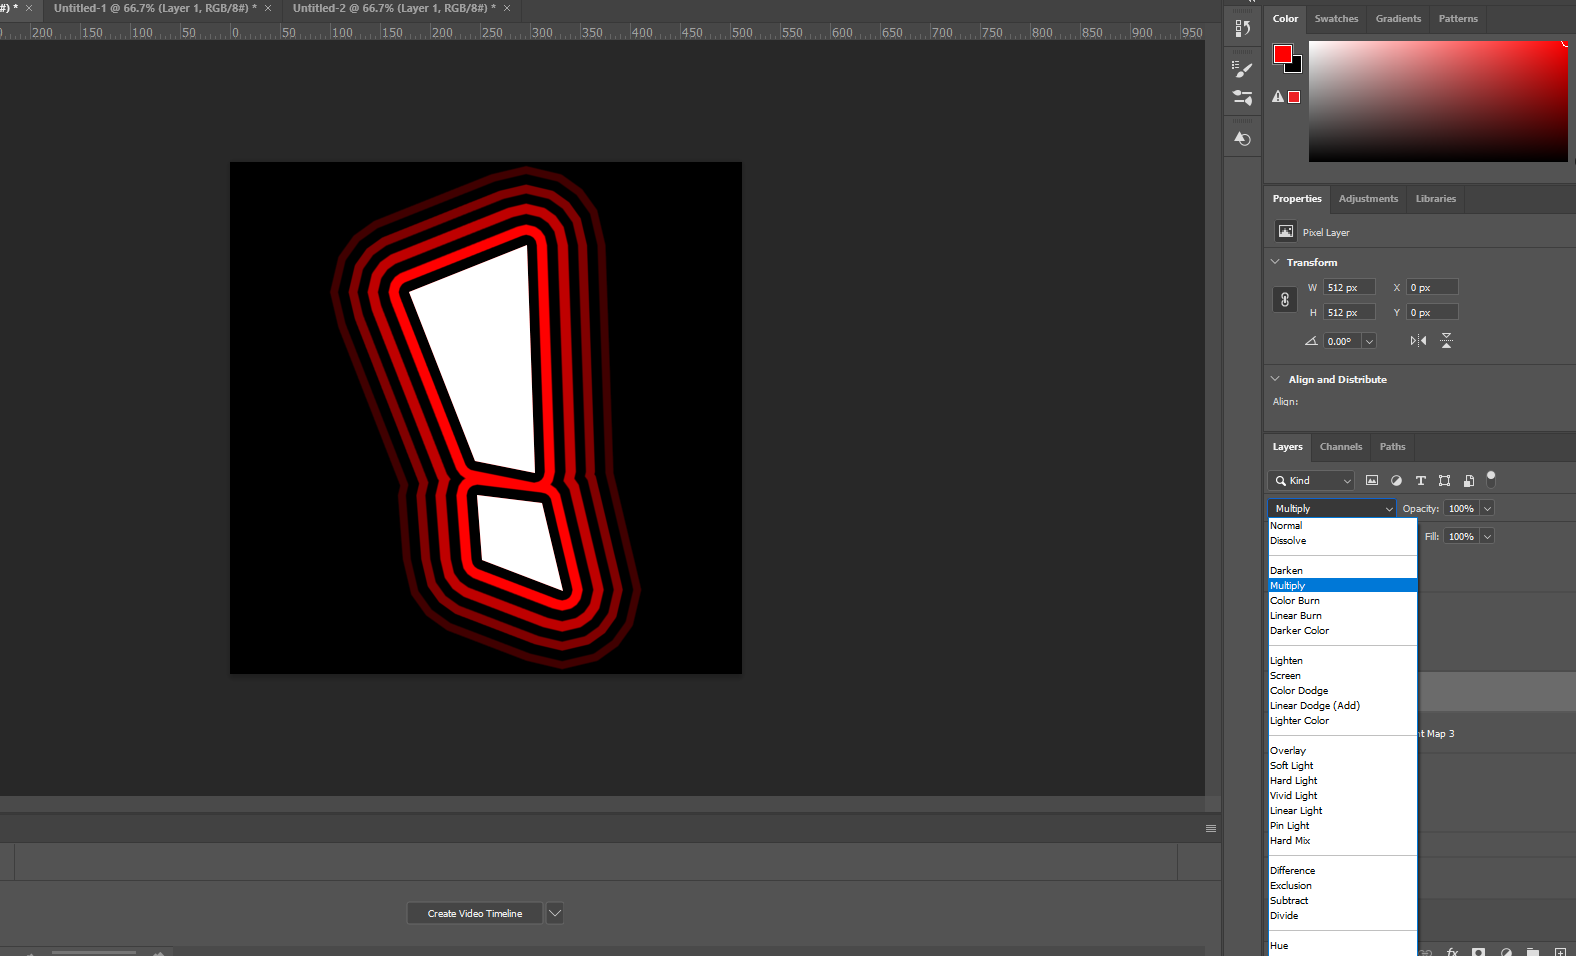
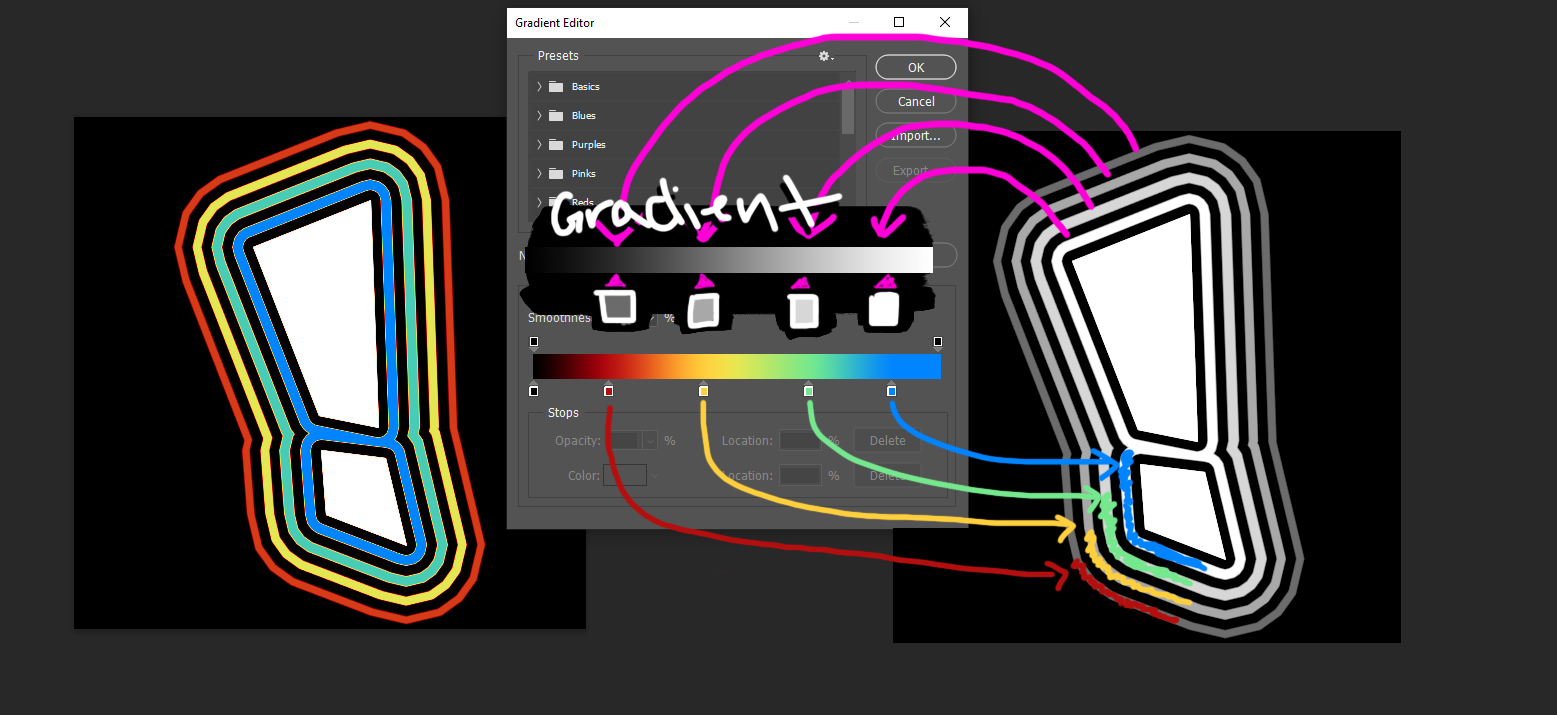
What an engine color tint does if I were to tint this in Unreal or Unity would act as if I were to multiply a red color on my stroke layer:
This is a gradient map in photoshop:
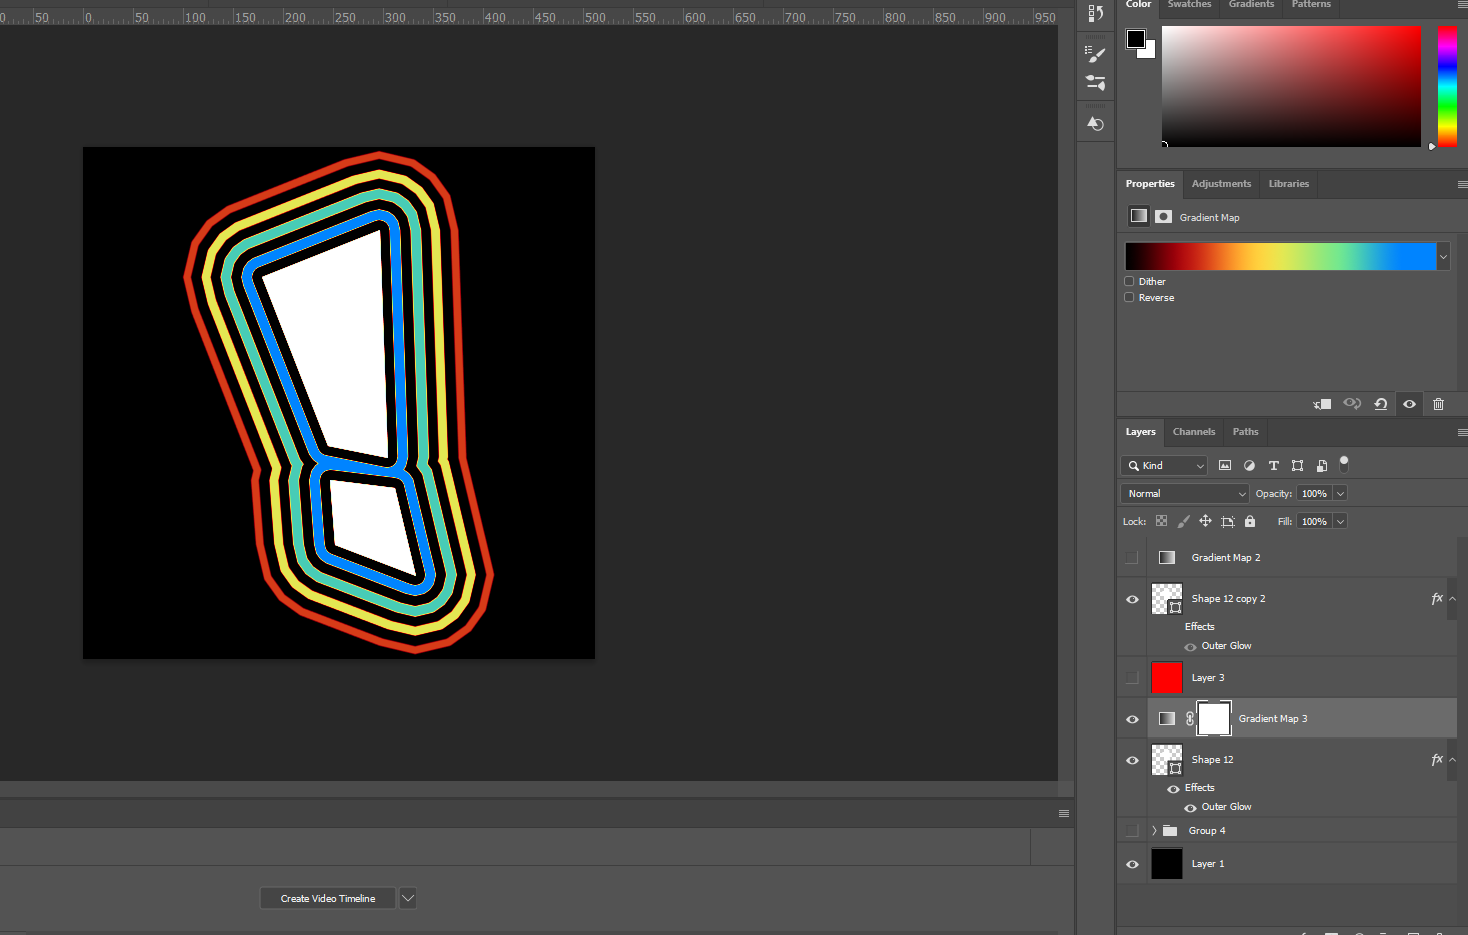
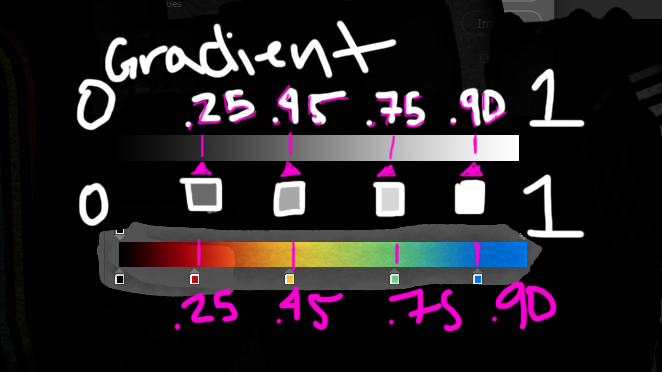
Here is how the gradient works:
The completely black part of the gradient will map to black
(0 in the grayscale texture will show black)
Dark gray will map to red
(.25 gray on the grayscale texture will show red)
Middle gray will map to yellow
(.45 gray on the grayscale texture will show yellow)
Lighter gray will map to green
(.75 gray on the grayscale texture will show green)
Light gray to white will map to blue
(.95 gray on the grayscale texture will show blue)
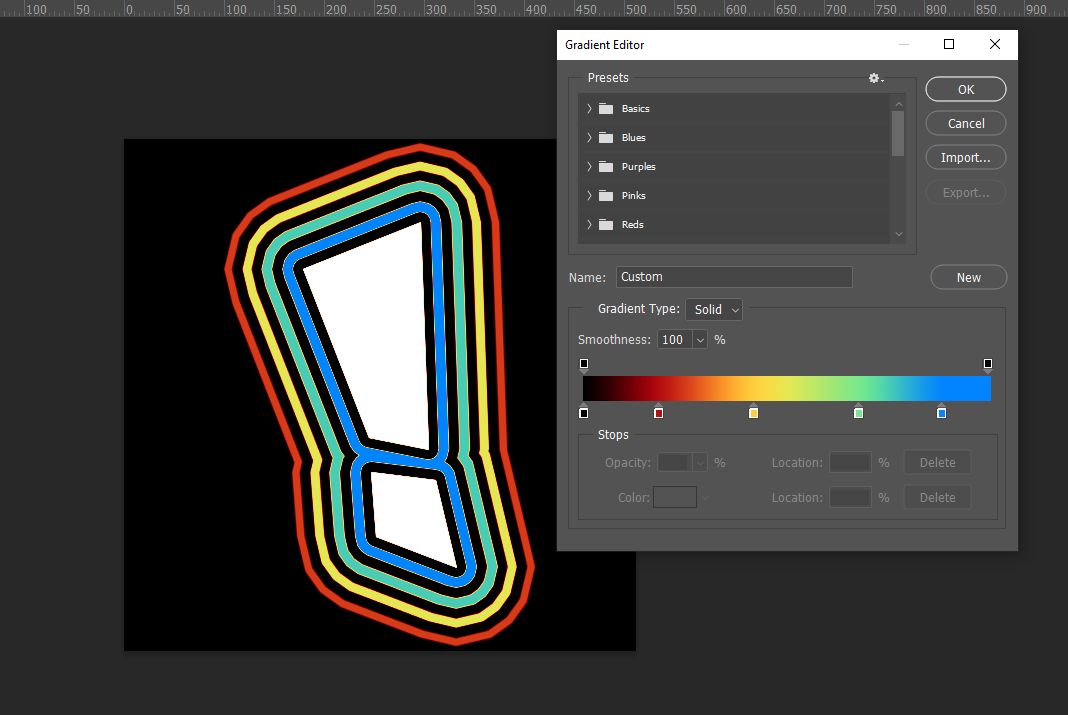
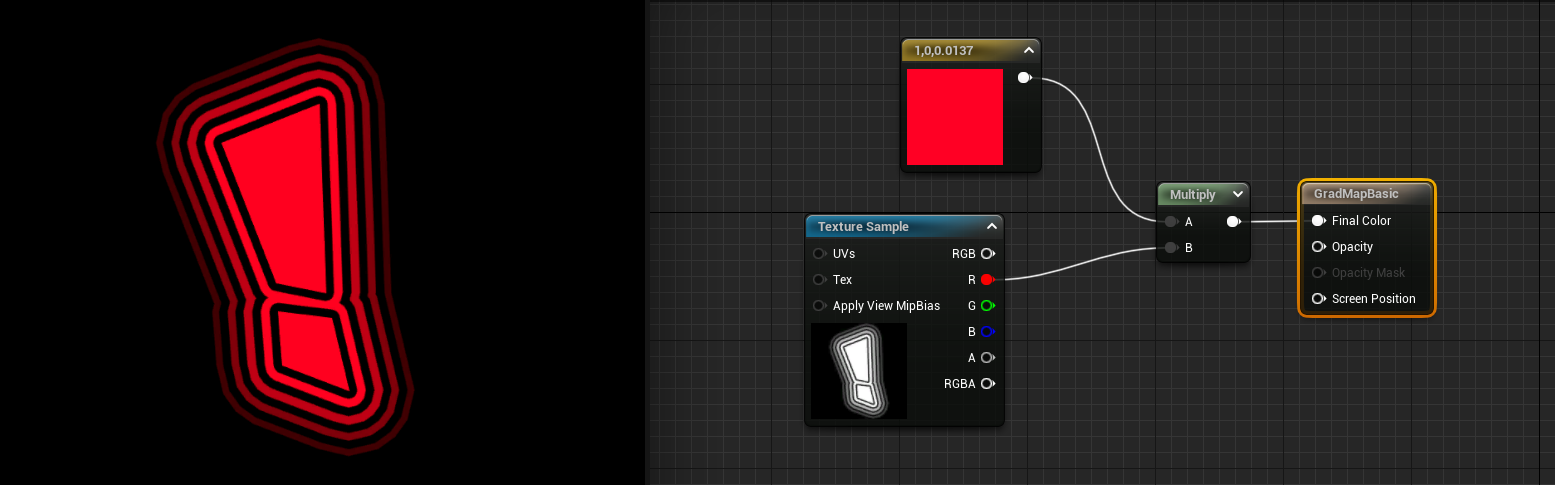
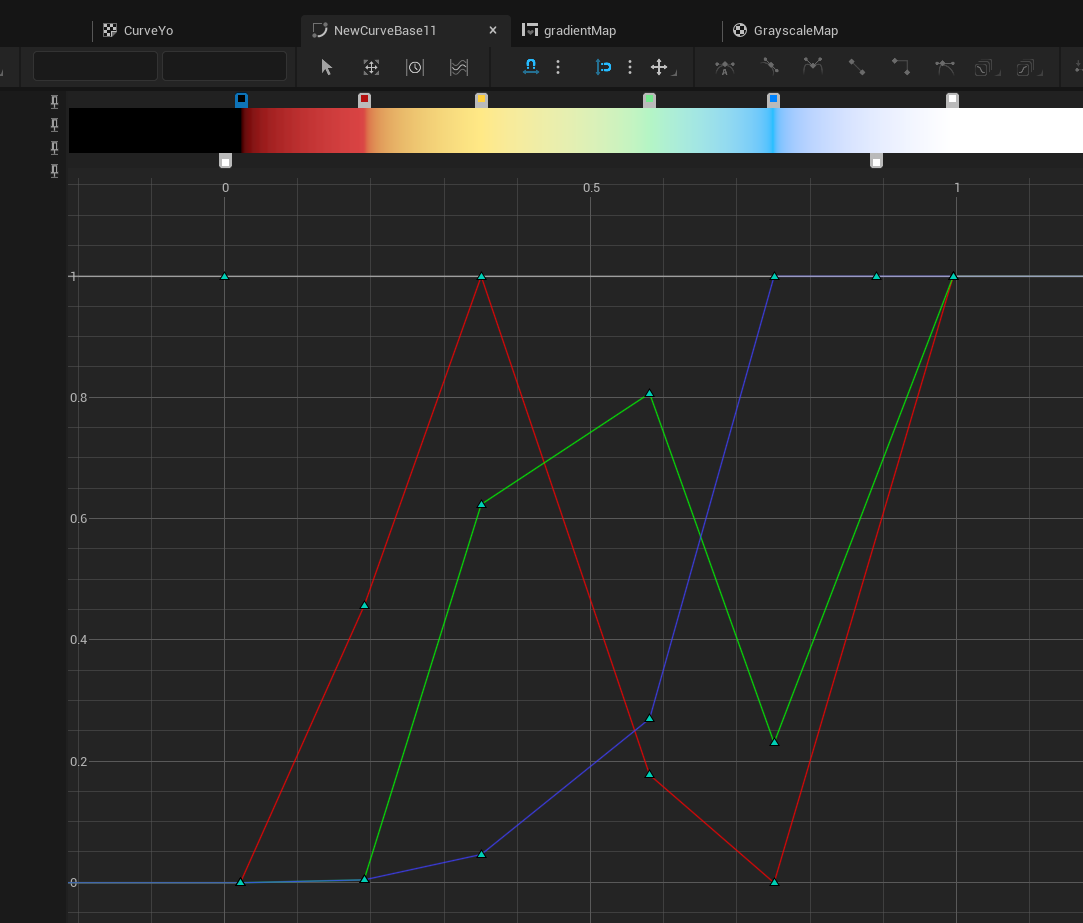
To bring it all together here’s hopefully the most intense diagram in this article:
In Unreal if I take this texture in a material and multiply node it by a color that would be the same as tinting or a multiply layer in photoshop:
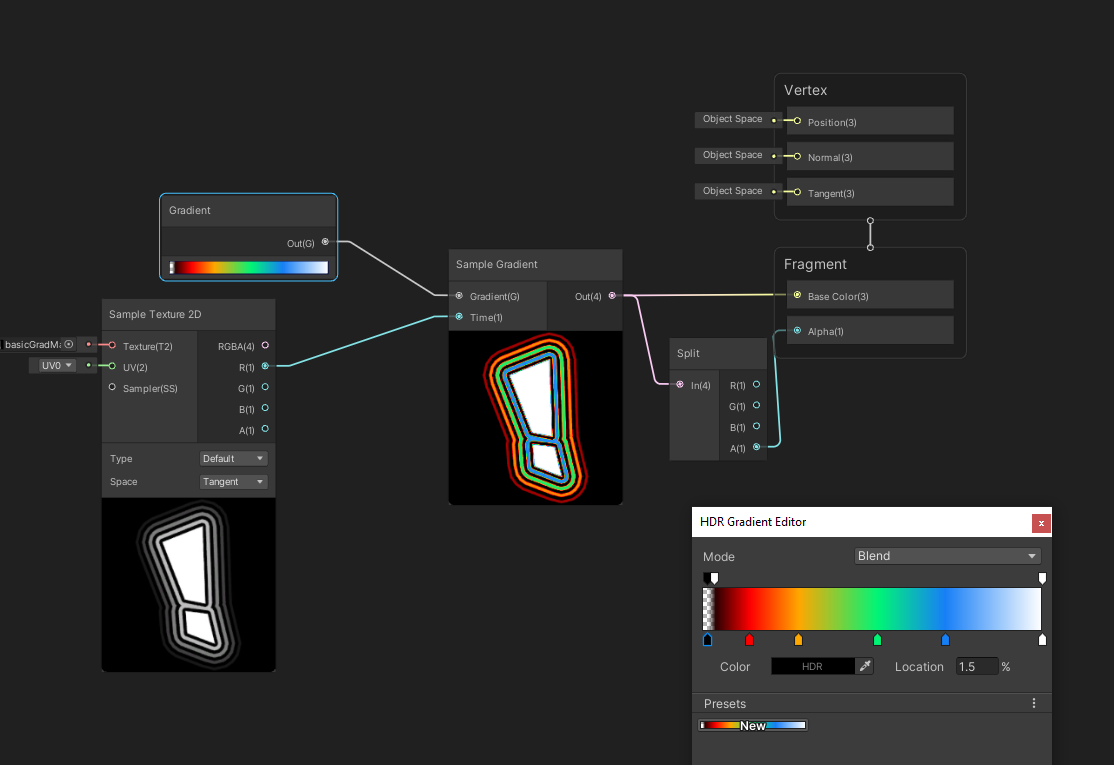
But Unreal can also do a gradient map and to do this one way is to make a Curve Atlas asset
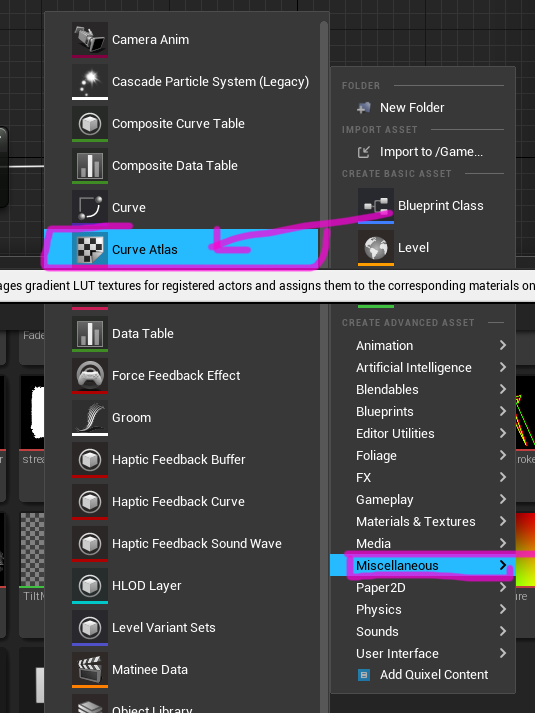
One of my curve atlas assets looks like this:

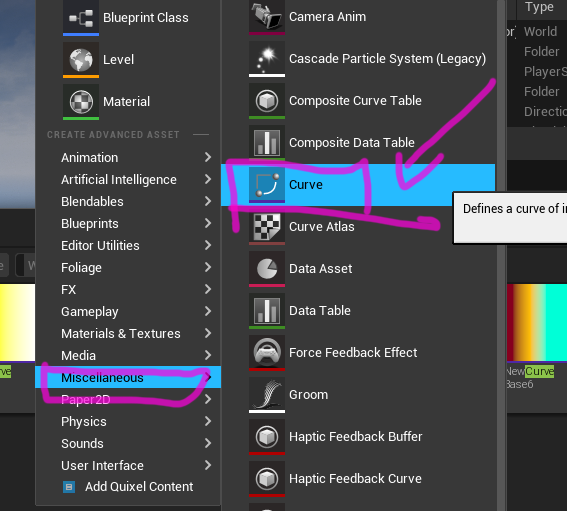
And the curve I want is the CurveLinearColor

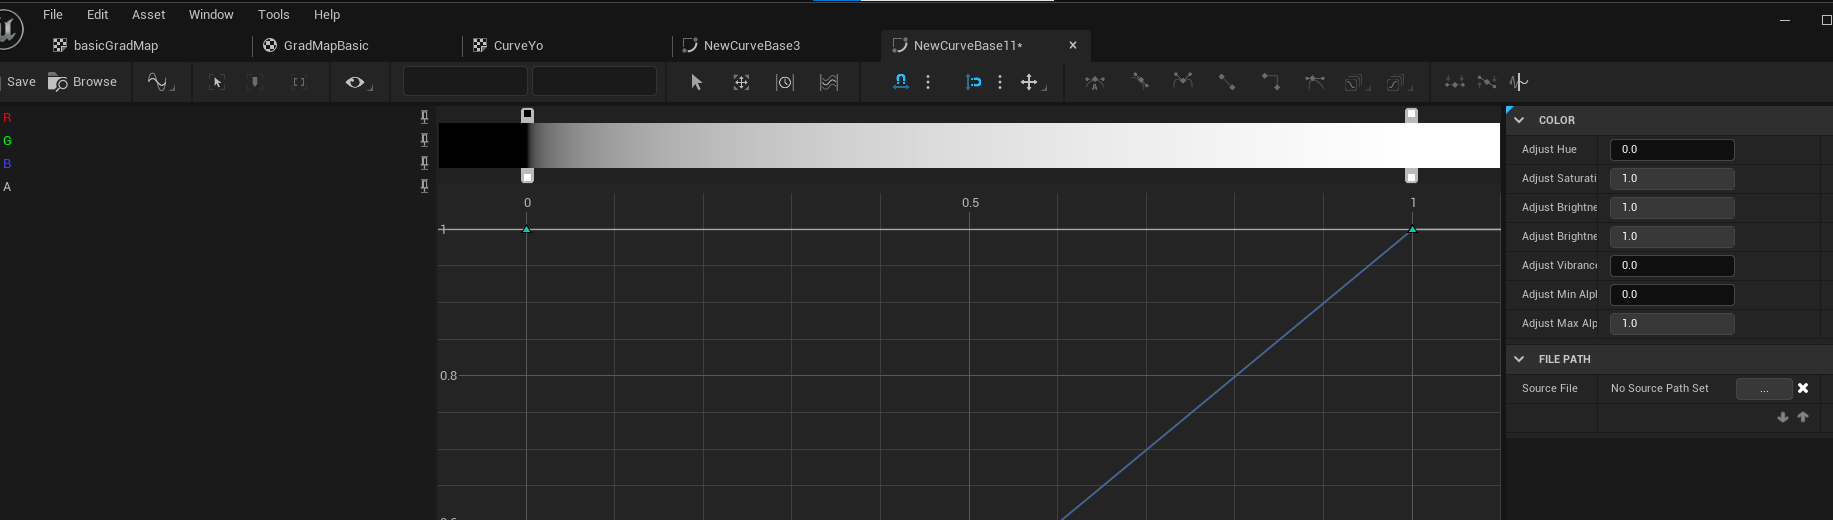
Add the new gradient curve to atlas curve texture:
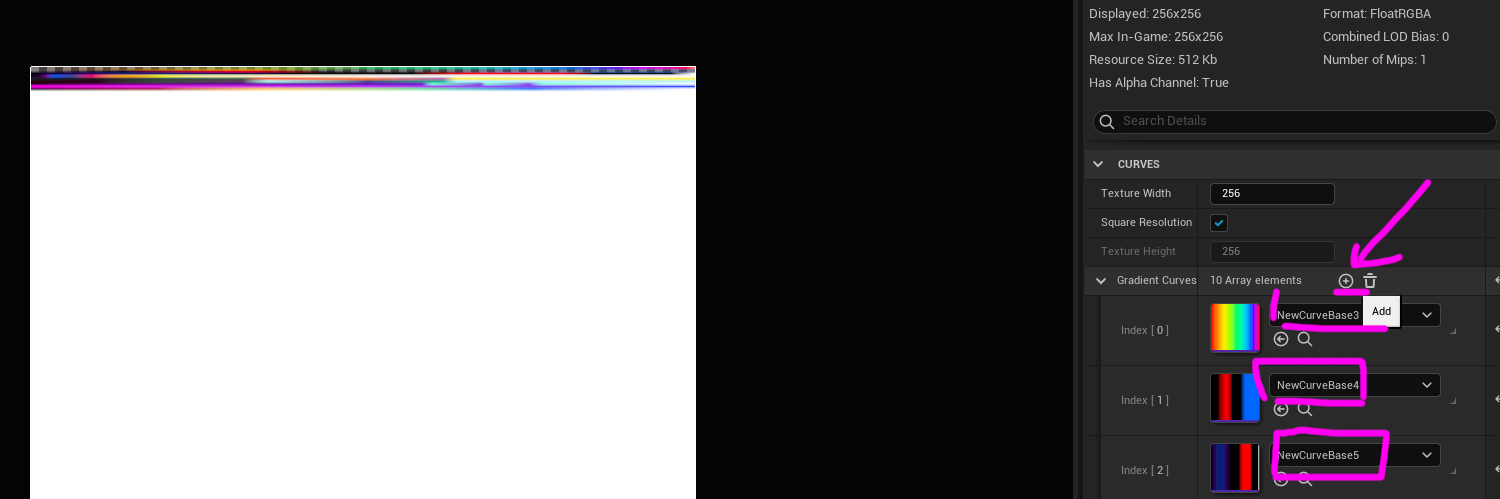
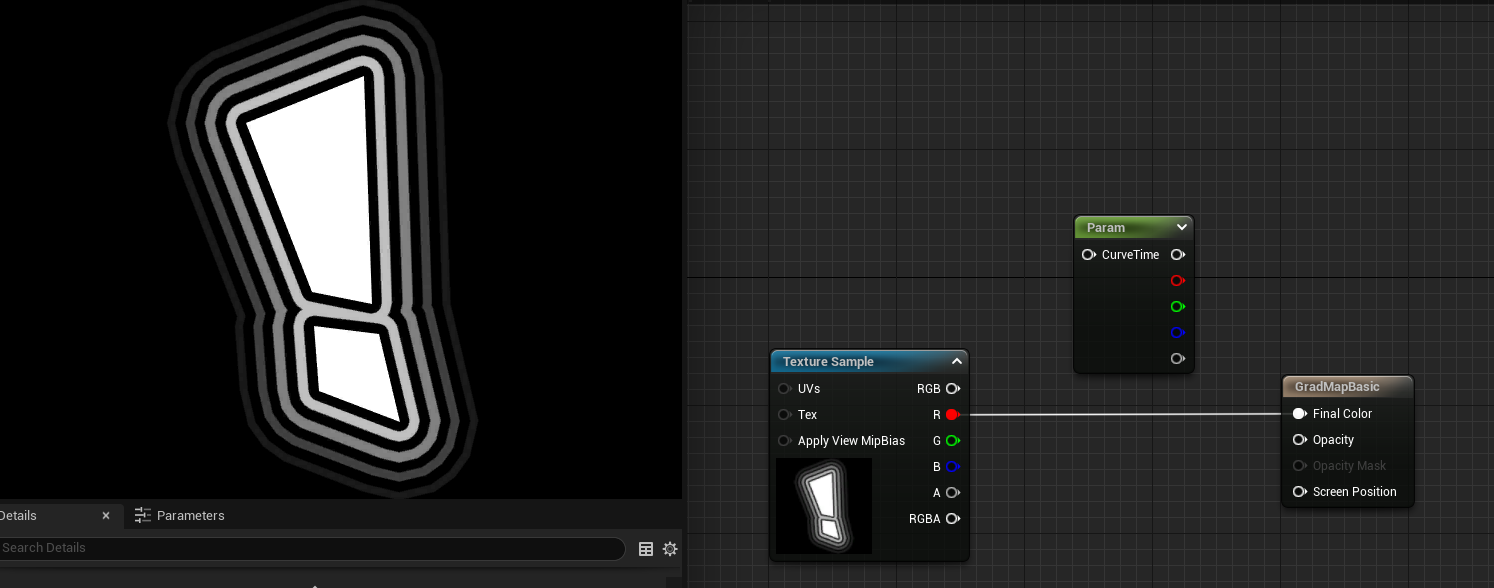


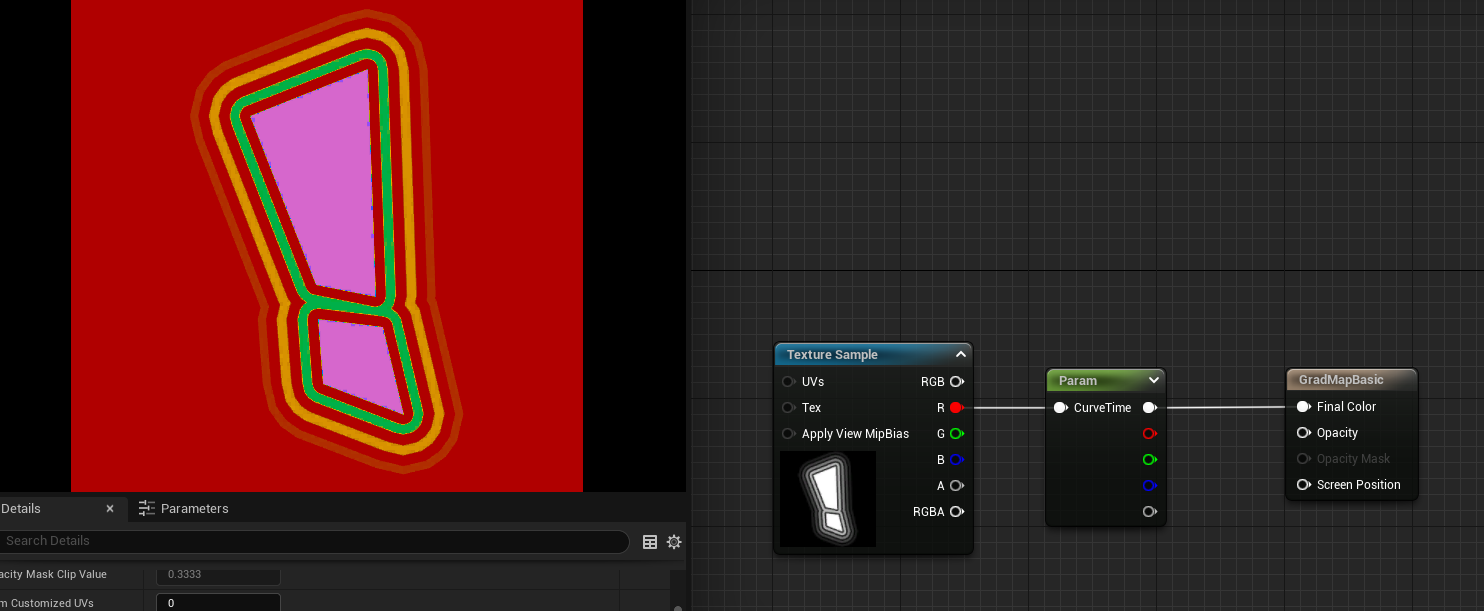
And in this node I can specify the atlas curve texture and the gradient curve I made which was “NewCurveBase11” great default naming...
Now I can plug in one of the channels (it’s a grayscale texture so it’s the same texture on R/G/B channels) into the node and output the Final Color
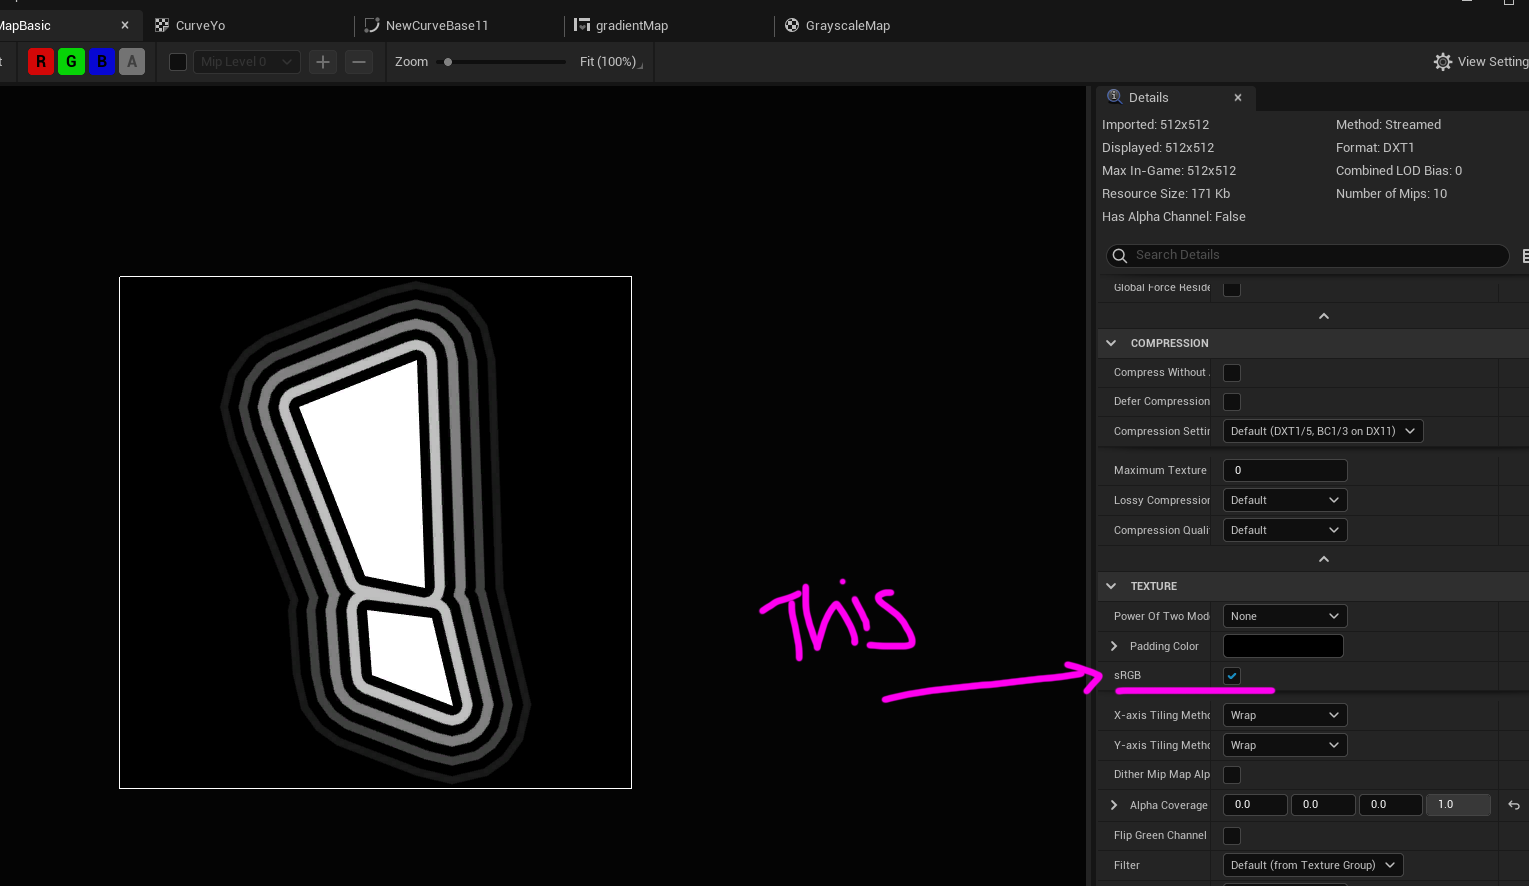
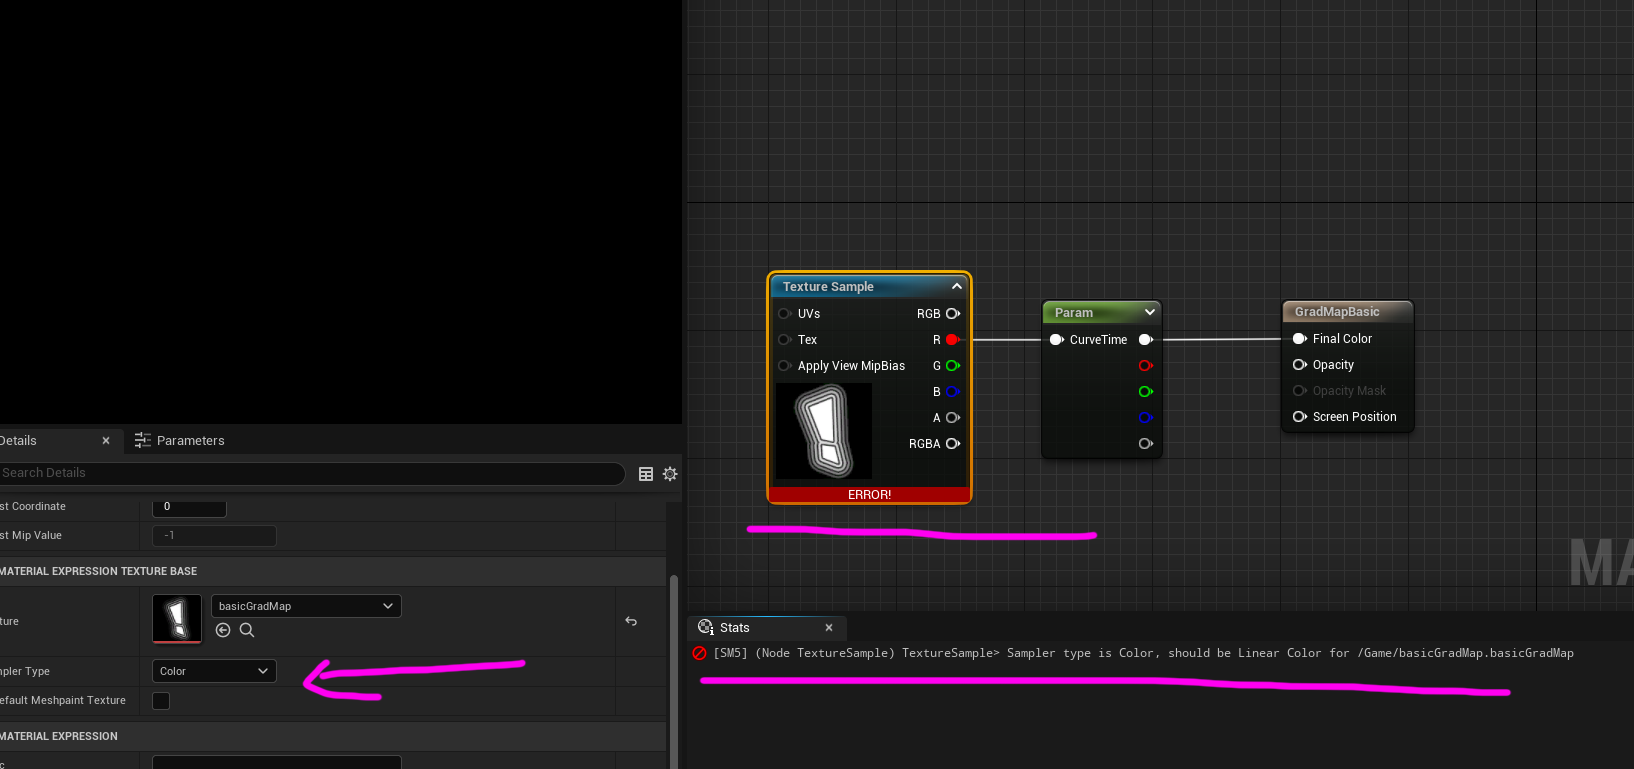
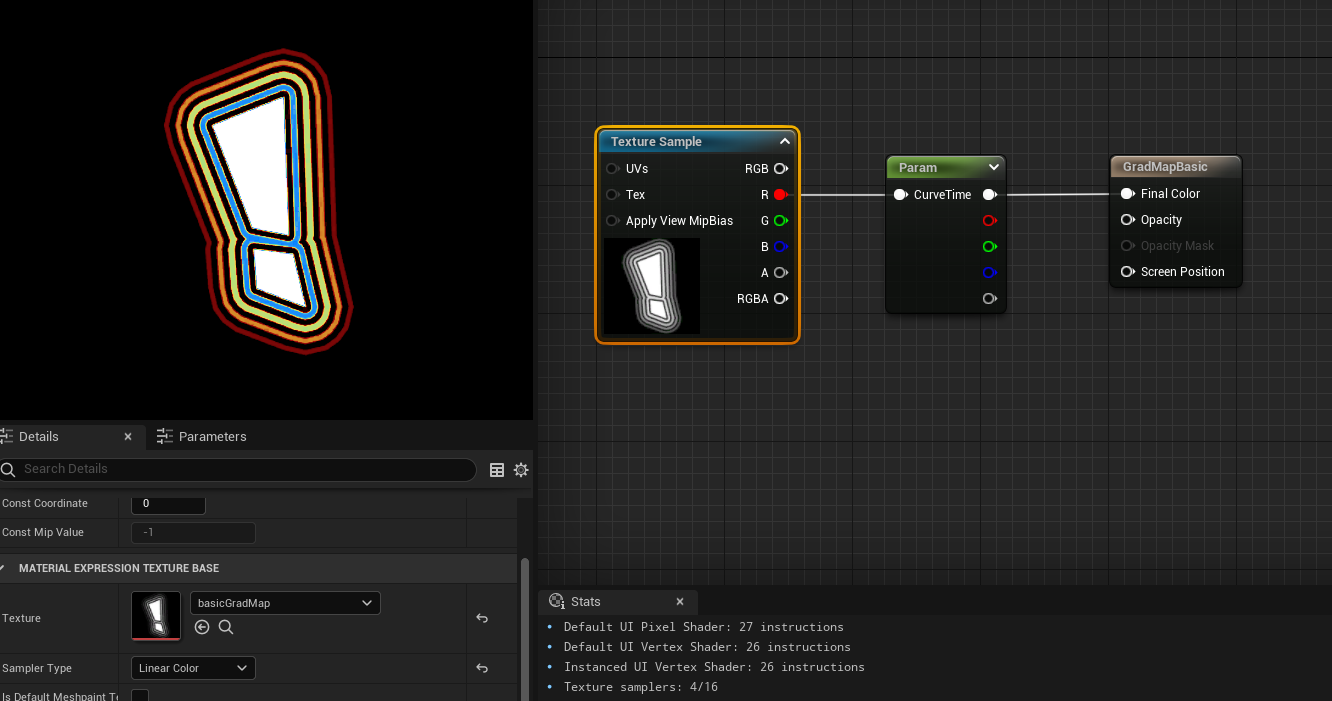
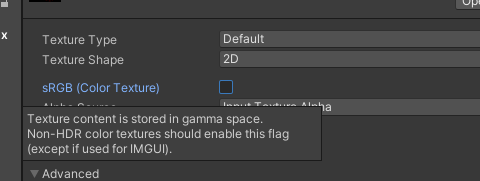
Well it turns out unreal has a sRGB curve it applies to textures so if you want to have the texture the REAL grayscale values you need to turn off the sRGB.
Then it should look as expected:

And where this can be helpful is coloring say buttons:

Then you can do crazy things like animate between the gradient mapped colors or parts of the colors:
Unity Gradient Mapping
Unity is pretty lucky as it’s got a gradient node that plugs into a simple gradient node where the “time” input will be the texture and the gradient is the one I made
I’m assuming more tests on Unity per device to see if this is true for sRGB unchecked out of principle to make sure the grayscale values are the same ones that came from Photoshop or whatever software created the texture, but feel free to ignore that or not depending on what results you the reader might find.
GRADIENT MAPPING
Without an Atlas Texture - Unreal
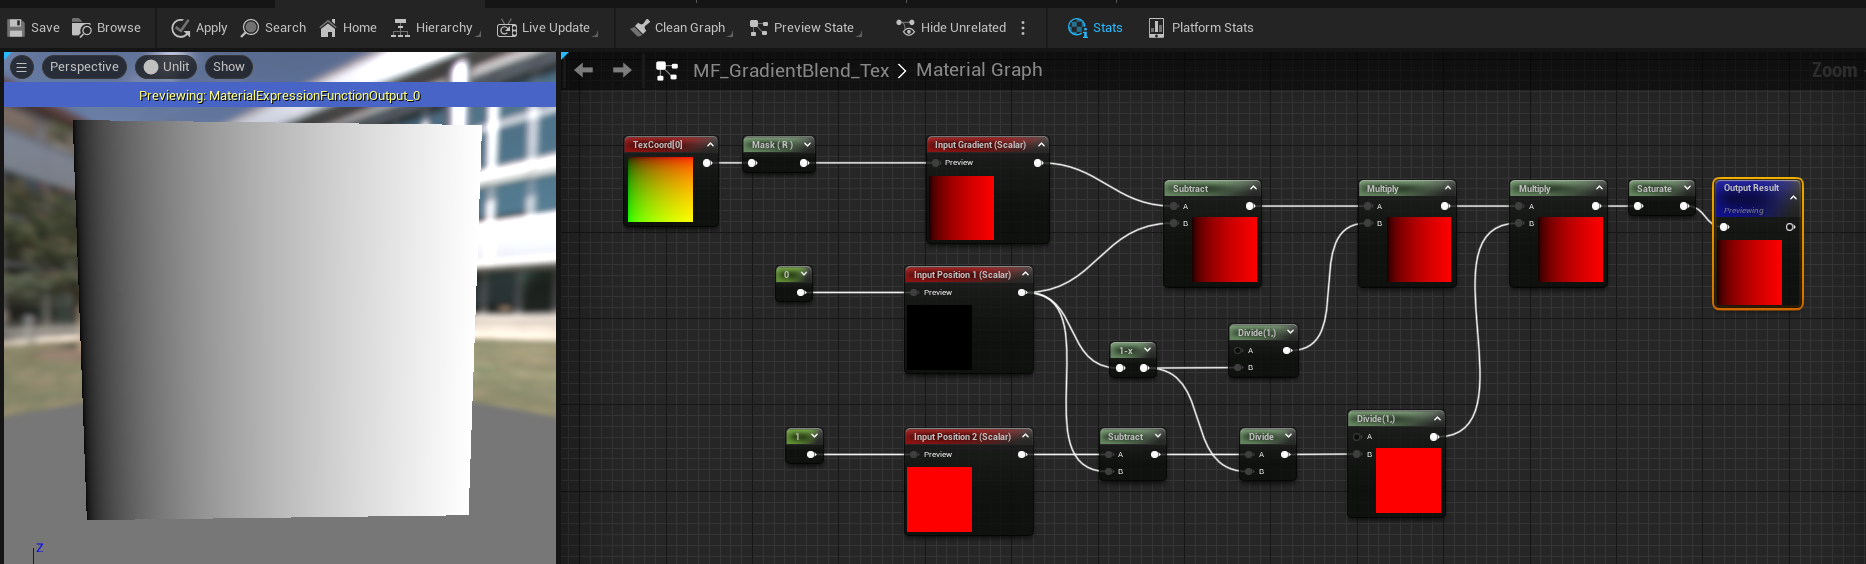
Sometimes, and it’s most of the time, I wont use the Curve Atlas Texture for my gradients in UI shaders. And that’s because instead of making the Altas and Linear Curve and adding that curve to the atlas row I have a material function instead and pack all that information in the shader. Now the benefit this might have is not needing to sample that Atlas Texture, but if you plan to have lots of gradient curves then sampling that texture should be no issue in the pipeline. But as a one-off ocassionally needing a couple gradients I tend to use my material function instead, however it’s less visually intuitive for artists to work with. My function is based on this blog post about gradient mapping, I highly recommend folks read through that as it’s super detailed and explains a lot.
Here’s a gradient mapping using that function it’s called MF_GradientBlend_Tex and I put in the “position of color 1” and “position of color 2” as their own parameters so I can control them and of course the colors, then you pass the lerp of A/B and the alpha is the result of the gradient.
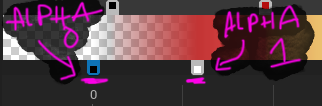
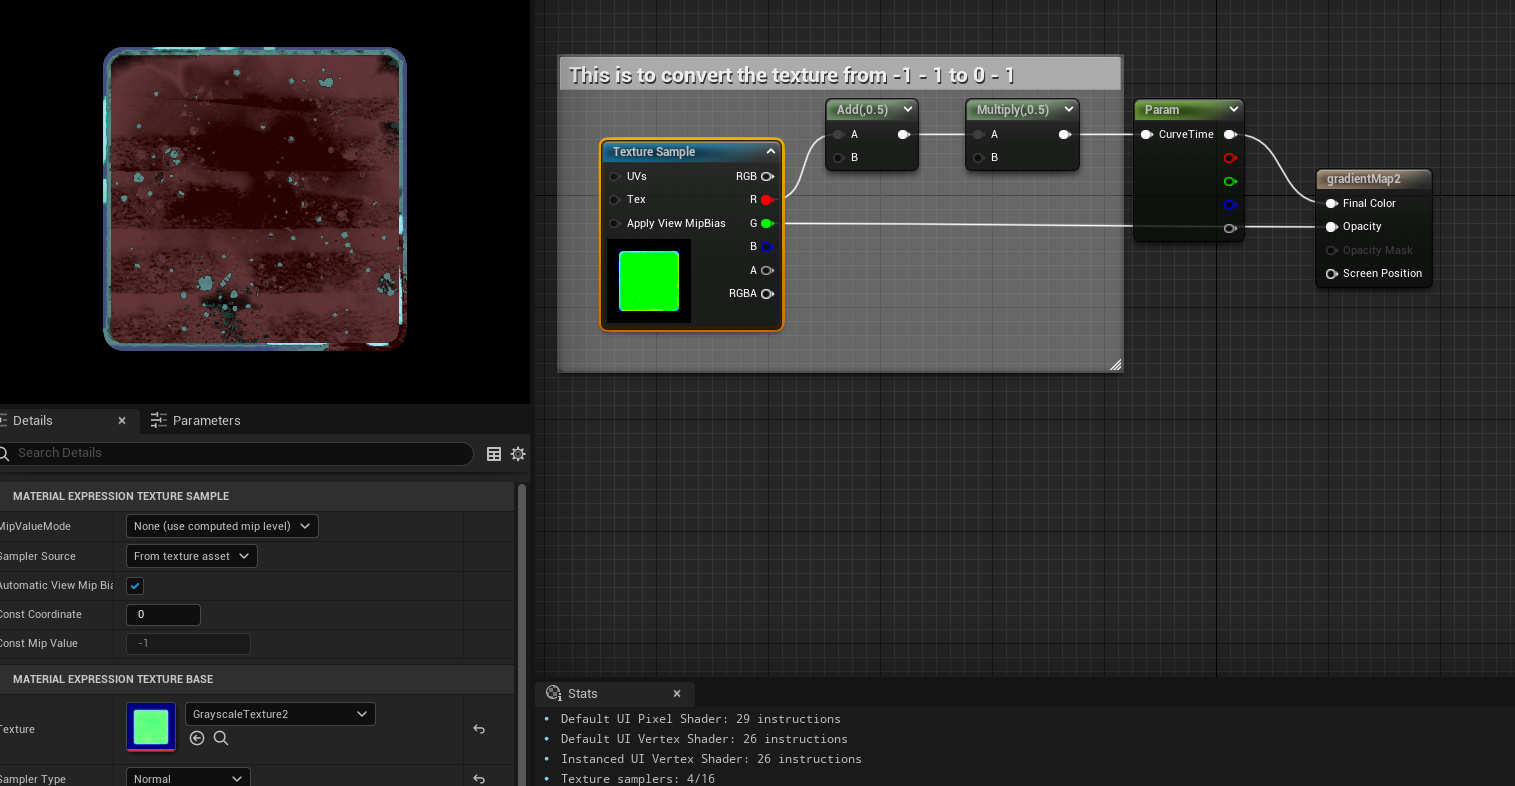
Again I’m using a texture with BC5 compression which I need to remap the values back to [ 0 - 1 ] instead of [ -1 - 1 ]and that’s with the multiply .5, and add .5 are doing. If you are not channel packing and using BC5 compression you can skip this step.
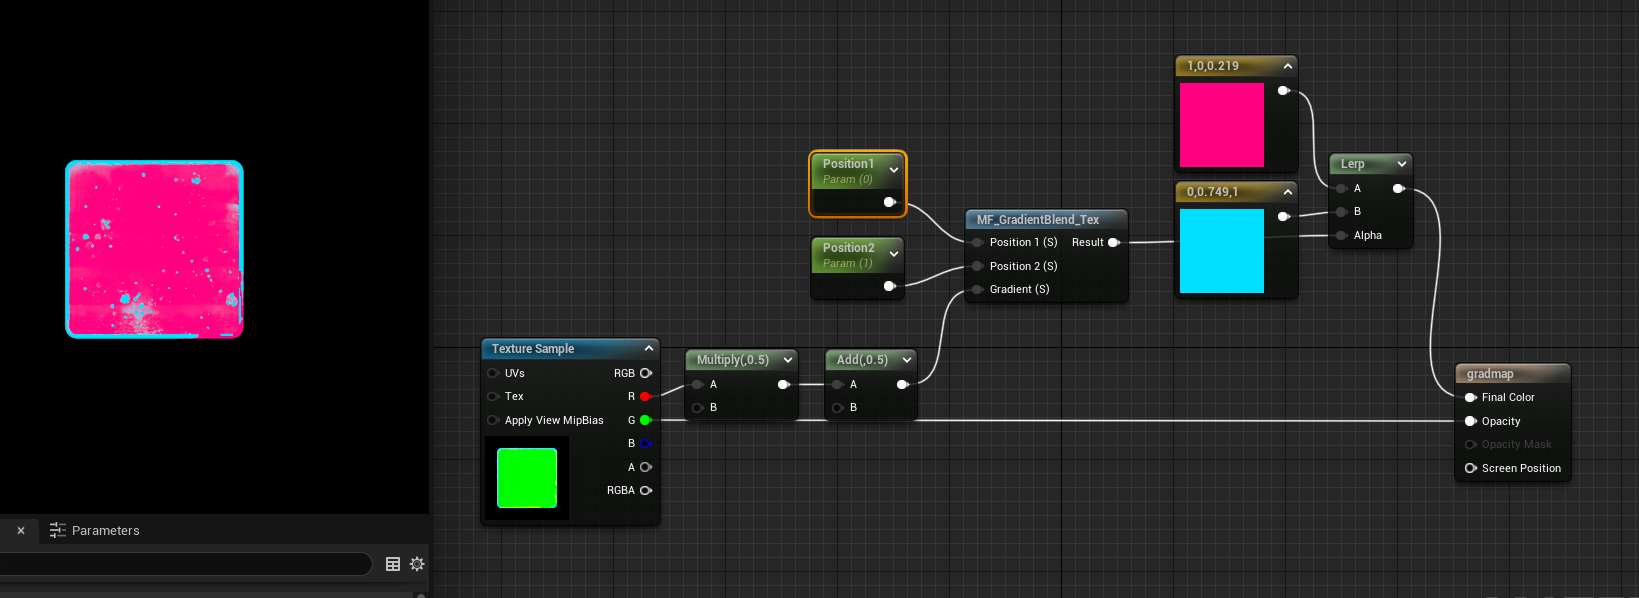
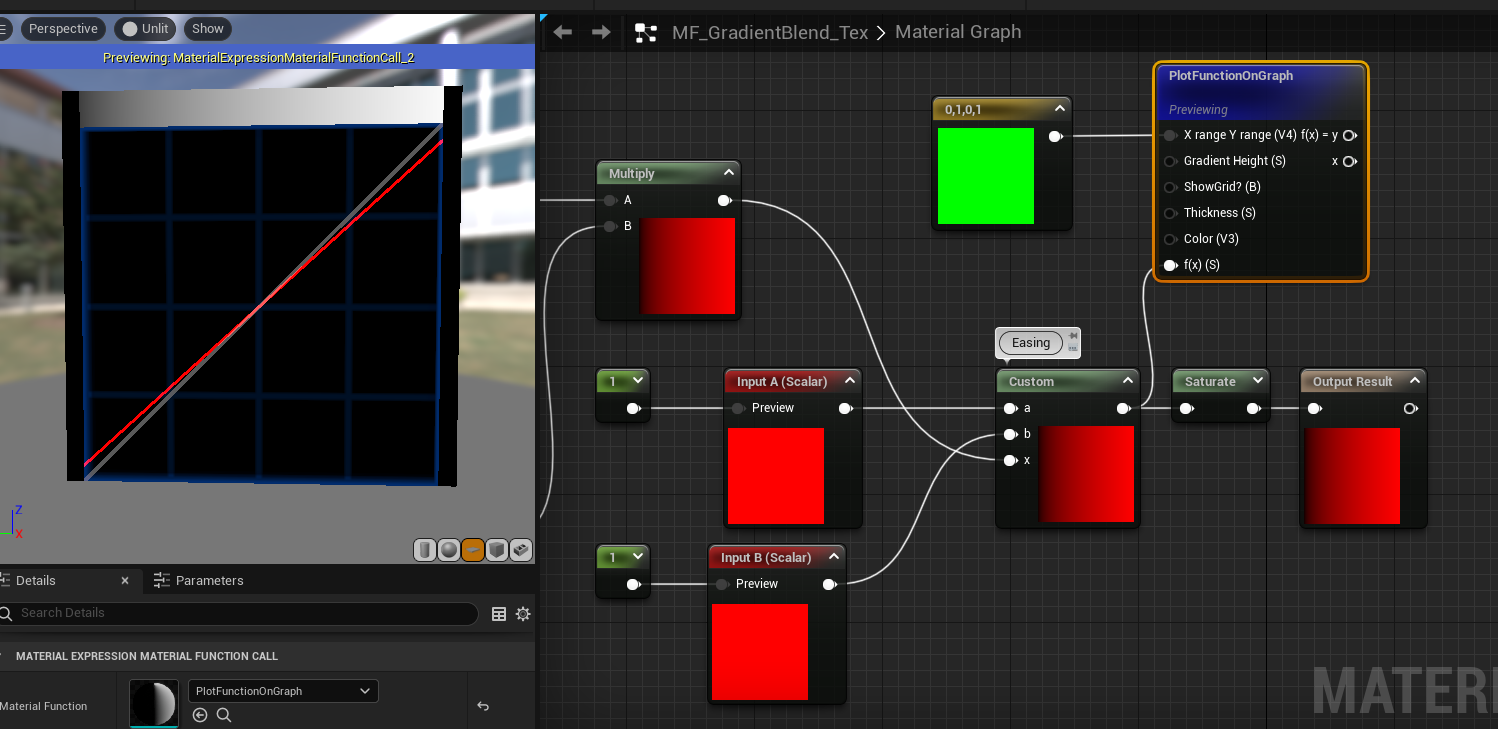
Here’s what the MF_GradientBlend_Tex function looks like:
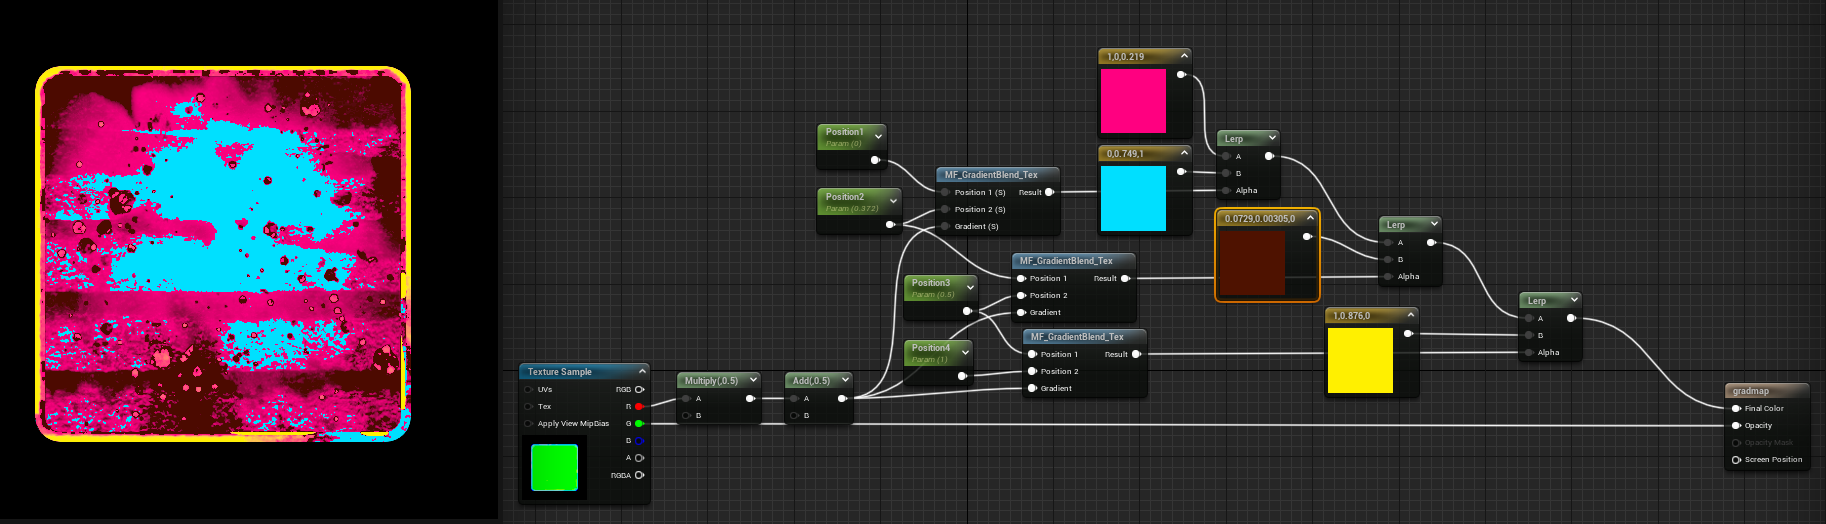
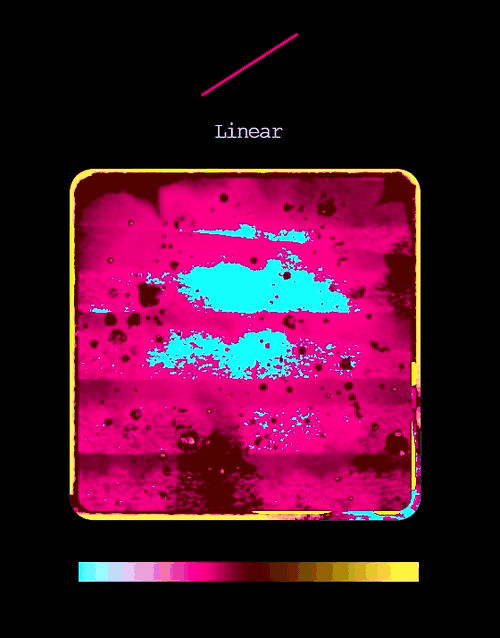
And it can support endless colors by adding more of the function with lerps:
You could also add in some easing at the end of the function to play with gradient maps using different kinds of easing. I took some easing formulas from this site here, and plugged them into custom nodes and tested them:
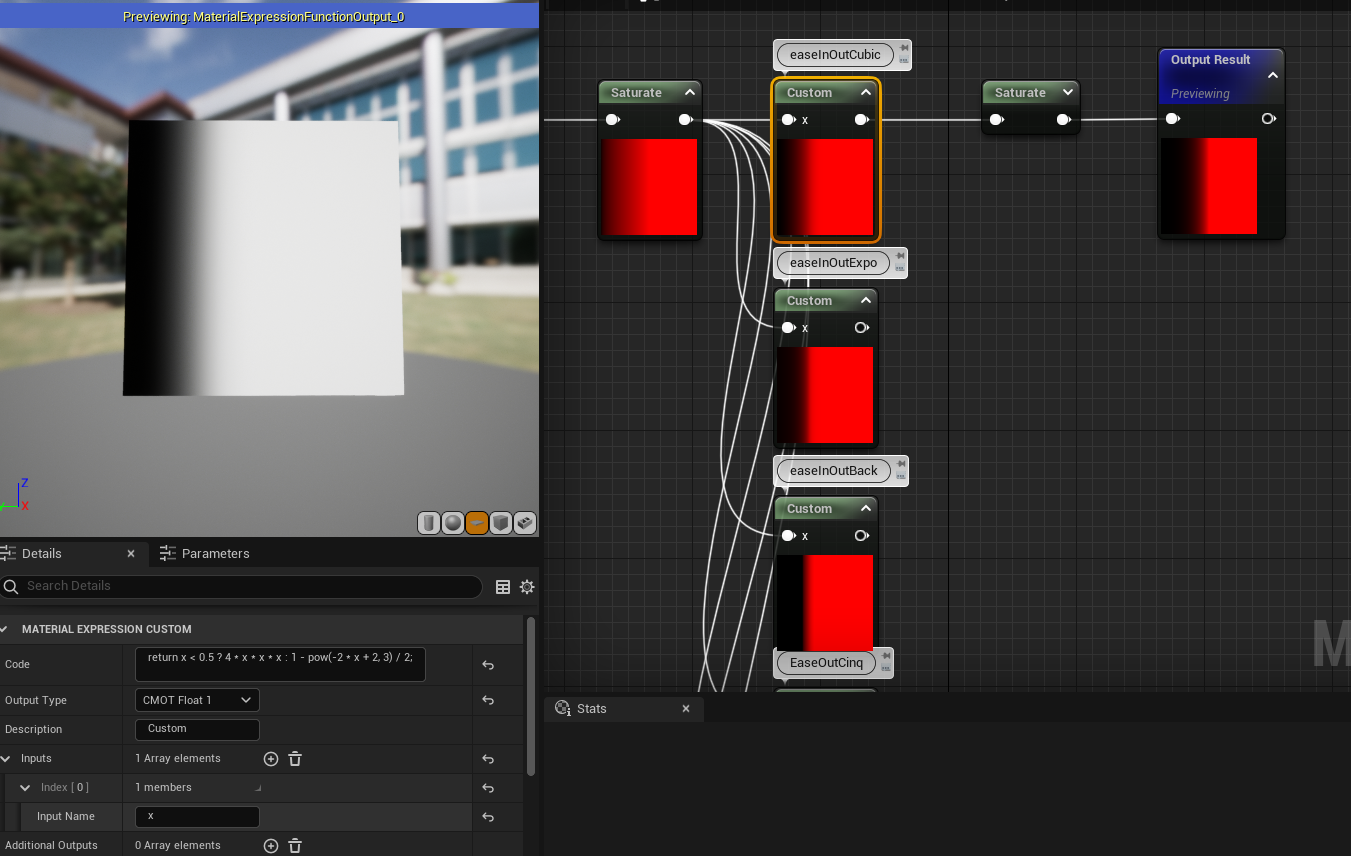
UPDATE - Literally a day later I see this awesome tweet talking about only one function that can do a lot of basic easing and I put it as a custom node and only ONE node which is great
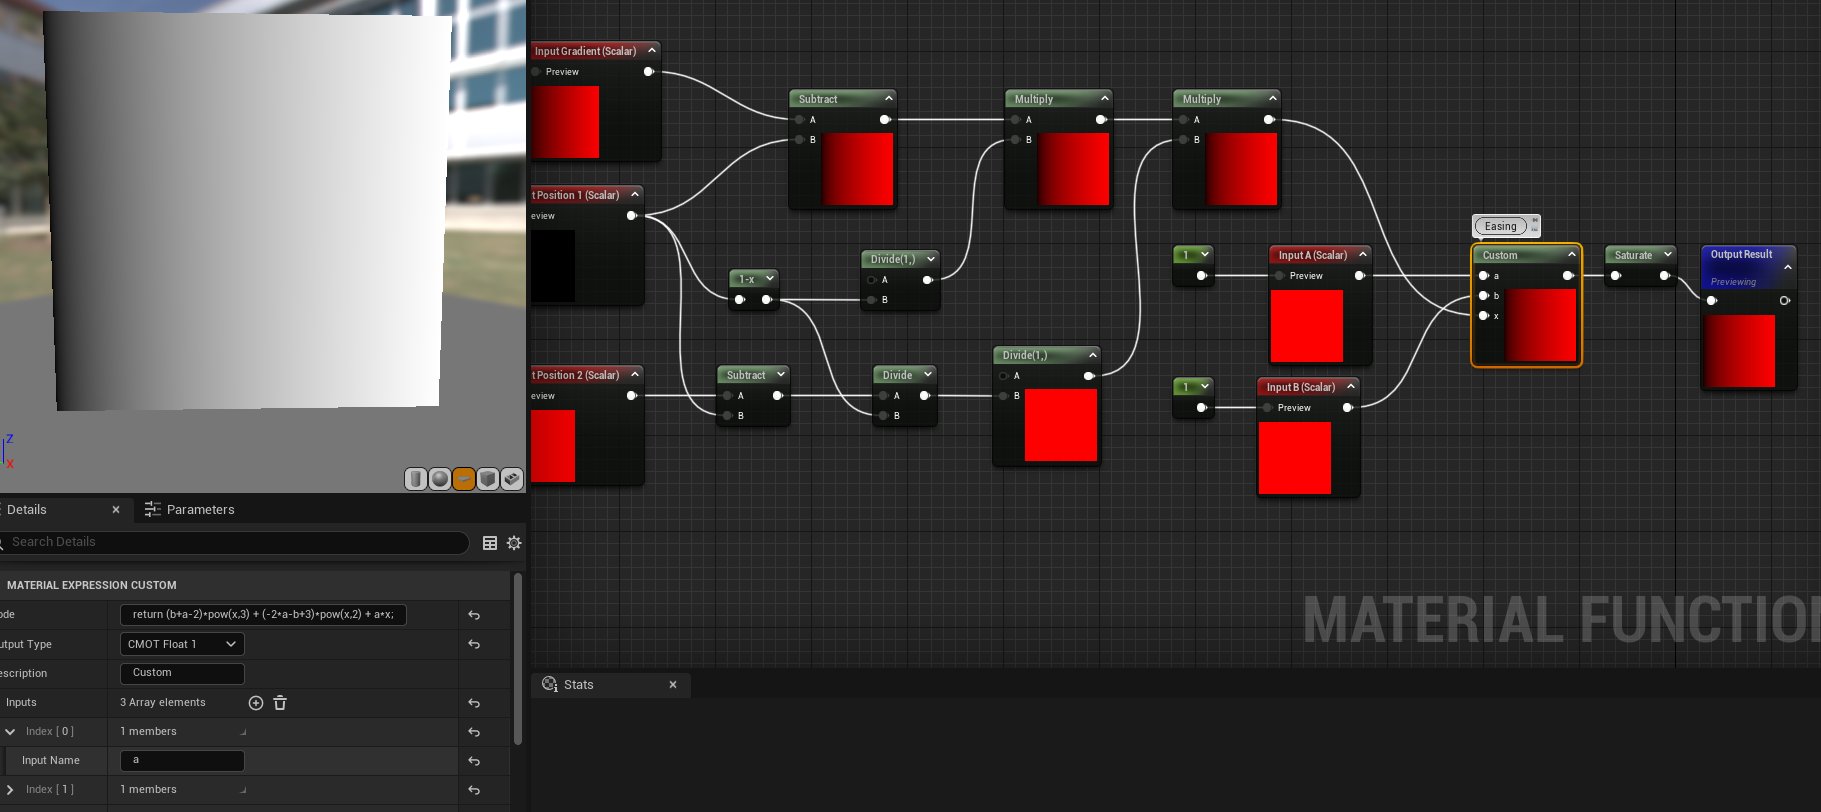
This is the forumla: return (b+a-2)*pow(x,3) + (-2*a-b+3)*pow(x,2) + a*x;
Using that formula I can make a bunch of easing curves and only use one custom node and so here are some examples of the curves it can make:

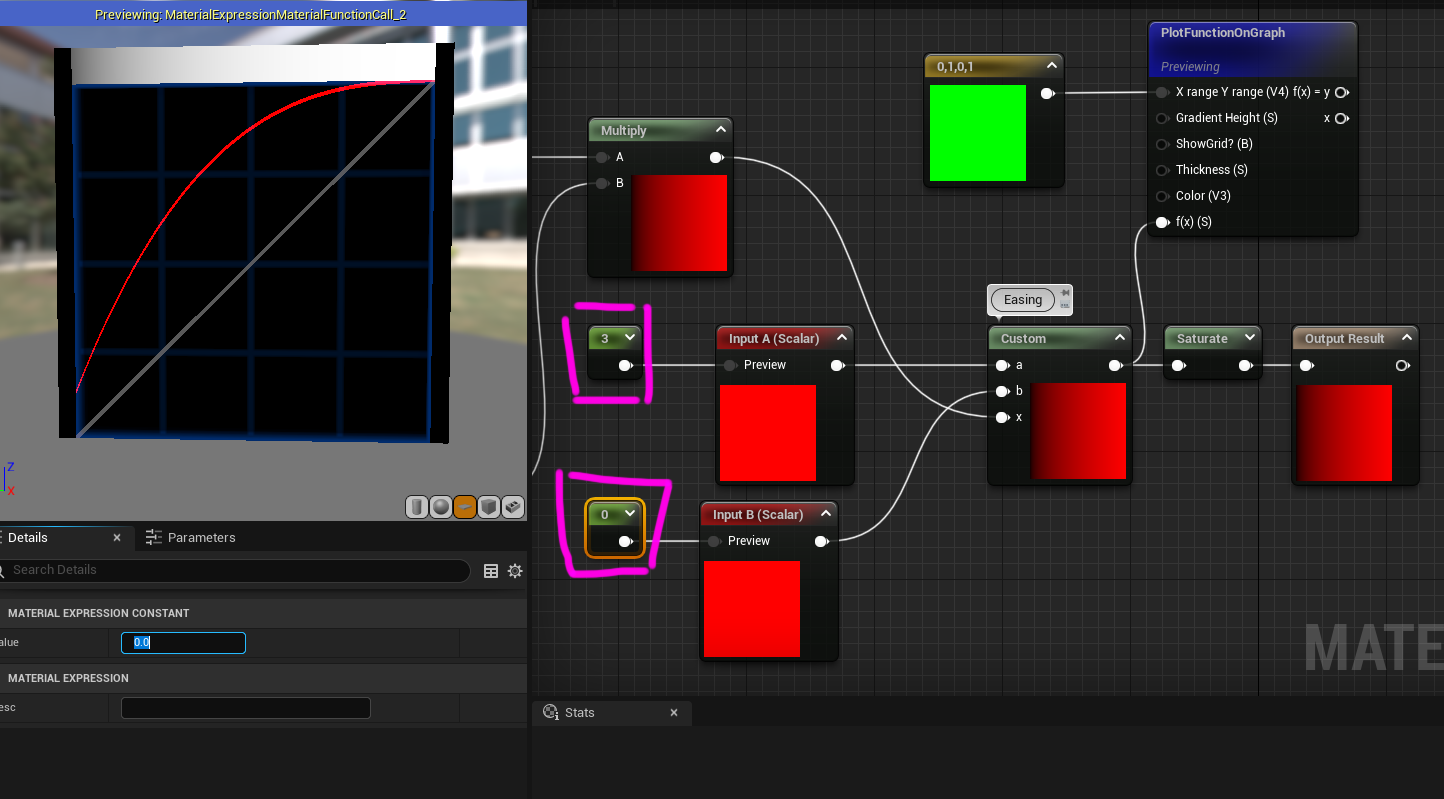
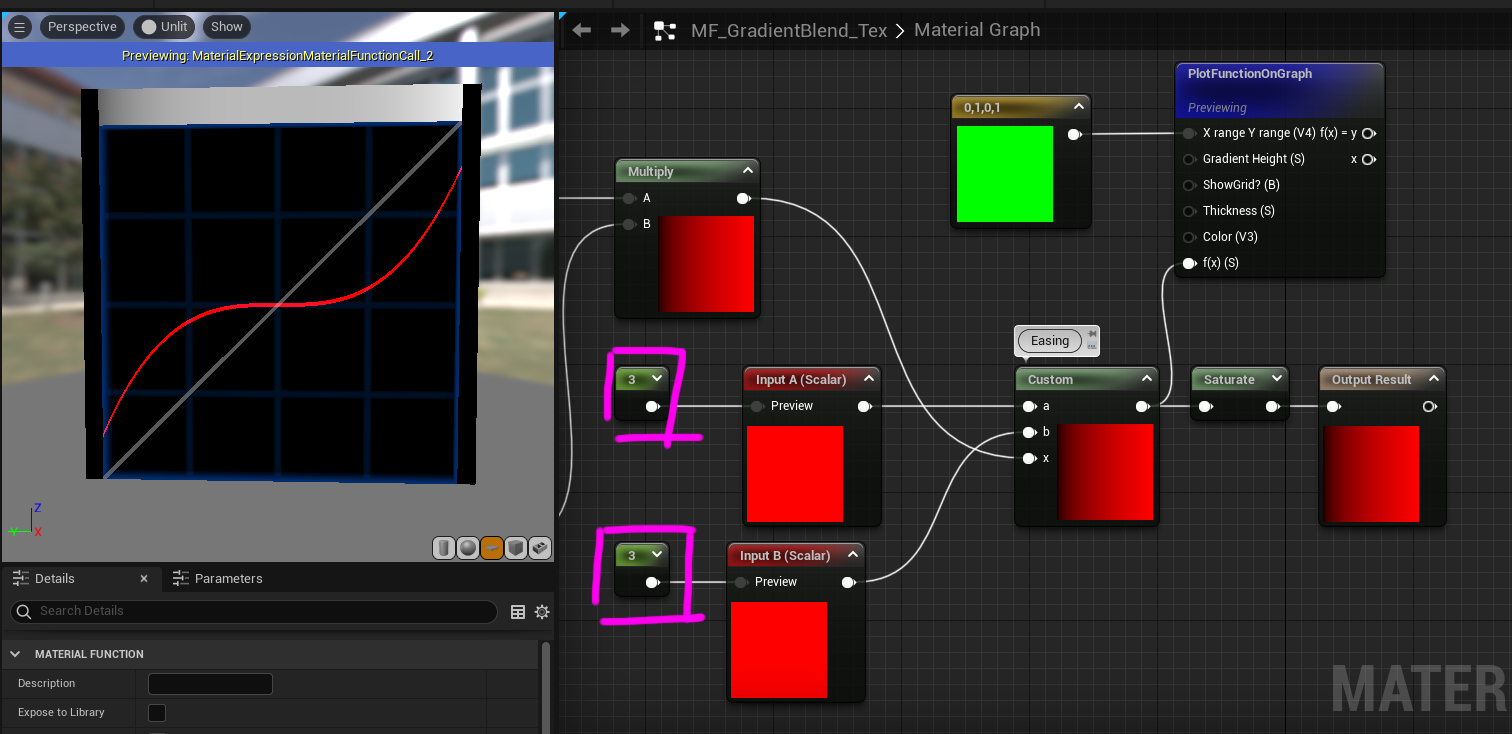
Just by changing A and B parameters it can change the gradient mapping + easing and thus get the results seen earlier much easier and more options as well.
So that’s gradient mapping (let’s hope I don’t get another update) but wait... there’s more... what.. about highlights? Animations? And other things we can do to the texture now we have a grayscale map of it!?
Now this isn’t the end of gradient mapping but as I’ve been sitting on this tutorial for 7 months I think I’ll do a part 2 later... where I showcase how to do various animations on icons using gradients: