
2D Tech Art Chronicles: Lerp
Image Layering in a Material
With Linear Interpolation!A lot of times it helps artists to understand shaders better if I reference the image editor counterpart such as photoshop or figma or any other 2D image editor. So I’m going to put some basic translations from Photoshop (but this can be any image editing software) to Shaders.
Image Editing Software
- Layers
- Clipping Masks
- Layers
- Clipping Masks
Shaders
- Linear Interpolation
- Linear Interpolation or Multiply
- Linear Interpolation
- Linear Interpolation or Multiply
Layers to Linear Interpolation
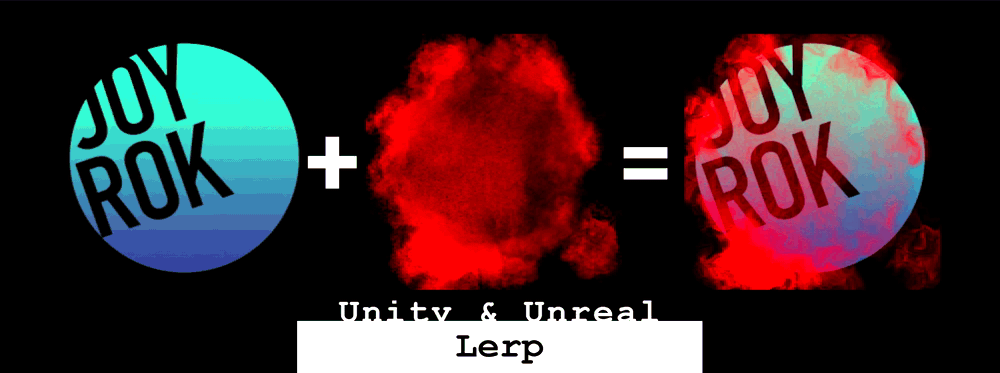
The first one is how to layer 2 textures or shapes together like photoshop and I made silly example with this logo texture and this grunge texture on top:

Layer A

Layer B

Layer B ontop of Layer A
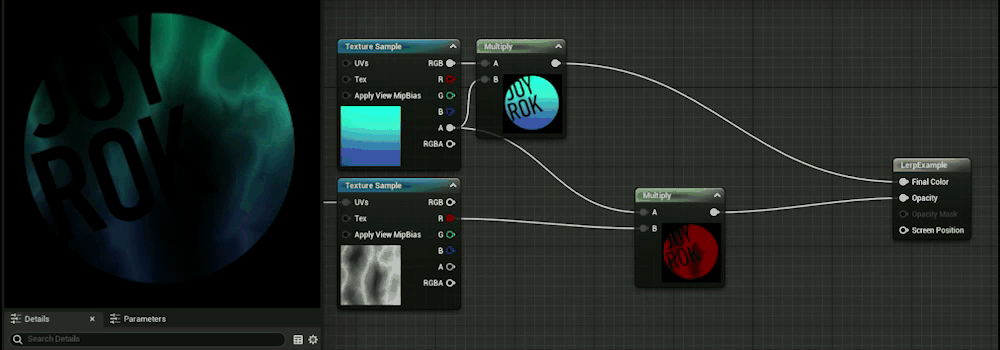
Unreal Linear
Interpolation:
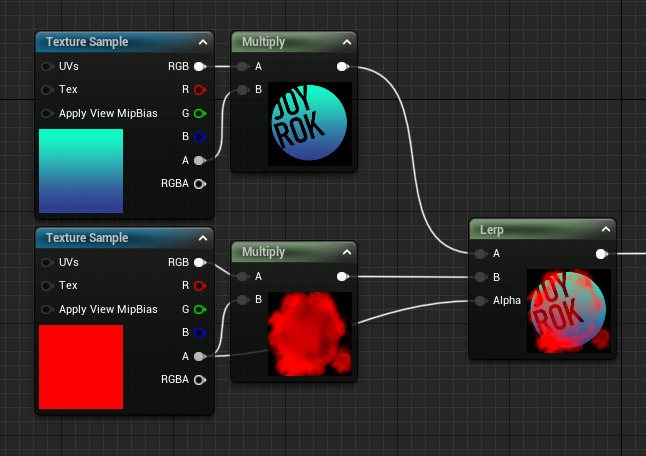
In Unreal if your textures are .PNGs and not in the texture group UI it will appear just as the colors of the texture and not include the alpha:
In general I like to multiply the Texture Sample RGB x Alpha to get my .PNG textures to act like they would in Photoshop for Unreal. This isn’t necessary all the time but oftentimes if I’m having weird alpha issues in my materials this will fix it most of the time, and this is my workflow when using “most” PNGs in materials for Unreal. This is my preffered method for demoing PNGs and not messing with the Texture group and texture settings since that’s how most users might encounter a .PNG in Unreal for the first time and if they are following this little article they likely haven’t changed texture groups or texture settings.

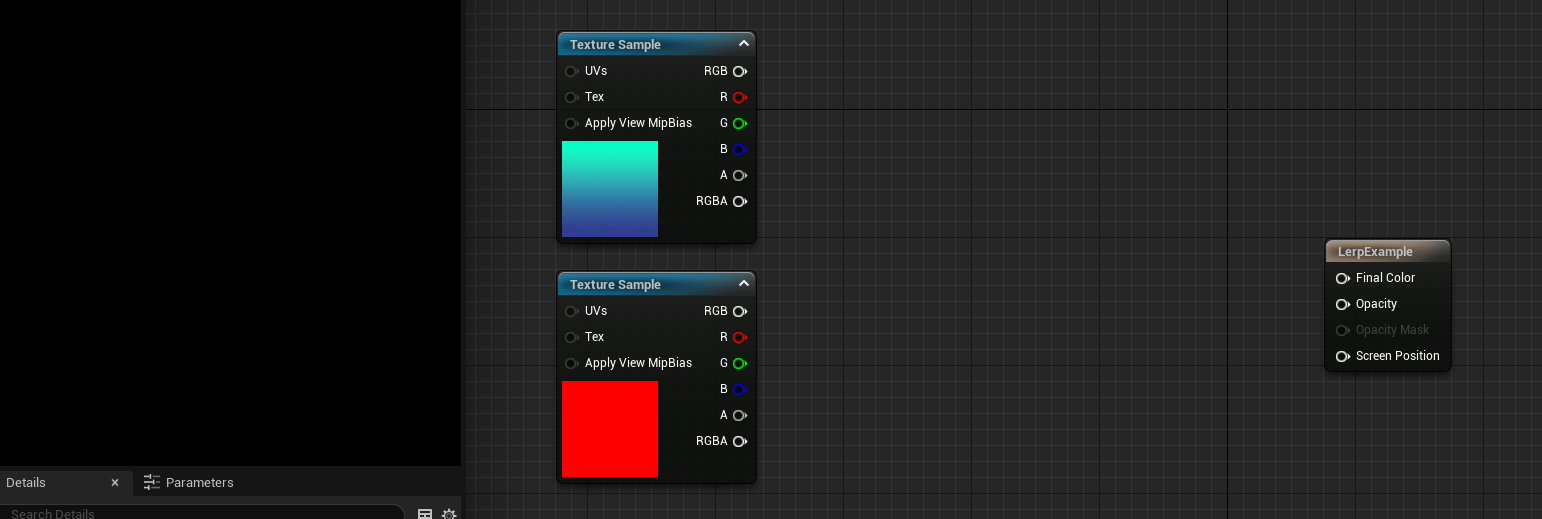
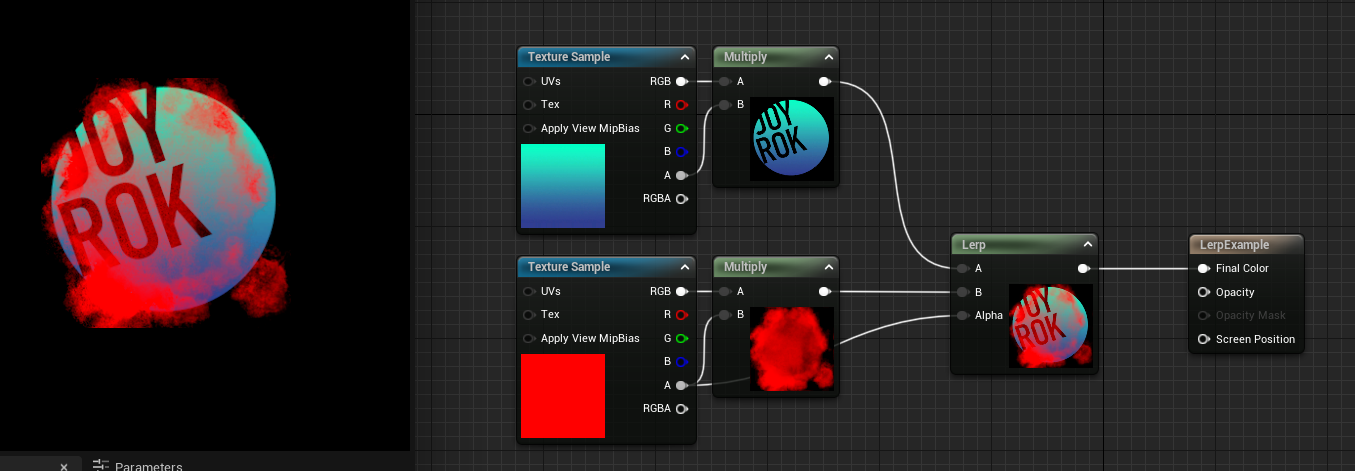
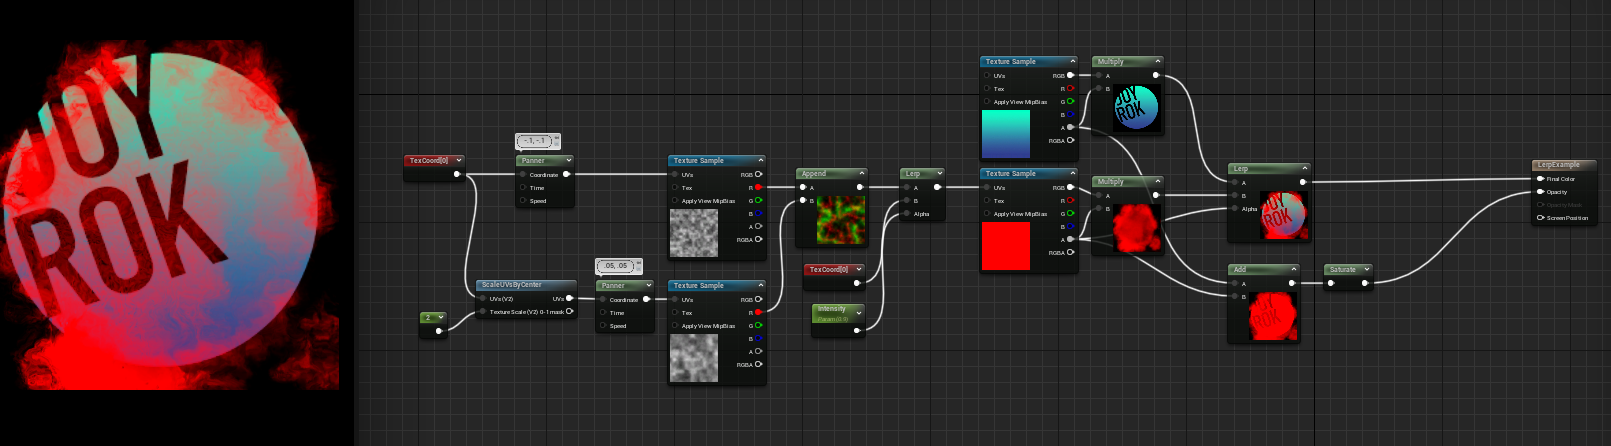
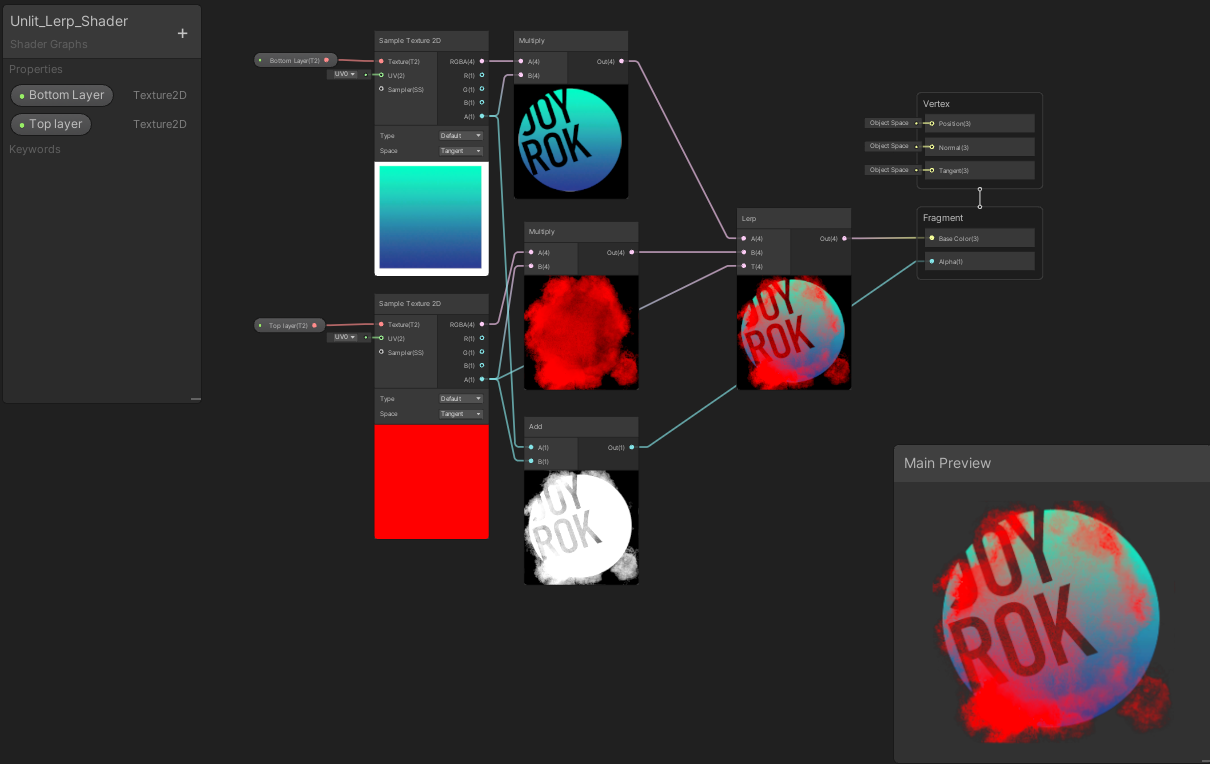
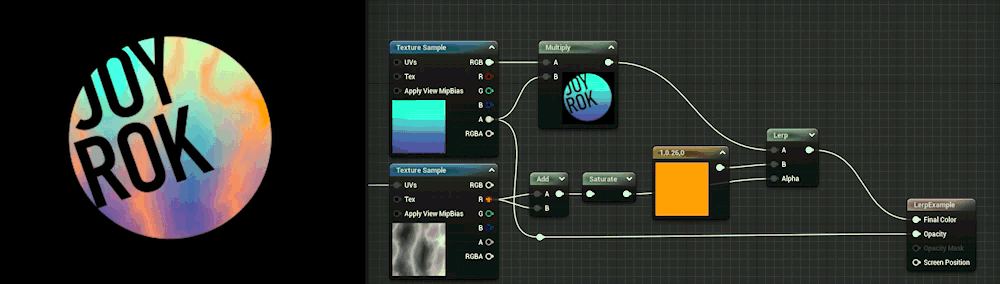
Now we can get to the Lerp Node:
Bottom Layer (Logo) - goes into A slot of Lerp
Top Layer (Grunge) - goes into B slot of Lerp
Alpha of Top Layer (Grunge) - goes into the Alpha of Lerp
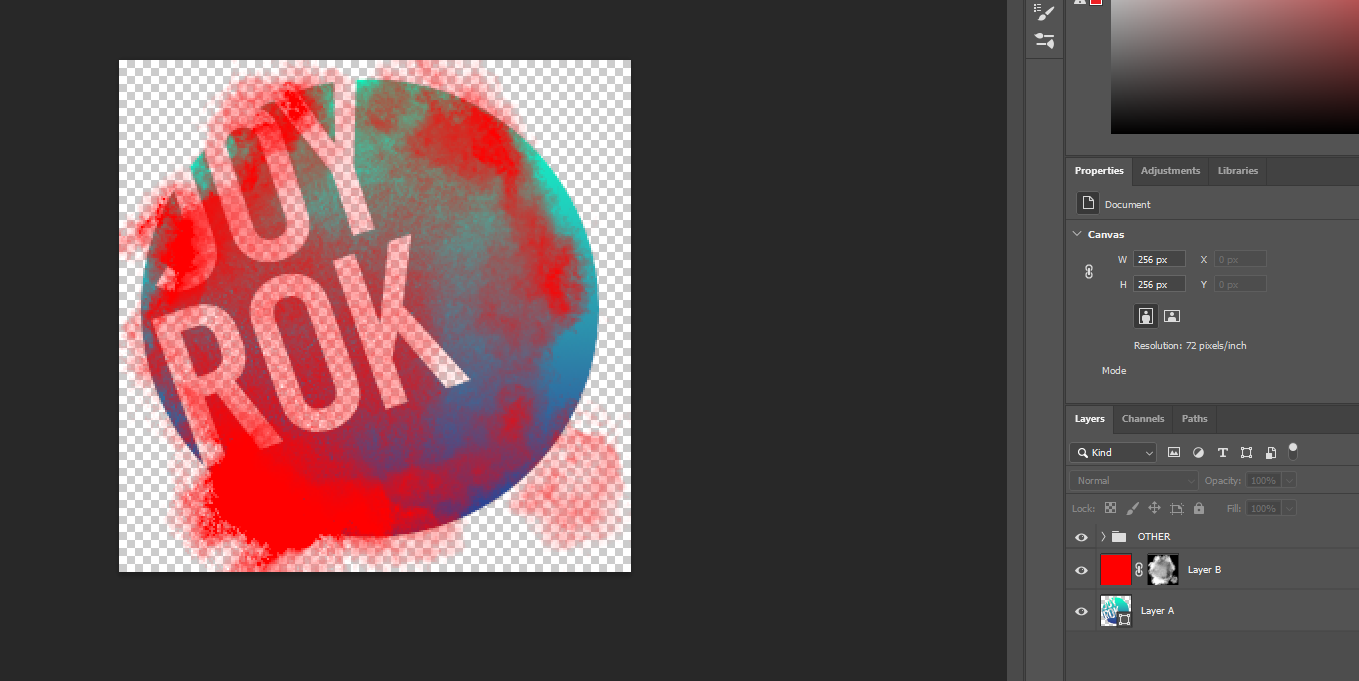
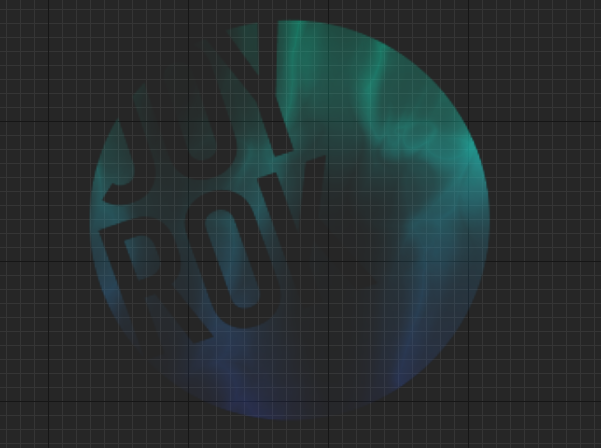
If we take it back to photoshop I can show off what’s happening:
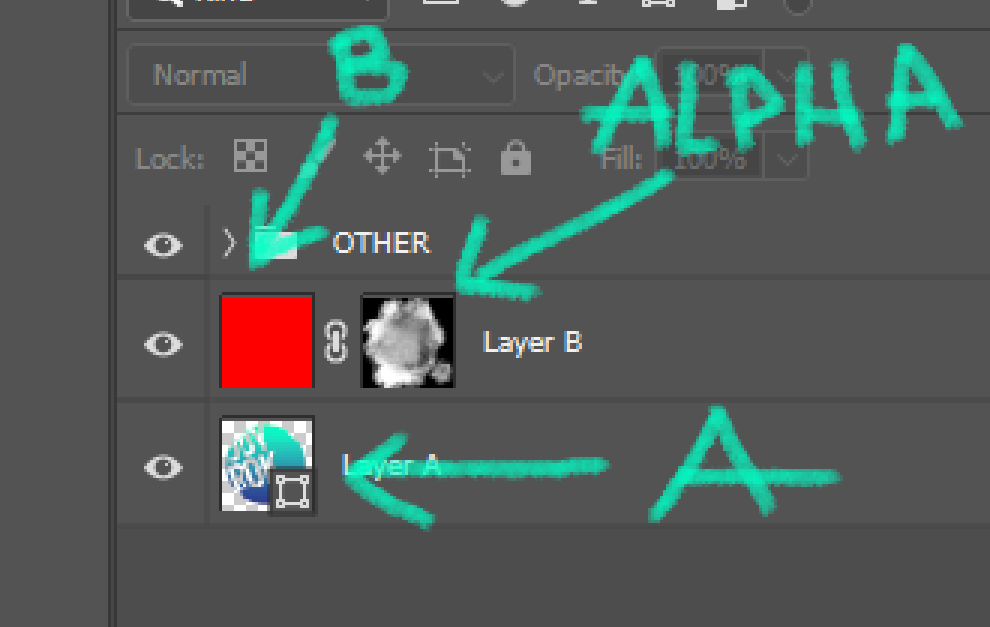
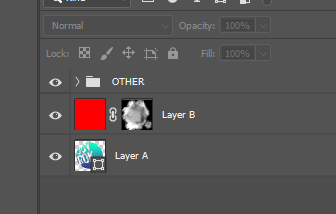
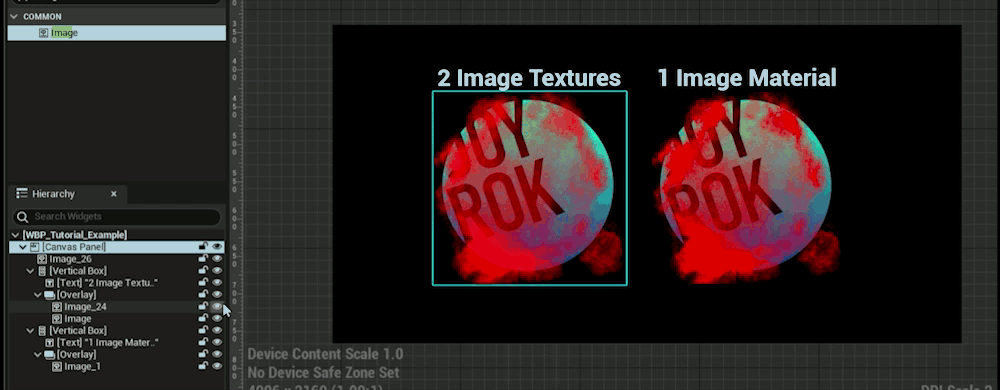
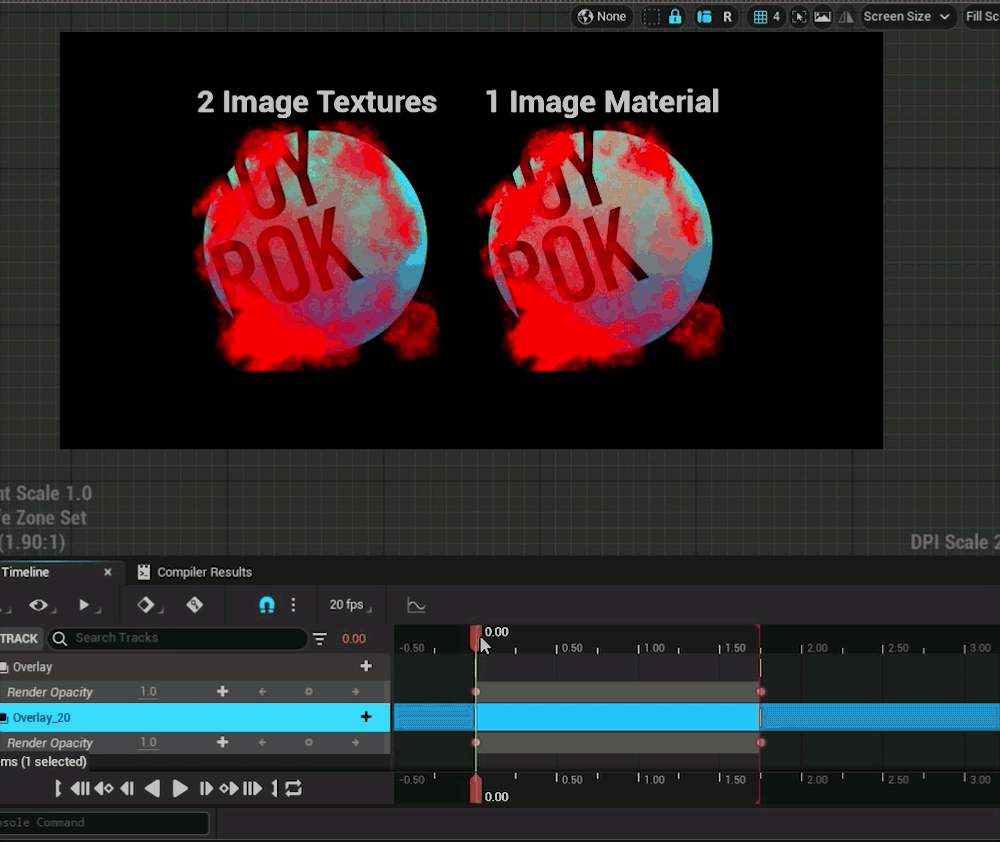
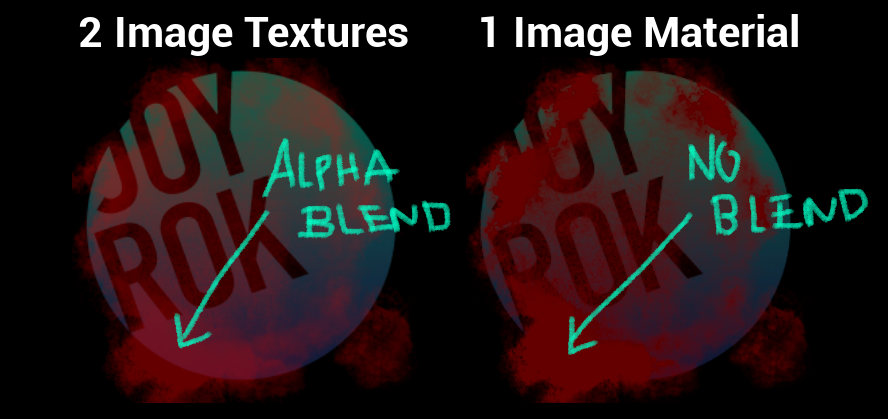
The clipping mask is basically the Alpha, the red color is the B layer and the A layer is the original bottom layer. Then you might ask why do this instead of just layering 2 images on top of each other in the UI editor? Say in Unreal - you layer a lot of Image Widgets in UMG ontop of each other is going to cause more alpha draw calls. That’s usually bad for performance especially if it’s taking up more space on screen. There’s also another issue that can happen which is alpha blending when you want to fade the group of images together.
Here’s an example of layered images vs the single image material animating opacity of the entire container down to zero.

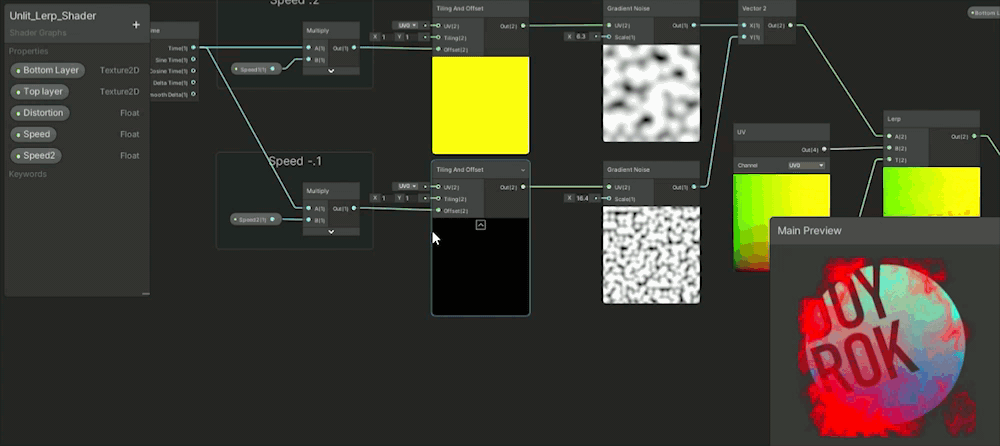
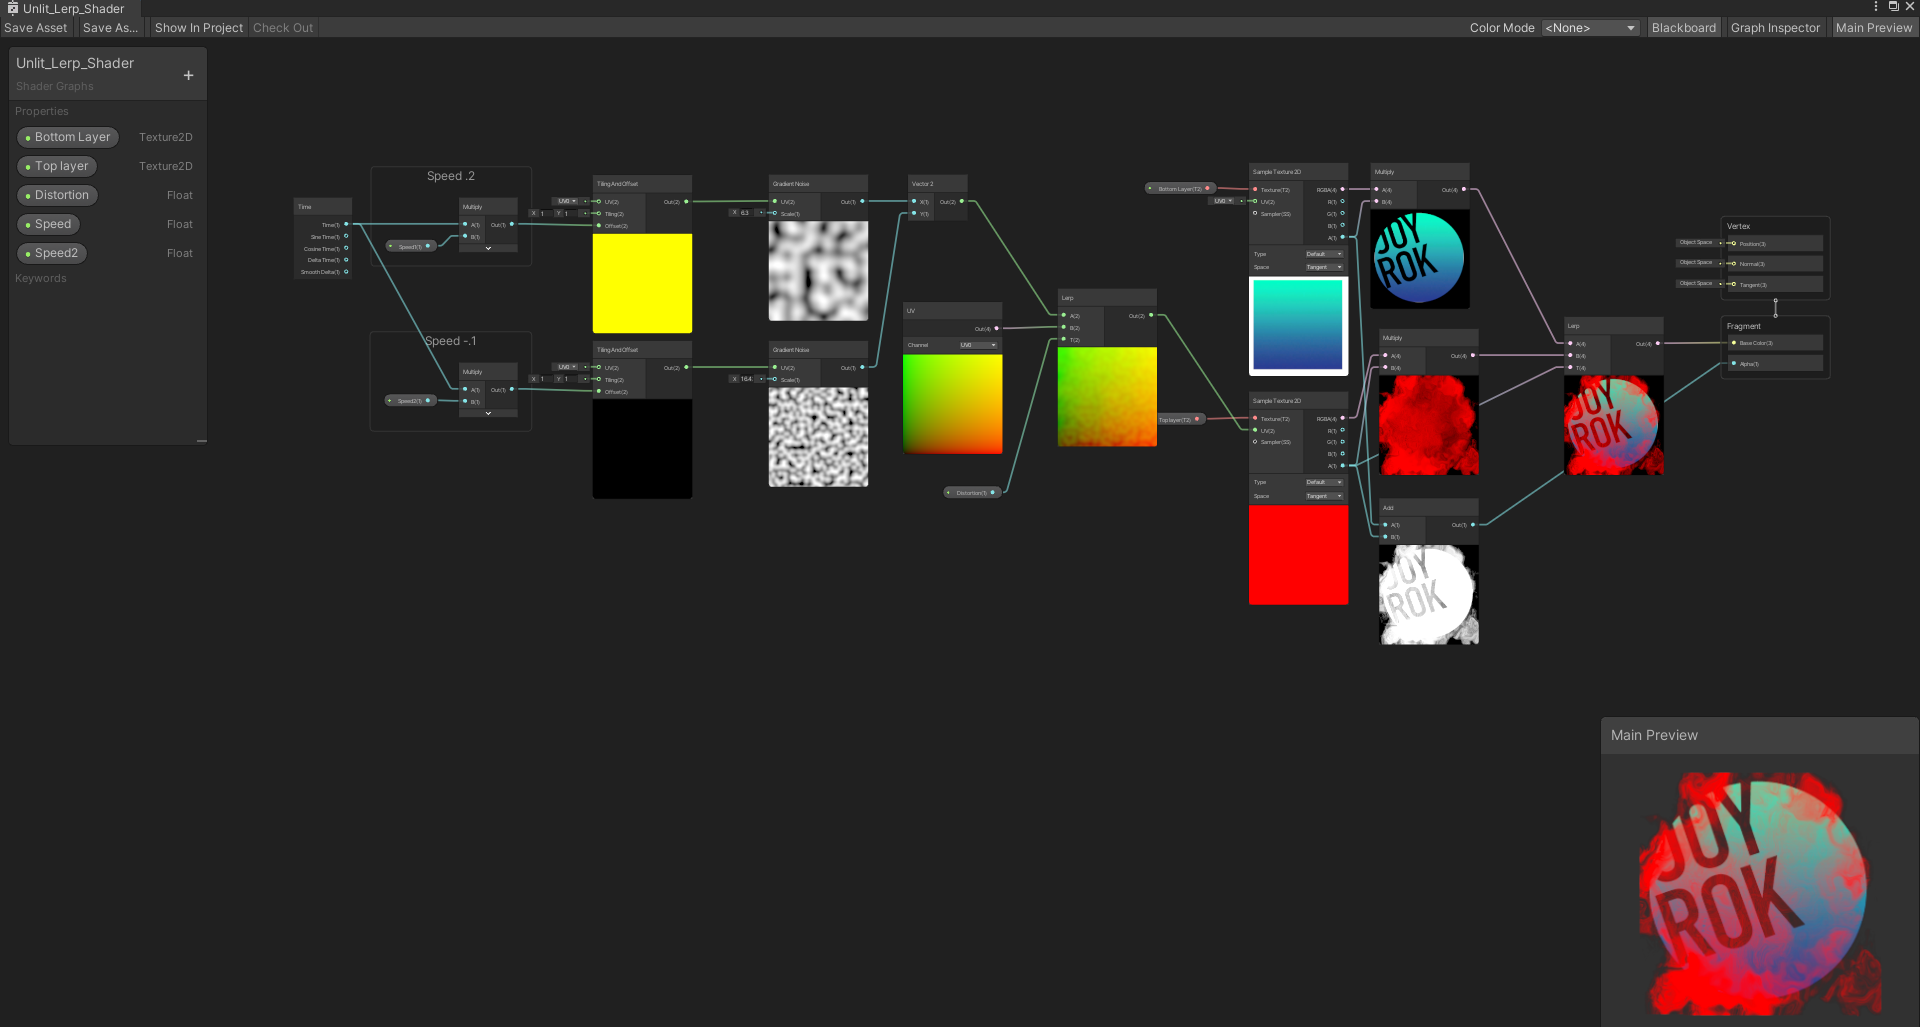
Unity Linear Interpolation:
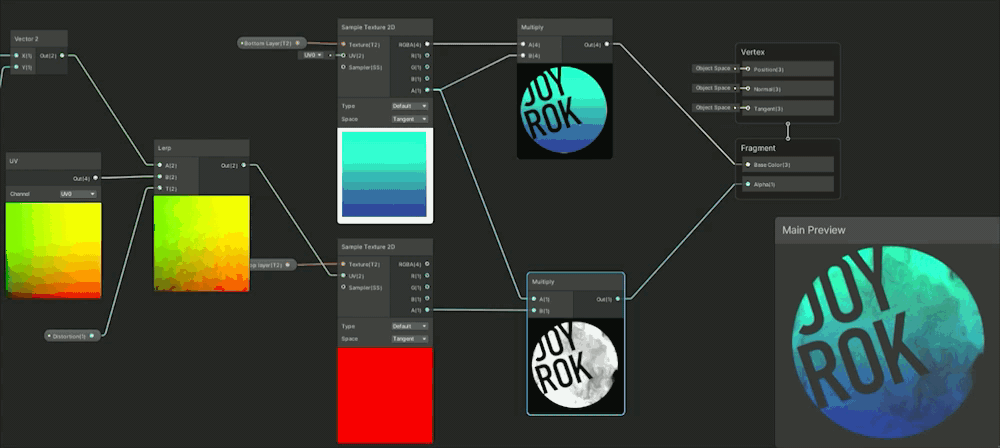
In Unity similar to Unreal it has a Lerp Node and .PNG images previews lack alpha if just a basic texture import so I use the Multiply Node with my Sample Texture 2D, I set it up like this in the Shader Graph:
Here I’m actually adding the two texture alphas together and plugging that into my final alpha just to make sure it renders in the engine with alpha, just adding some extra functionality artists are likely to expect. Also I can use a fun UV distortion with shader graph Gradient Noise Nodes to make it animate:
Clipping Masks to Linear Interpolation/ Multiply
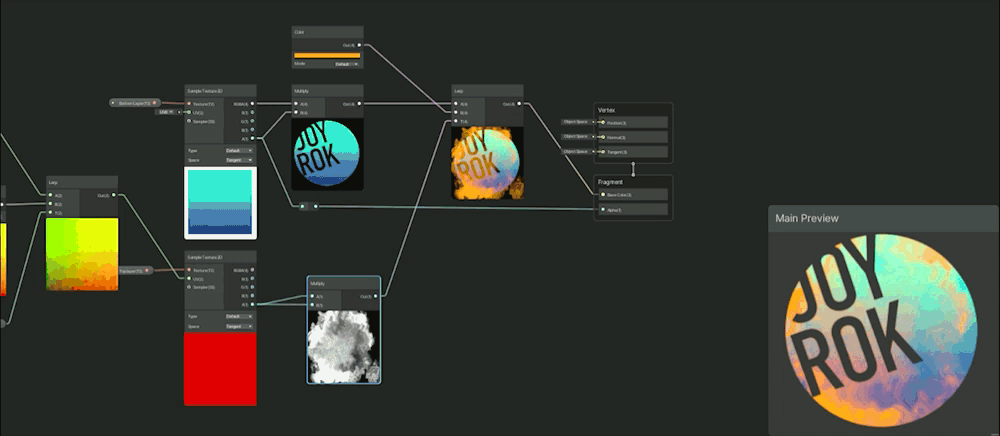
A good hint on how to make clipping masks in the last section was seeing the Lerp Node refferred to a clipping mask in photosohp because thats also what Lerps can doUnreal Multiply:
First up is Multiply Node and I’m usually using this in the context of alpha or opacity of the material.

The basics of the shader works by multiplying the texture’s alpha channel with the animating mask and that creates the effect of a clipping mask. In photoshop a clipping mask is grayscale, black means mask and white means show the original layer, gray is various opacity of masking. Multiply is the same concept. When you multiply 0 - black, you will mask something out because anything multiplied by 0 will be 0, when you multiply 1 - white, you will keep it visible, and gray would be various levels of opacity.
Unreal Linear Interpolation:
Lerp Nodes as hinted above can also be used to create masks and here I love to use them to create color fills very similar to this image (I’m going to keep showing this image to help re-enforce what lerp looks like in photoshop)
Unity Multiply:
You’ll notice nearly everything in Unreal is quite possible in Unity and these basic nodes are almost always the same name, thus it might be shocking to know but Unity’s graph will look quite identical to Unreal’s with the multiply node creating the alpha with it plugged into the Opacity output.
Unity Linear Interpolation:
So where in the Unreal Lerp example I wanted to brighten up the clipping mask texture in unity I wanted to darken this particular texture and how I like to do that is by multiplying the clipping mask effect to itself and you can see that will darken the darker areas and lighten the lighter areas. Then of course the Lerp Node masks the clipping mask and I can change whatever color I want in the B slot to be anything!
That’s a little bit of the basics on clipping masks and masking in general through Multiply Nodes and Lerp Nodes but other nodes could be used too those are just the ones I tend to fall to right away as they are easy direct comparisons to photoshop and usually get the results I’m expecting.