
Tech Art Chronicles: A Tale of 2 Engines
Struggles That Lead to 2 different Art Styles
![]()
6.18.2020
-
First and foremost - I am not a tech artist or VFX artist (yet). Those are the amazing folks who make games look stylized (Zelda), realistic (Last of Us), and put in cool fire/water/and other effects. I am primarily an Experience Designer, meaning I make UX/UI, prototypes, game design mechanics, experience designs, and whatever else includes a journey of a user to a goal.
This is the start of my Tech Art chronicles as I explore and document this field l so I can look back, see the progress I made. and remind myself of all I discovered along the way. These probably won't be tutorials either as the focus here is more on cataloging what it is like to learn a new skill rather than teaching others. This is similar to a Tech Art notebook where I can see the discoveries I made but also look at the progress I learn.
-
Now onto the first topic:
Unity and Unreal
how to make the same look in both?
I wanted to document my process using the same models and taking those assets into Unreal and Unity. With each engine I wanted to see if I could make the same visual effect... throughout the process though I’ve discovered that I want to see where each engine’s features and distinct look takes me in the creative process.
I have very little knowledge of Unreal and only used Unity a little bit so I’m coming in pretty new to those two engines. However I have former knowledge on the Telltale Engine so I generally understand how a video game engine functions.
The initial goal was to get a look similar to Dedouze’s look and feel in a game:
UNIQUE THINGS I’M DOING:
These are the unique things I am doing with this project that other projects most likely aren’t going to do. For a food analogy this is the “terroir” about the look I’m putting together, terroir meaning the food was grown locally and has that special taste that only local grown can give. I’m giving these assets my own locally grown “terroir” creativity that’s in my head.
Outlines are a mesh:
The unique feature to all of these outlines and look is that it’s a mesh generated in blender using Grease Pencil.
Cel Shading is not a post processing effect:
First off, post processing effects are effects like changing the entire scene to be black and white, or tinting the entire scene to be red. That’s a post process effect where you are in the post of rendering applying a filter or an effect over the entire visual composition of the scene. My cel shading and outlines will not be using this effect? But why not? I like the ability to control the color/cel effect per each object or material so that’s why I prefer not to do it as a post processing effect. I’ve also read that it messes with depth and fog and other post effects later that I might want to use.
ASSETS I’M USING:
Character by INMERSYS
Environment by KITSUNE GRAPHICS
FIRST STEP:
Use blender grease pencil to draw the outlines ontop of the meshes and make an outline mesh per object
The first thing is to make my legos, those are the building blocks of what look I will eventually build. In games usually you start with a character to animate, or an environment you want to start exploring in the game. I’m doing both, so I am taking a character from sketchfab and stylizing it up so when I put it inside the engine I have something that looks unique and I can test on. And I’m doing the same process with an environment I found on sketchfab and giving it that spruce style and putting it in the engine.
The process was a little tedious and therapeutic to draw ontop of all these objects and characters and make a stylistic look of outlines. I used Dedouz’s tutorial on youtube to learn how to do some of this. It's fantastic.
Environment was simple to do, just drawing on top of the meshes and exporting out each object as its own mesh, so couch object and couch outline mesh are two different .fbx files that I’ll load into the engines.

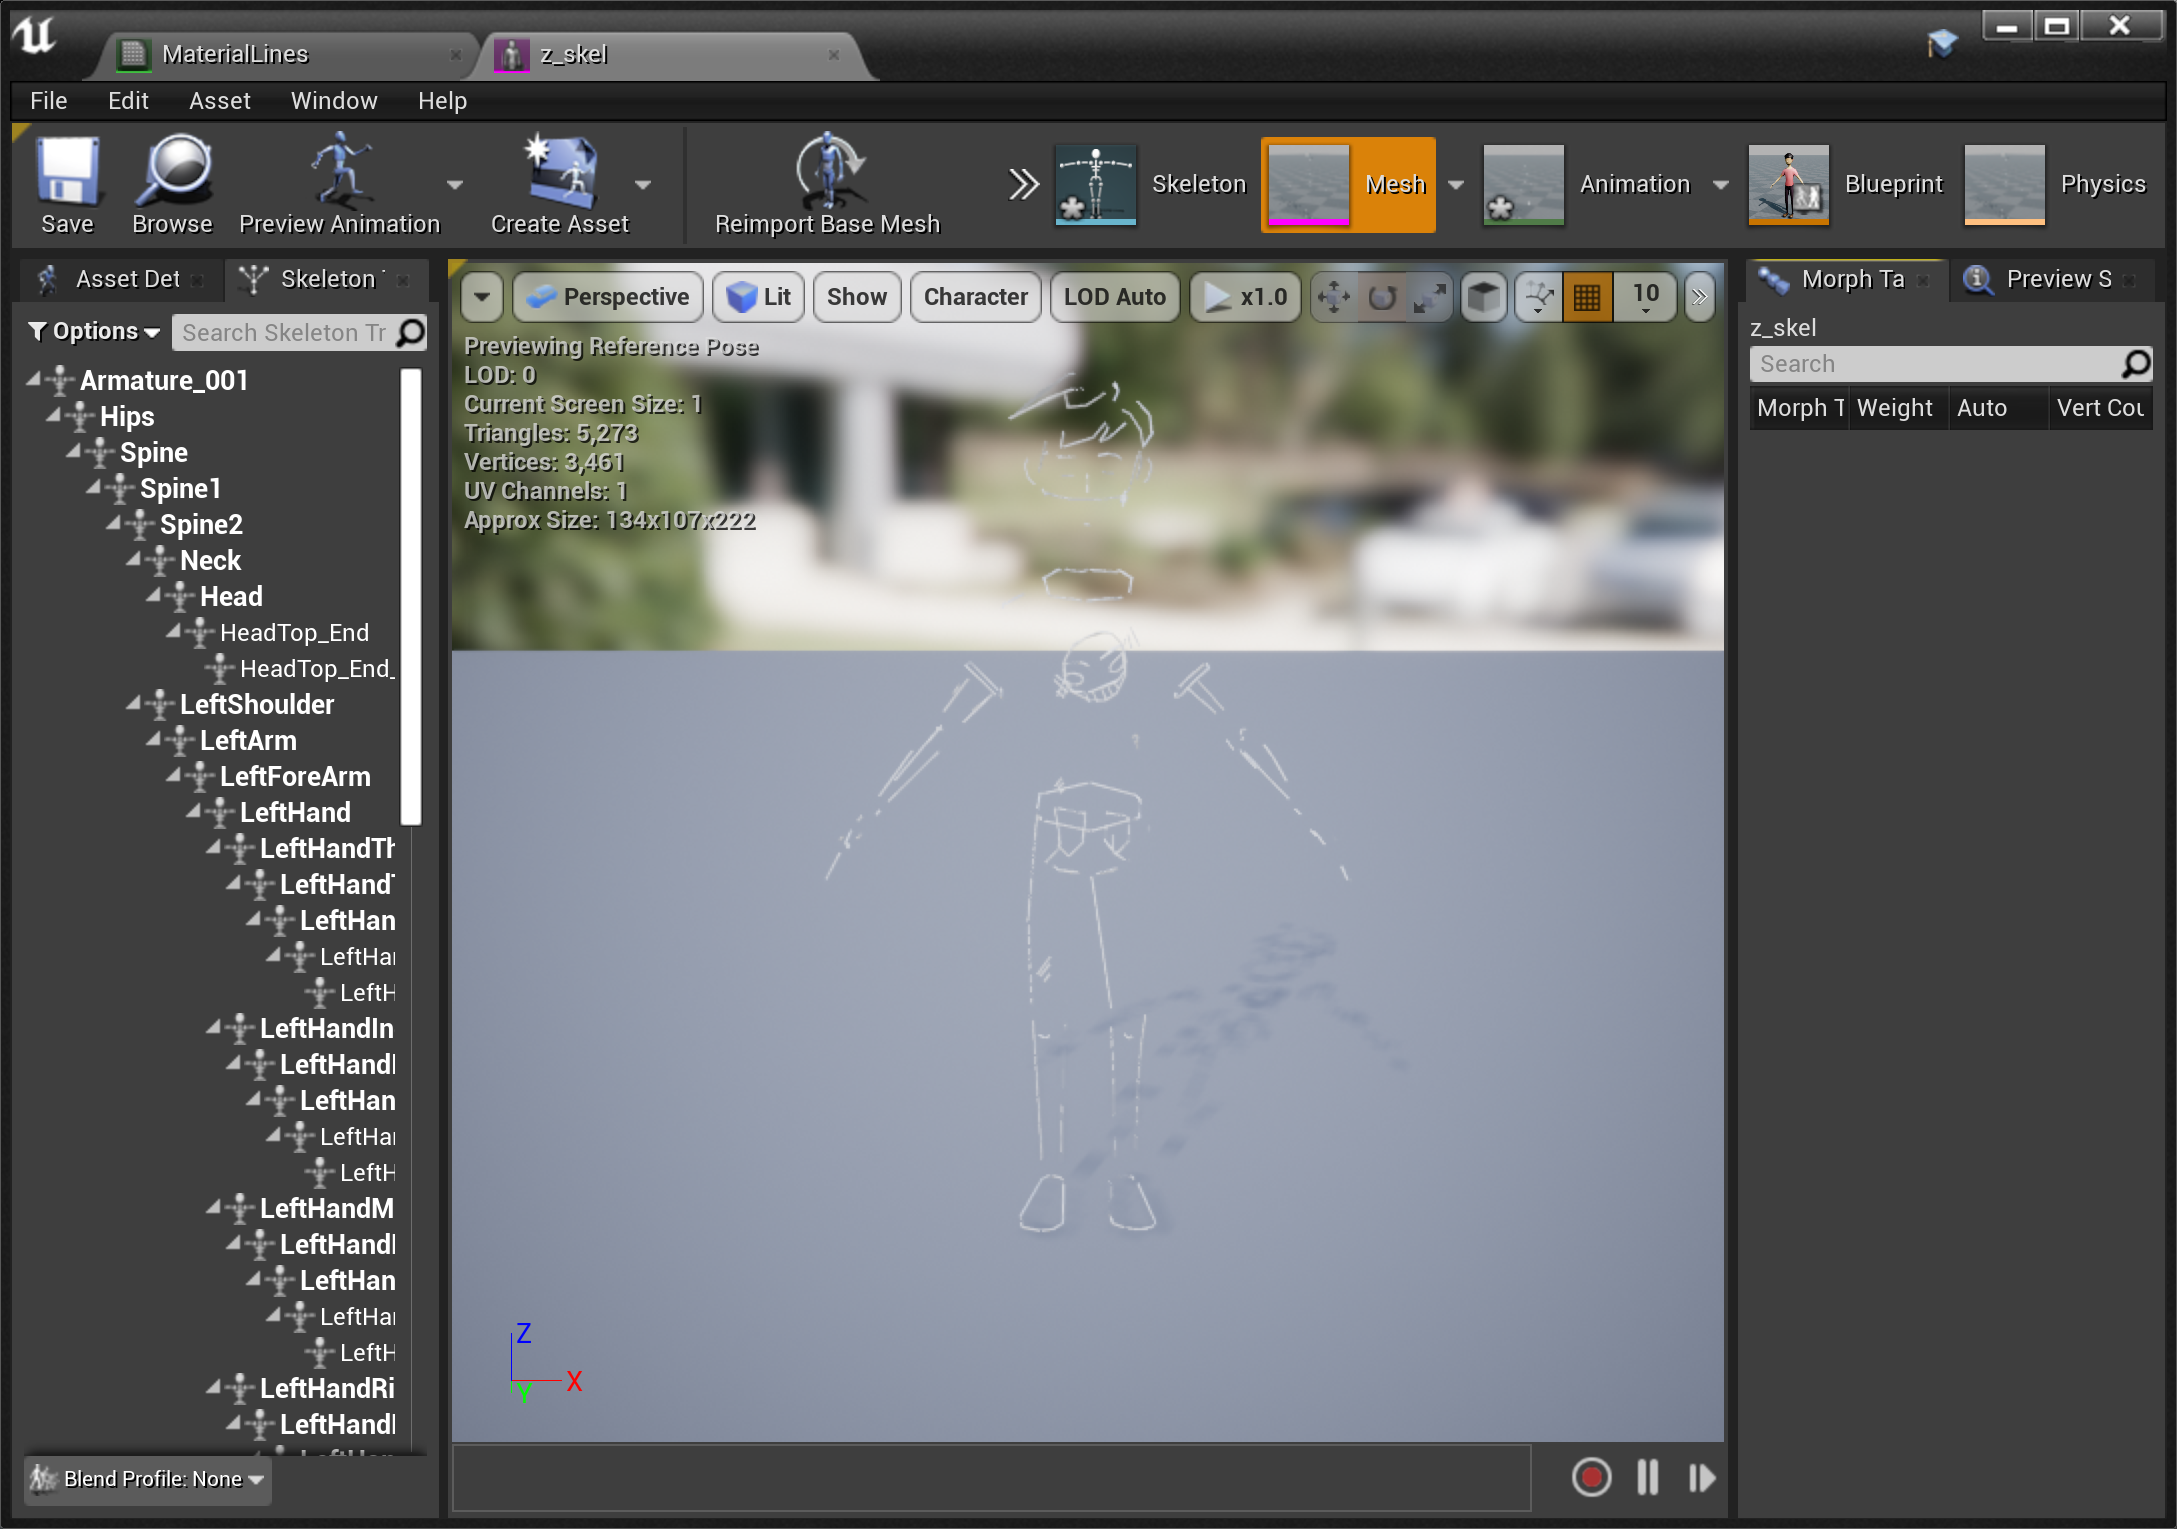
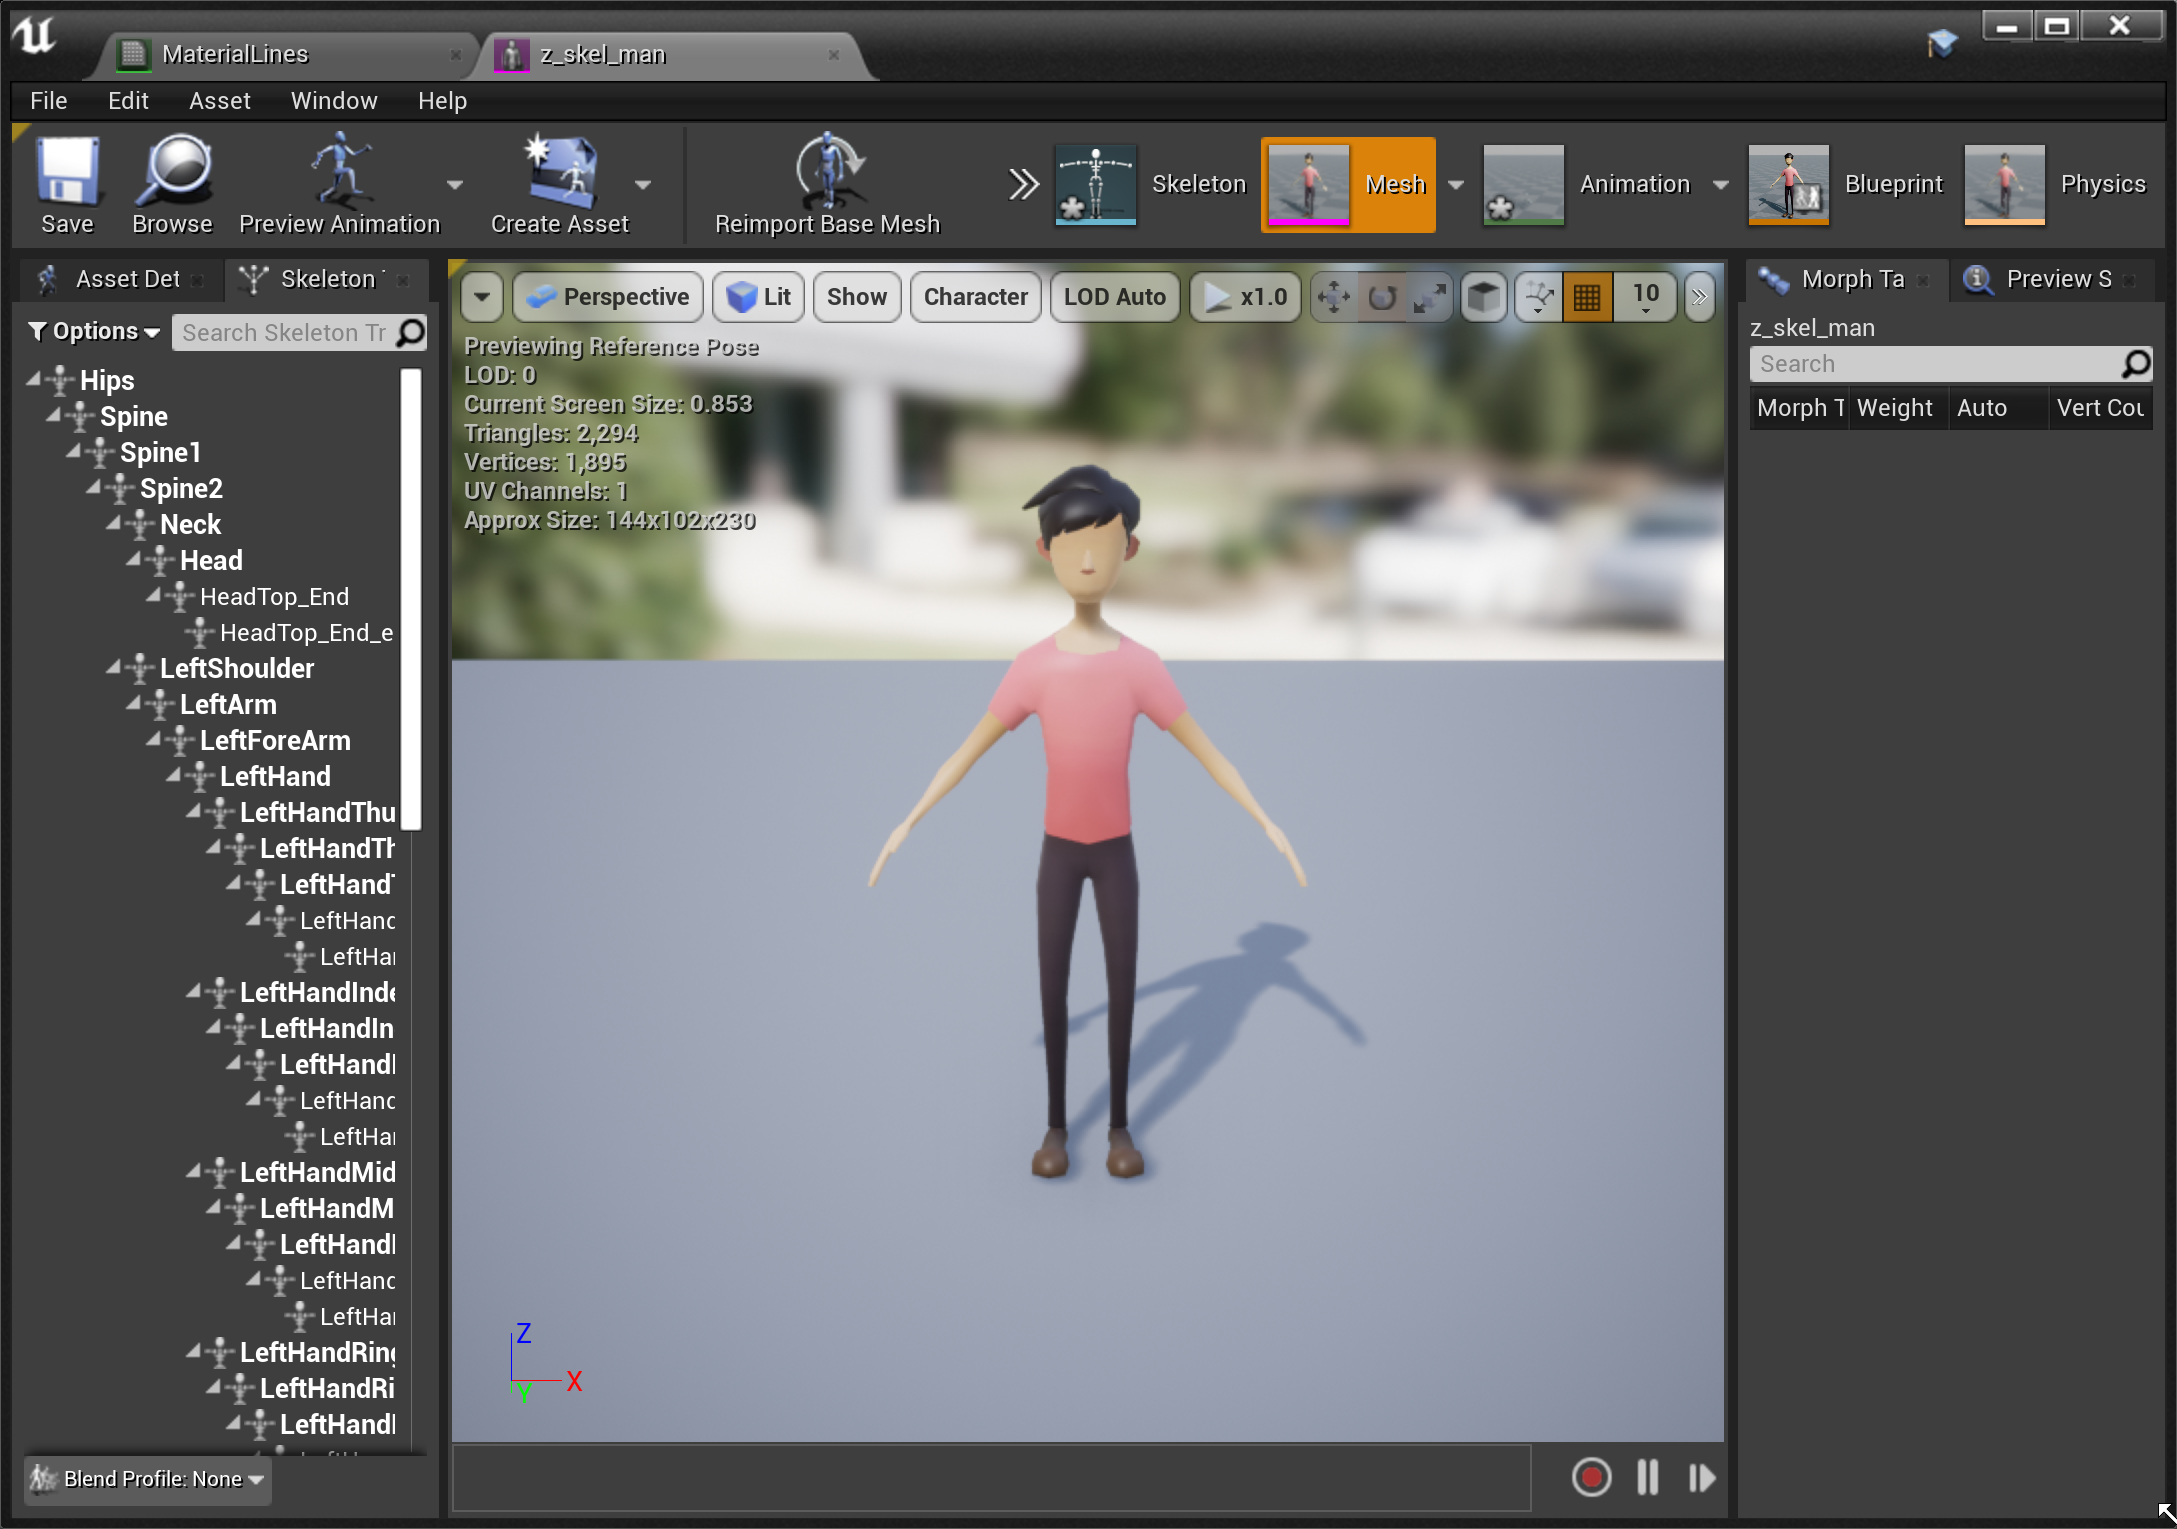
Just the Geo
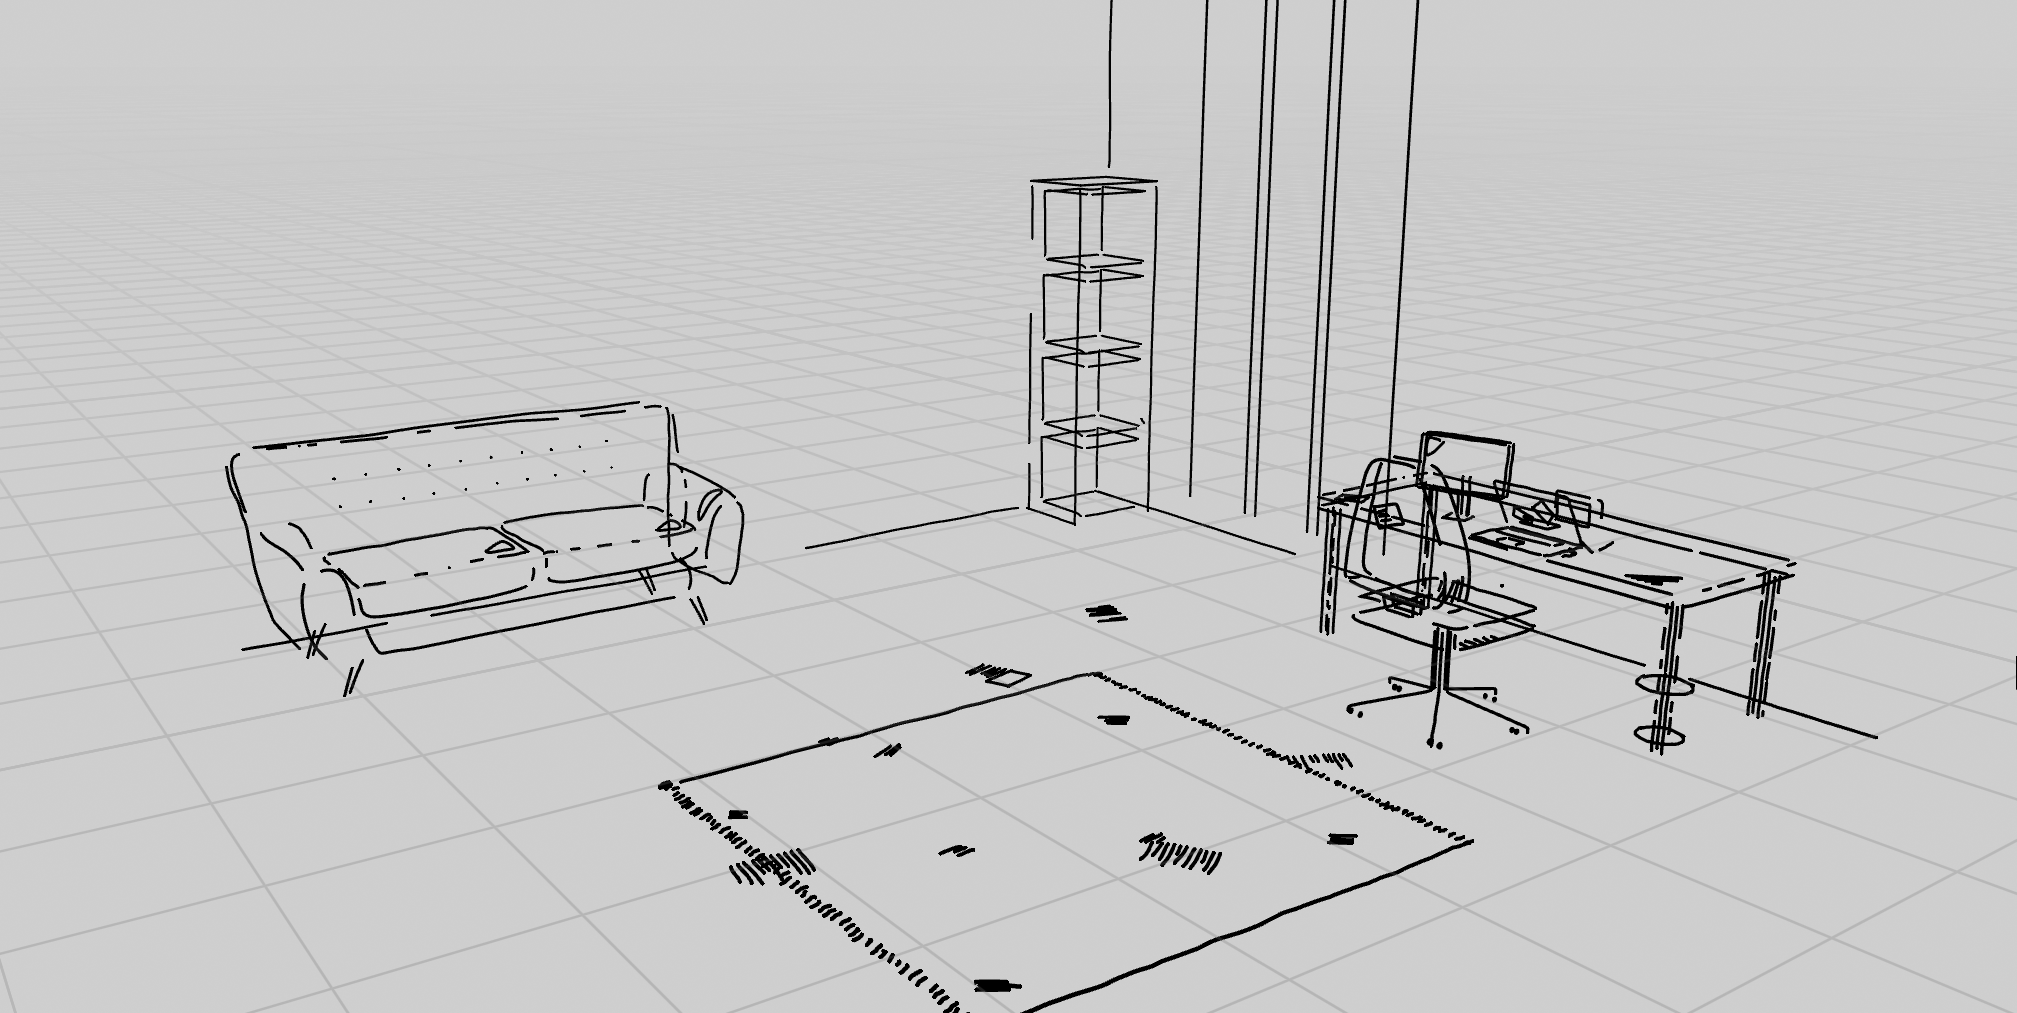
Just the Grease Pencil on top
Character was harder. I had to apply all the vertex weights and groups for my outlines inside the armature identical to the original character. In non dev speak, it just means, I had a really tedious hard time identifying what sections of my outline drawing needed to be in what animation groups. Like the torso, I had to put some of the shirt wrinkles in the torso group and some not in the torso or else it’d look weird when animated.
One day I’ll be emotionally strong enough to write how I lack ANY blender rigging skills or knowledge at all.
SECOND STEP:
Get these meshes in engine
Now that I’ve got my setpieces: the environment and character. The goal is to get those inside of each engine and play around with the little scene I made. Setting up an empty scene (unity)/ level (unreal) in each engine looks pretty similar, though when you start in Unreal it has no skybox which probably altered entirely how I approached the visuals. All black was dramatic and moody.
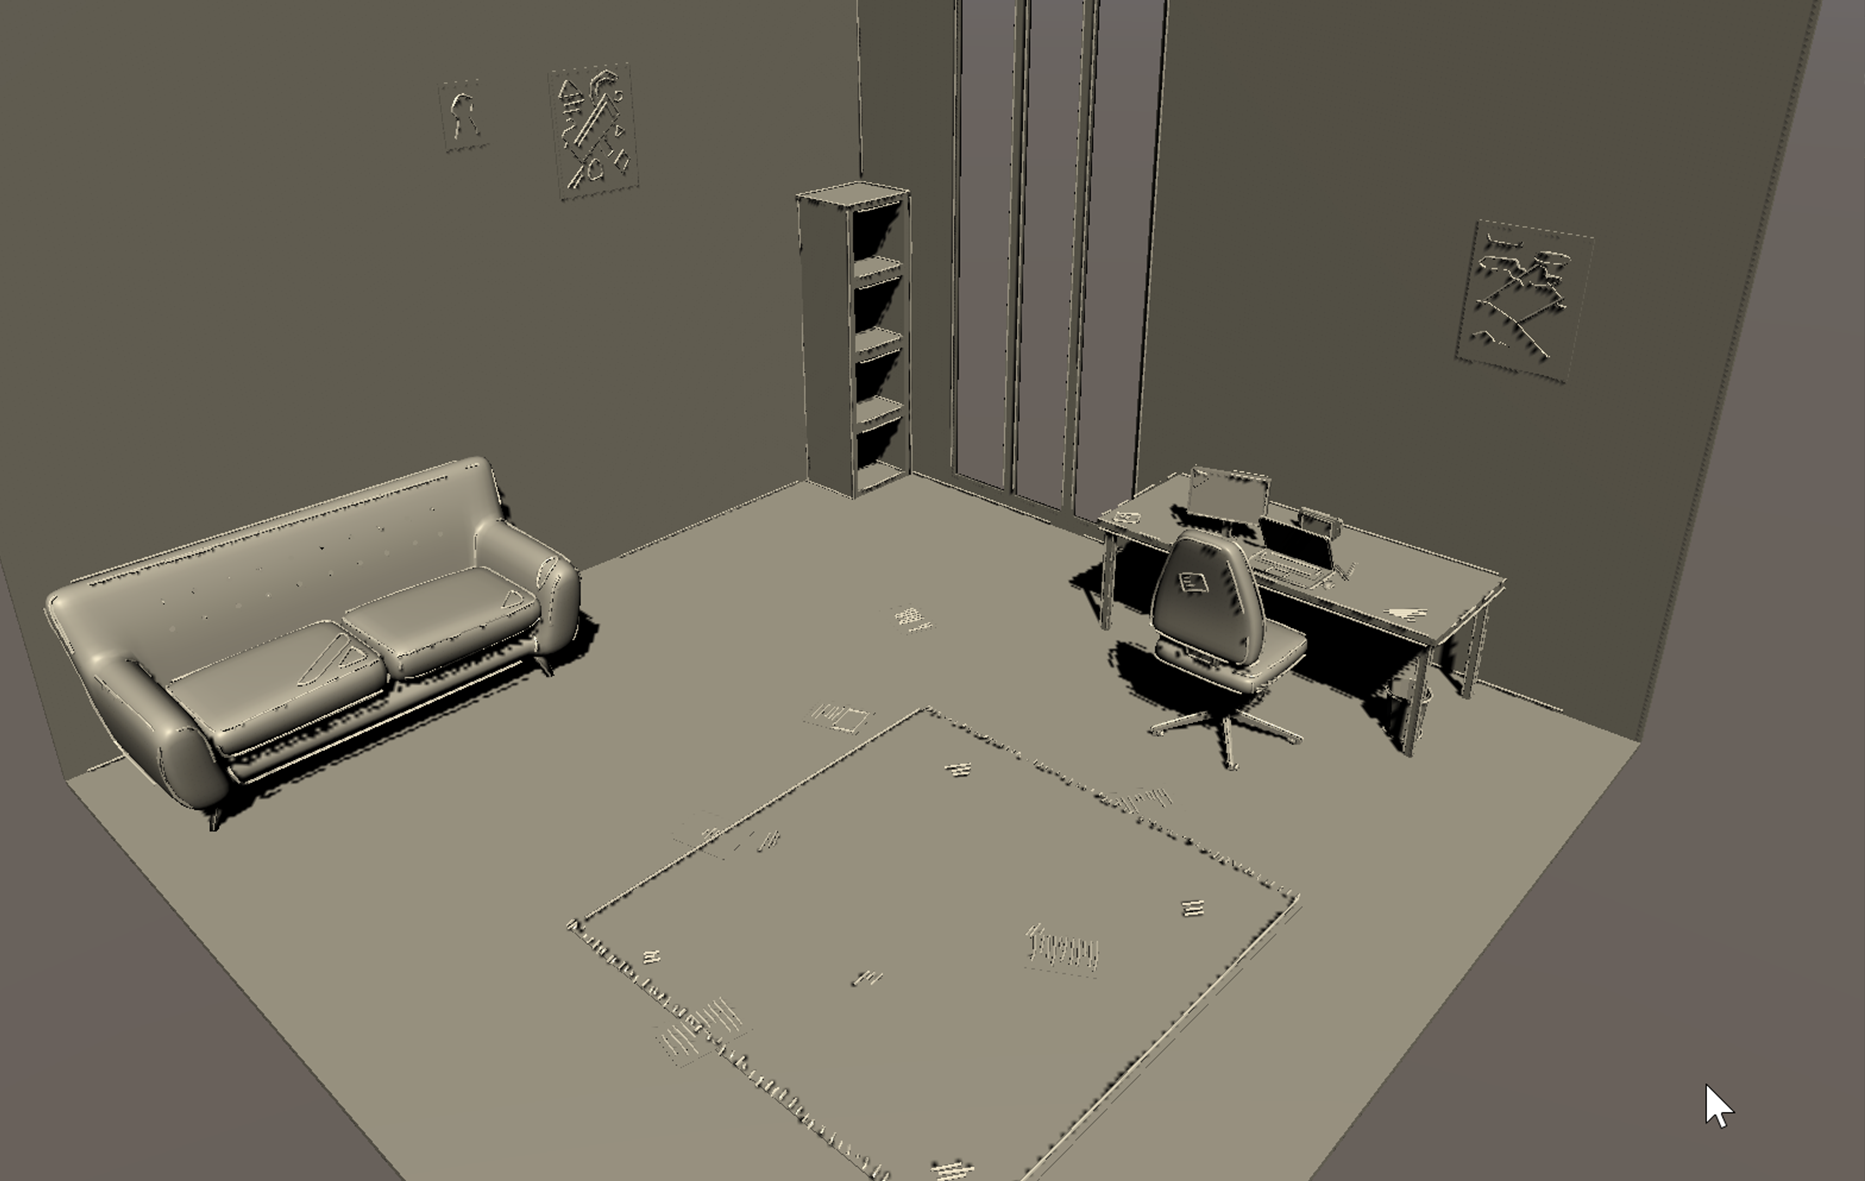
Unity
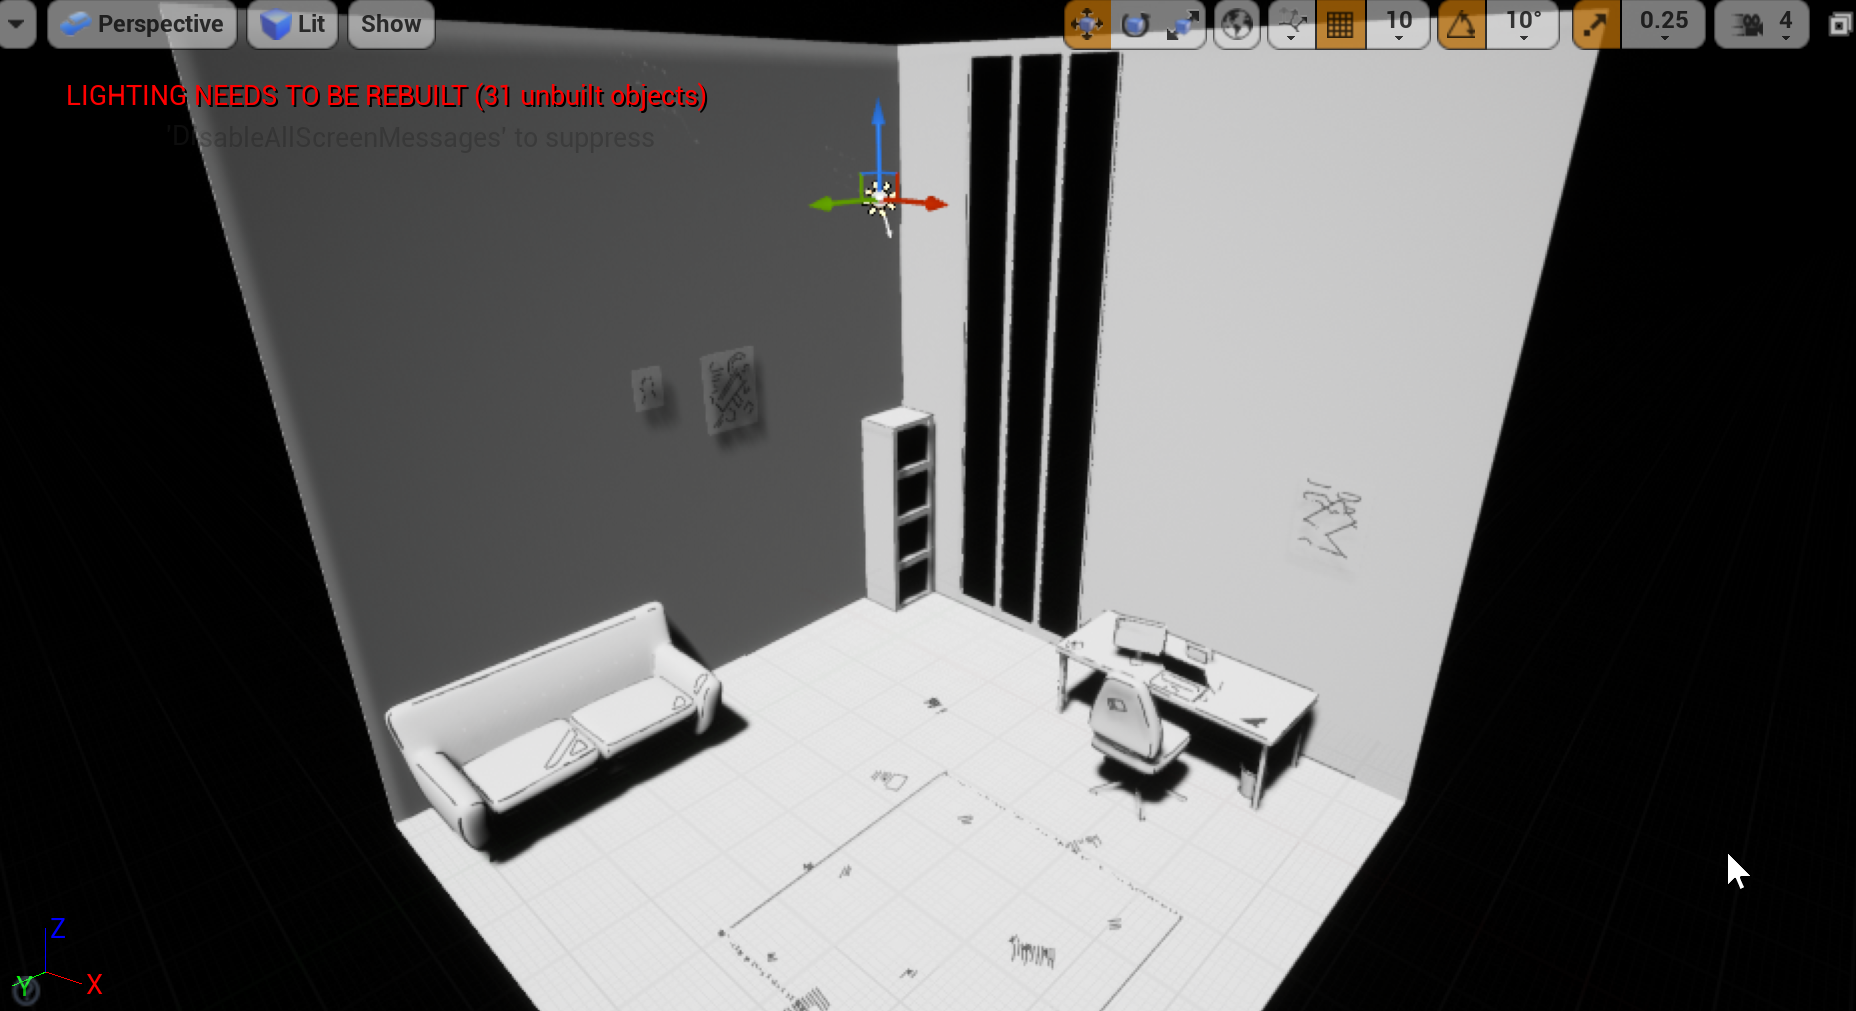
Unreal
Unity has default colors on the lights so that’s why Unity looks a little army camo tan -- also I have no materials (colors or textures) on these assets from blender imports so it came out with the basic material for both Unity and Unreal. Basically everything is the same color and looks blank because they are all using the same material or style on them.
A little annoying Unreal tidbit. Unreal has default static baked lights so it’s constantly showing preview shadows and asking to rebuild the lights. I endured rebuilding my directional light for a little while... and then I was fed up so I set it to moveable and moved on my way.

The rebuild takes a while and it makes it impractical... on the other hand Unreal has a really nice basic navigation in play mode. Unity doesn’t, so in Unity I never play the build, but in Unreal I did all the time.
Unity - Nope
 Unreal - Navigate in Play
These are just little things I discovered about each engine’s workflow that suited or didn’t suit the way I wanted to work inside them. Unreal things looked better on initial import and I could navigate around the level easier, but it would take a while to update shadows or build out lights that I spent too much time tweaking something slightly and having to wait 30 seconds for a rebuild. So I found a work around that just by making the lights not need to be built. For Unity I never ended up playing the build version because I needed to put in custom player navigation controls, so I just looked at everything inside the editor.
THIRD STEP:
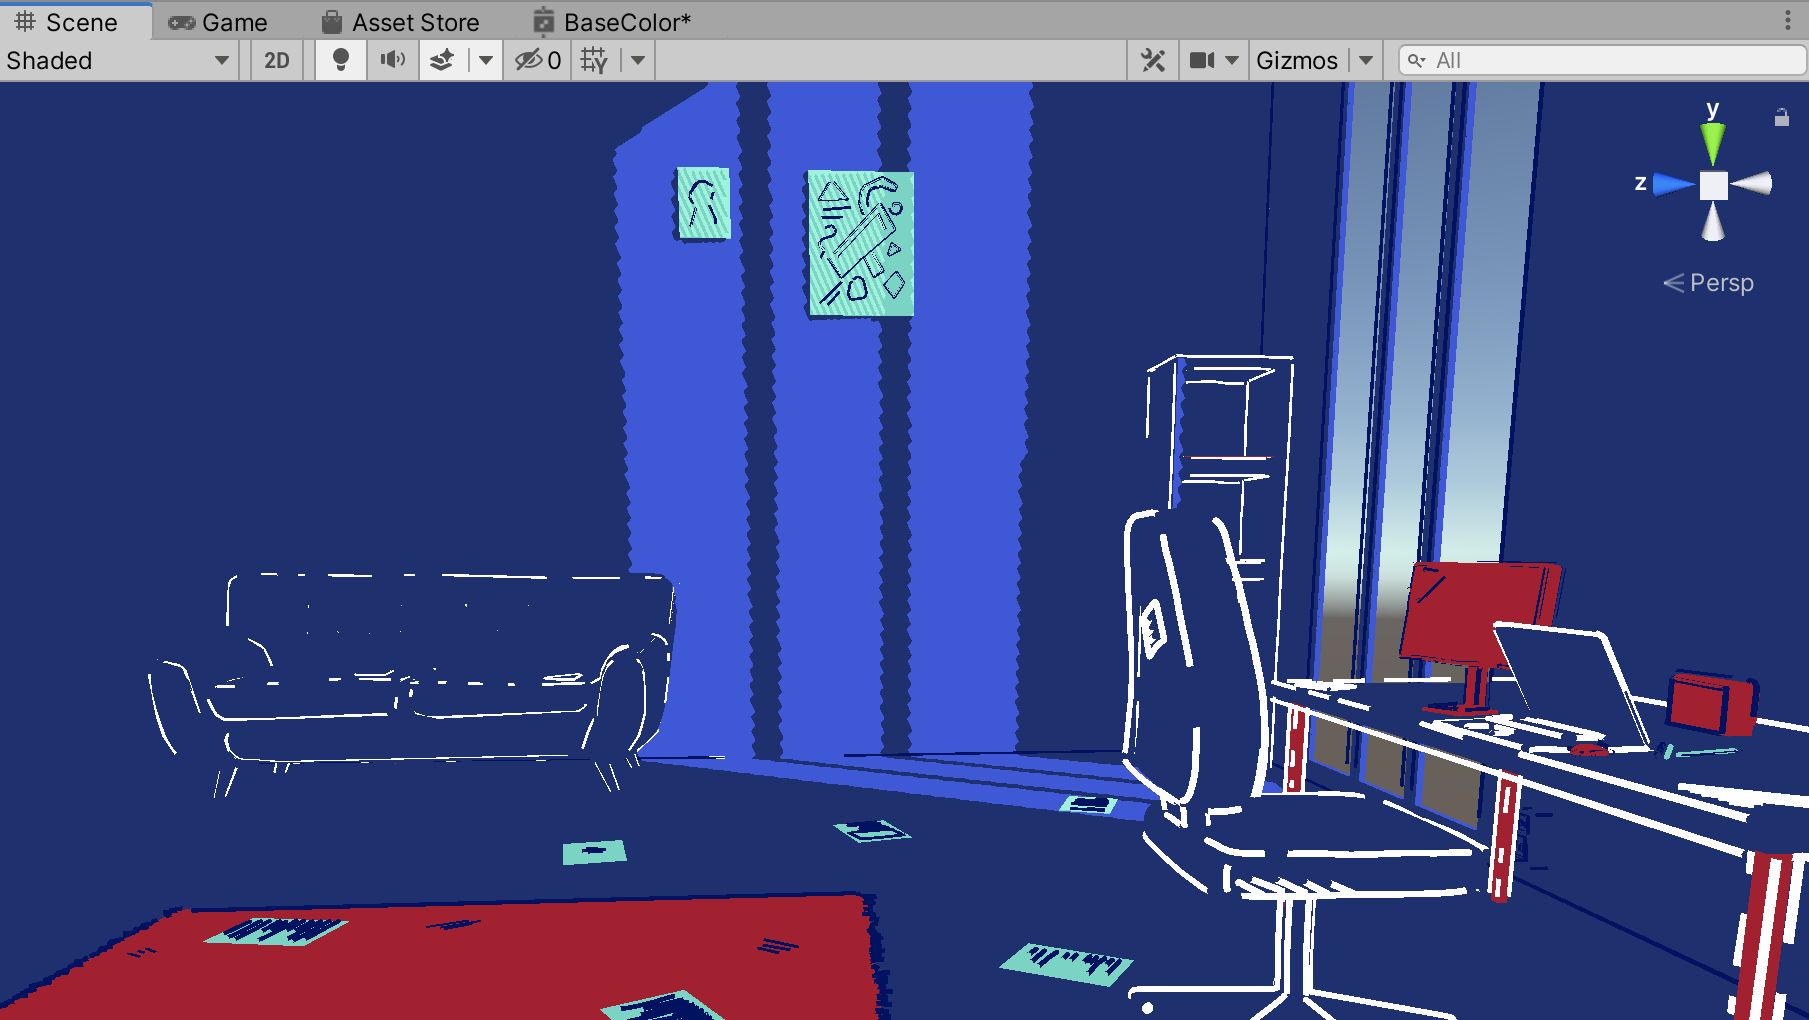
Make a base cel shaded material for the base geo
I’ve got the objects inside the engine now need to make a cel shading material in both Unreal and Unity to get that initial art style look. Both engines have a visual scripting language, Shader Graph (Unity) / Material Editor (Unreal) and that’s mainly what I use till later with Unity and the outlines animation. I won't go into the finer details of how to cel shade for Unity because there are tons of tutorials on cel shading in shader graph. SURPRISINGLY not a ton of cel shading tutorials in Unreal for a non post processing effect. In Fact it was awful to figure out in Unreal, I’ll go over briefly what I did.
The basic approach goes like this:
Get Lighting Vector from Engine Lights
V
Put lighting vector through a dot product with the world normal vector
V
Make a step function to contrast how much light on the surface will show vs shadow in the direction of the light vector
V
Put lighting vector through a dot product with the world normal vector
V
Make a step function to contrast how much light on the surface will show vs shadow in the direction of the light vector
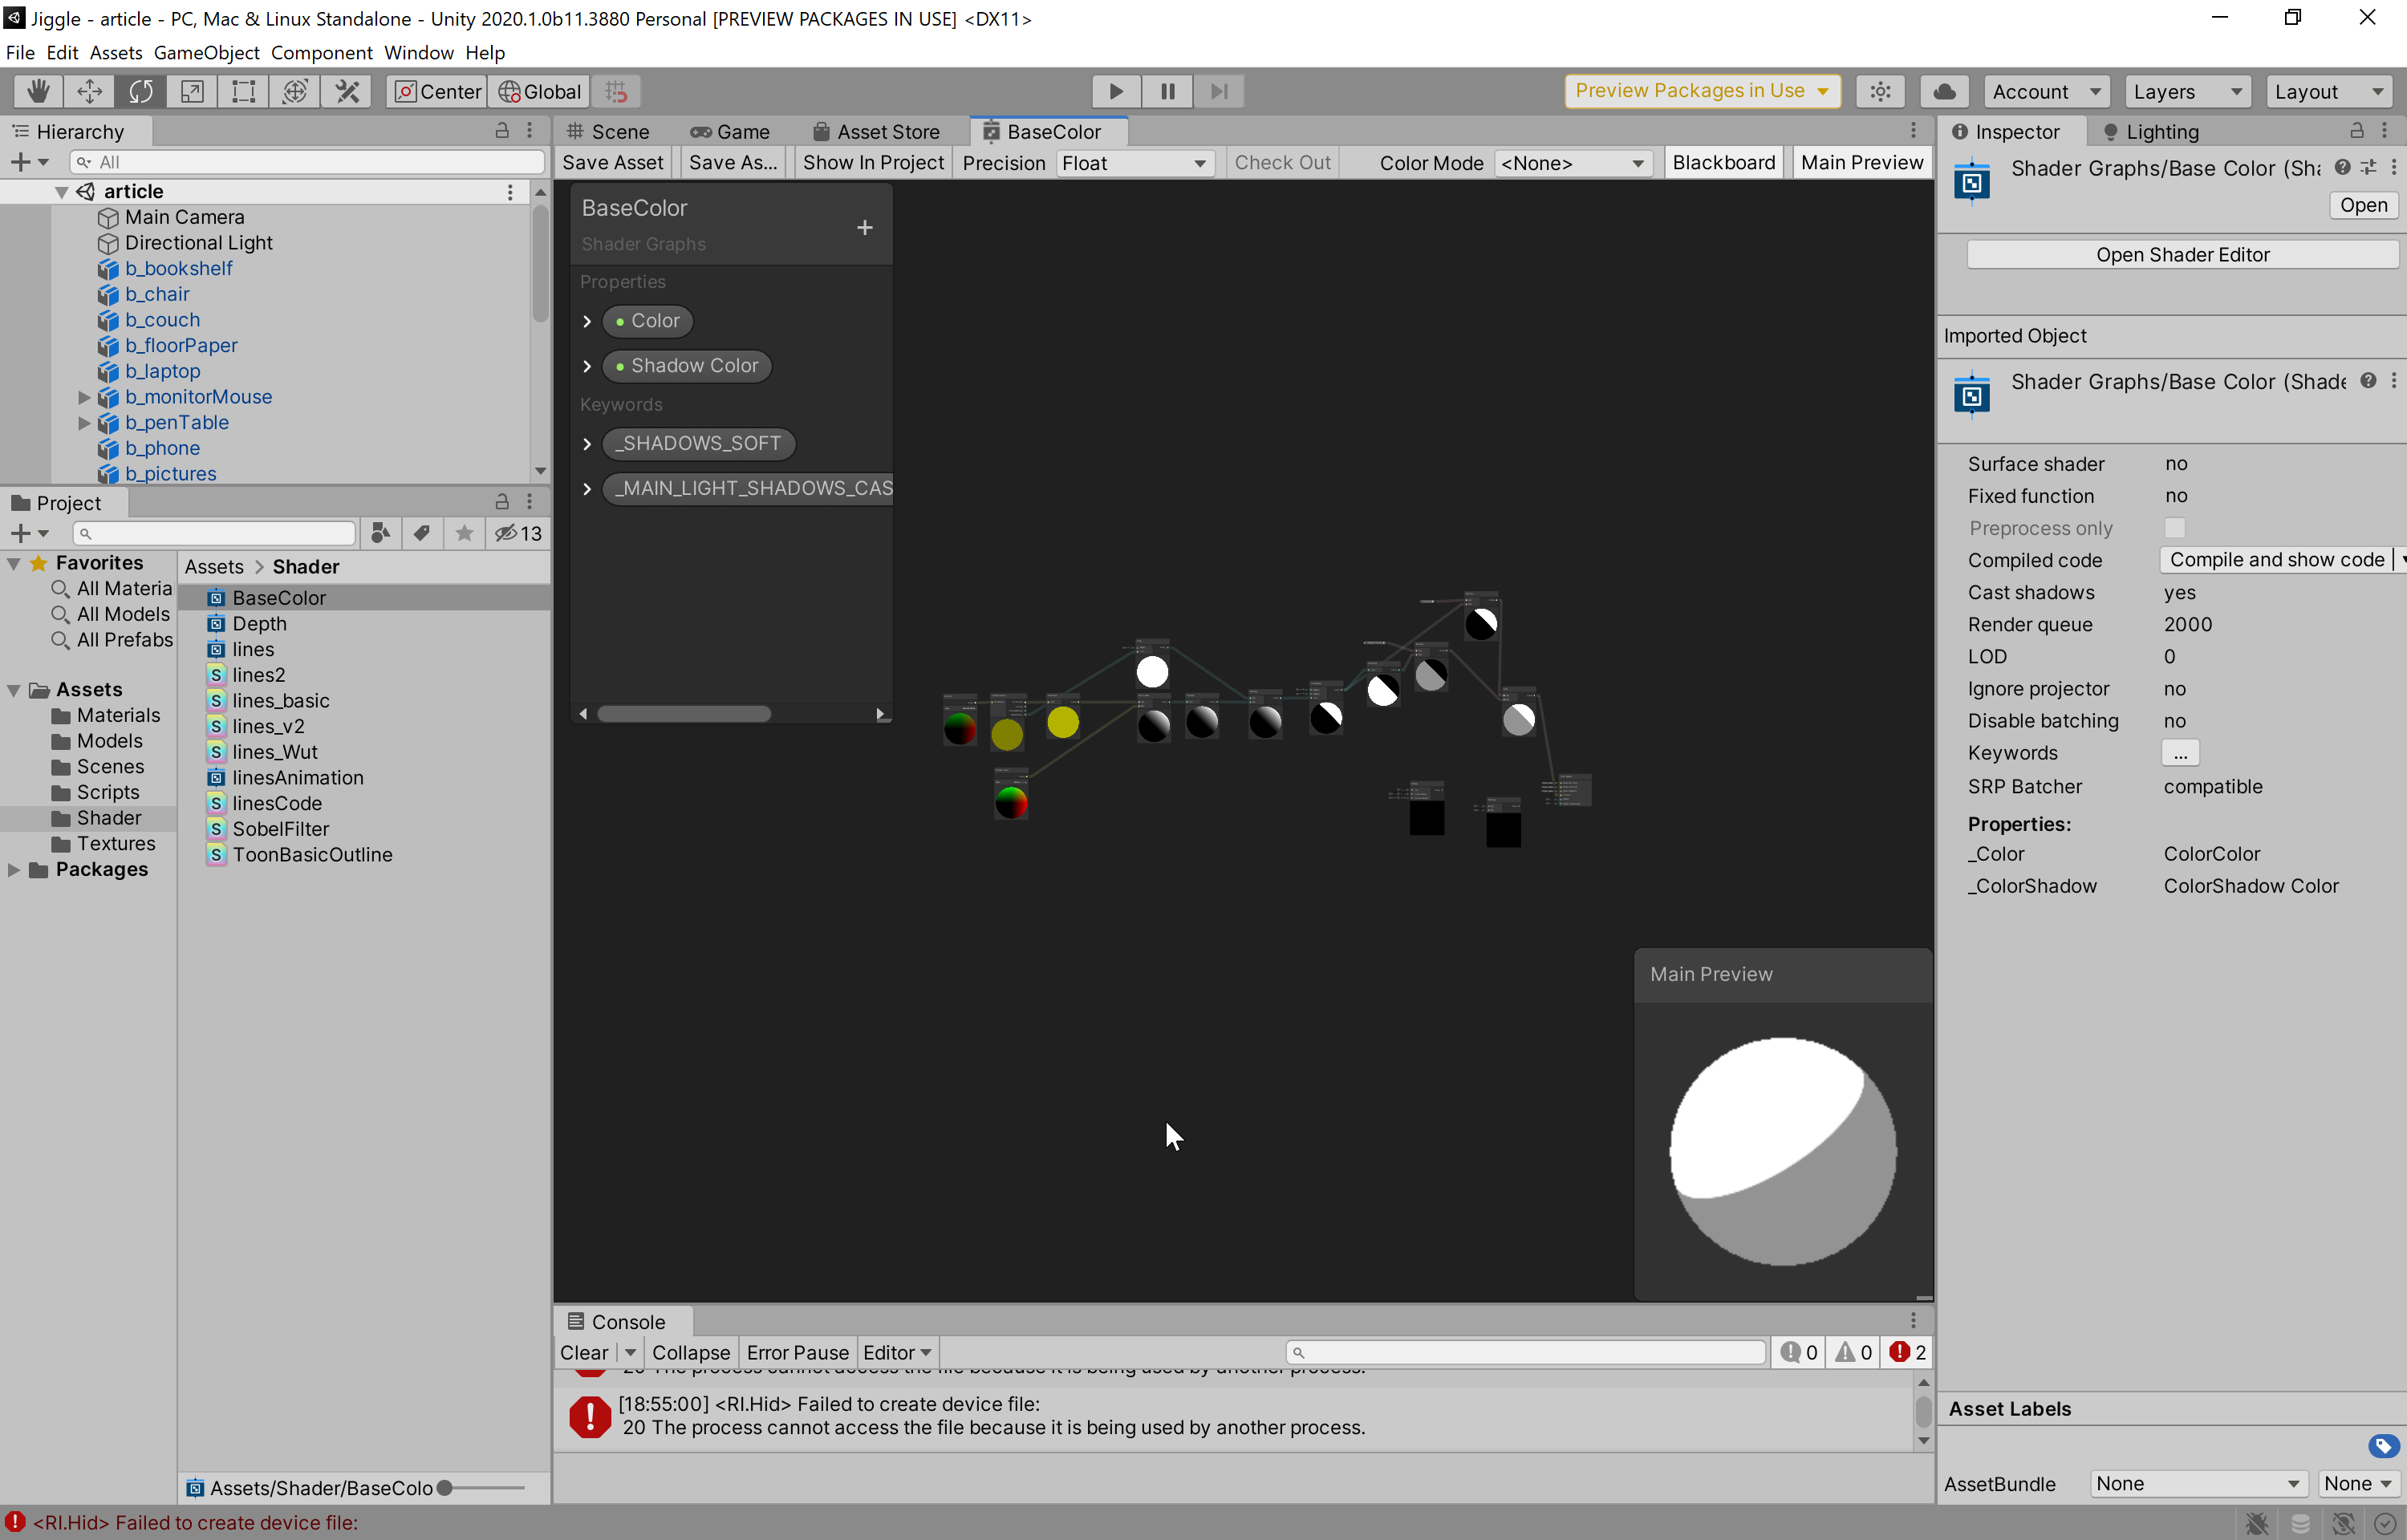 Shader Graph - Unity
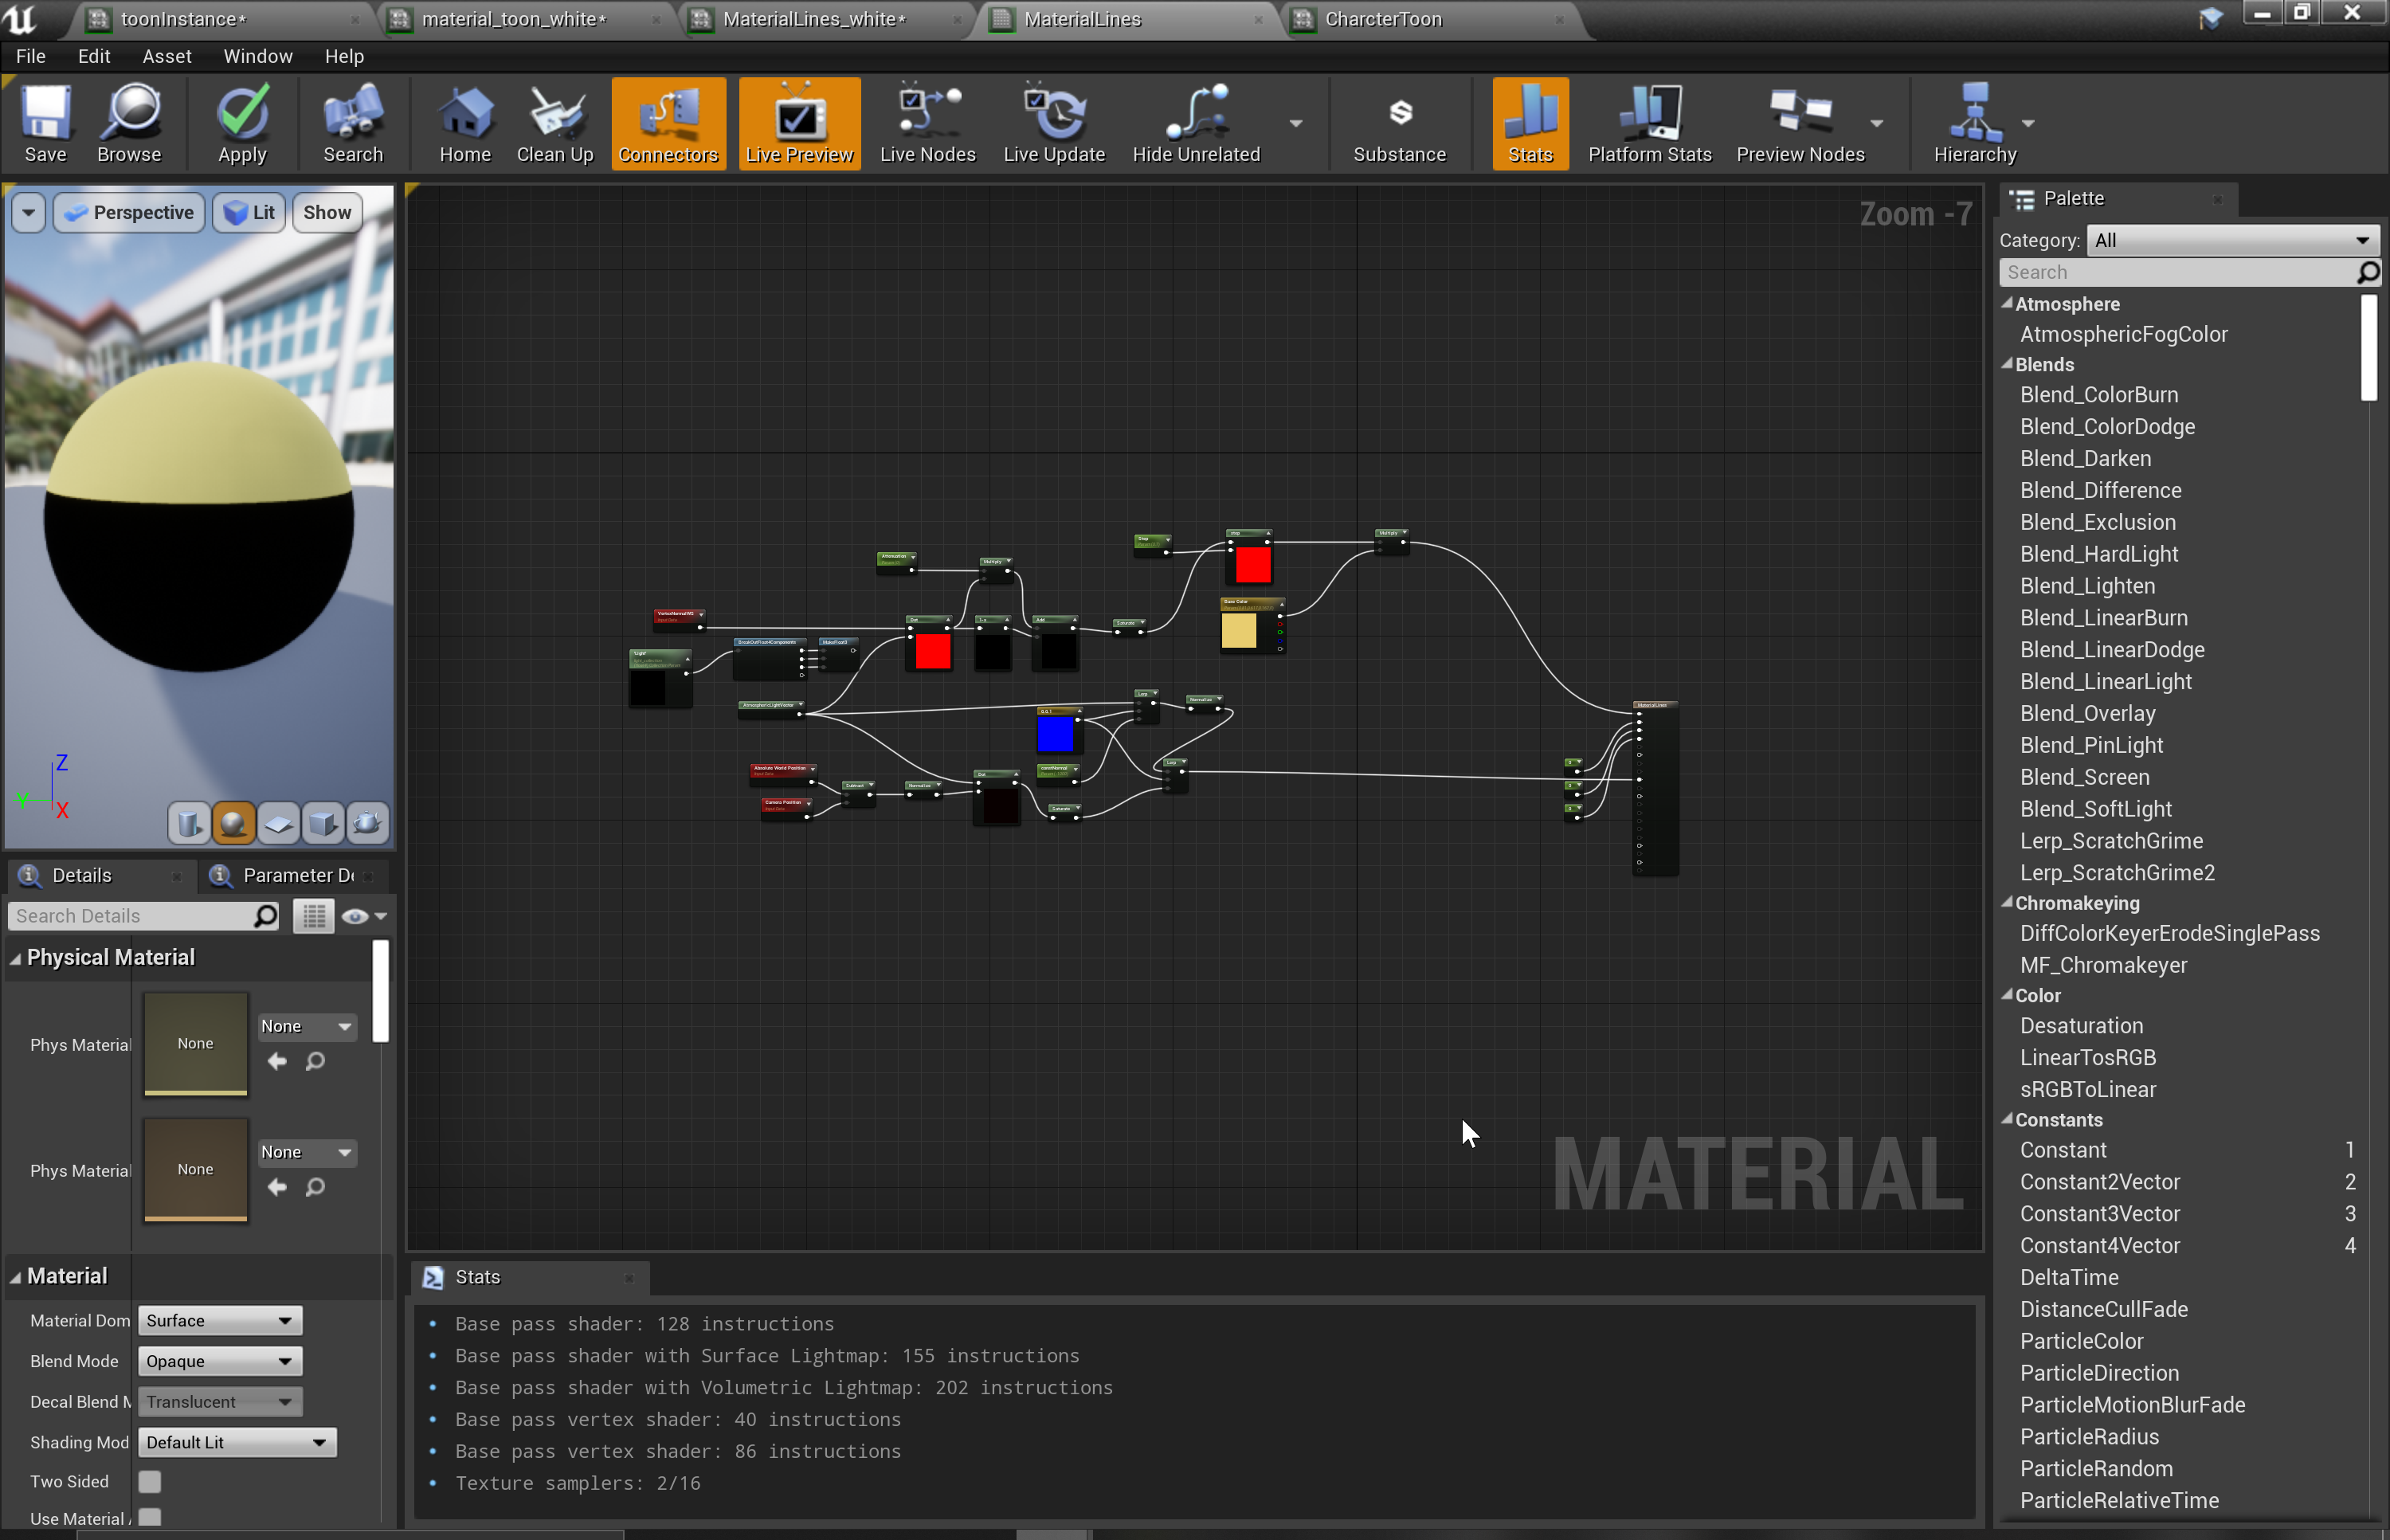 Material Editor - Unreal
These are all geometry phrases that I didn’t ever think I needed to know about beyond high school geometry. I figured I’d need to know how to calculate the area of a space because that apartment square footage is key to understanding what you pay for. Now I’ve got to refresh myself a bit on vectors in geometry and what they mean… fun going back to geometry class. Least I don’t have to write any geometry proofs, those were the worst.
Cel Shading in Unity:
To use the Shader Graph you need to install the package... Package Manger is Unity’s crutch where you can have a project as light as possible and probably looks like an aliased monster out of the box, but it’ll be quick to load and build... but to make things look good you need to add packages like you add items to your Amazon cart to meet that 25 dollar limit.
I am using Universal Render Pipeline and to be honest it’s a bunch of words that I don’t understand nor care about.
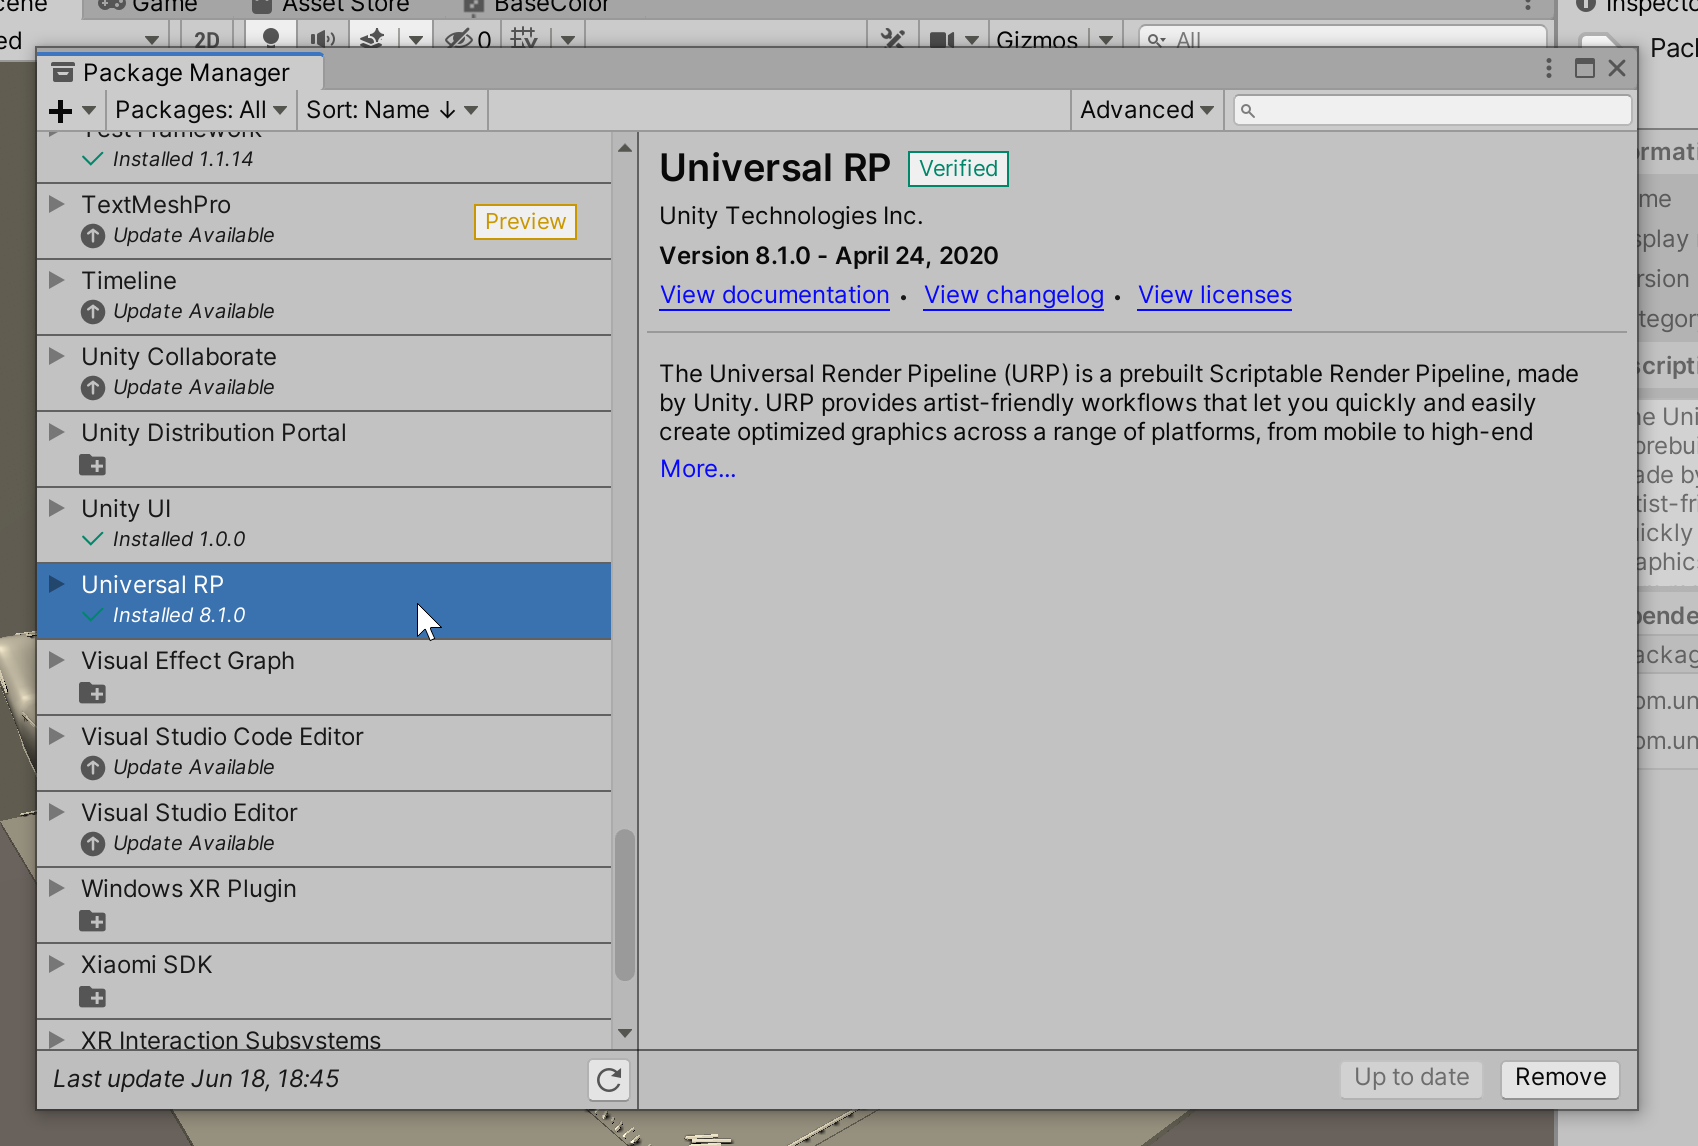
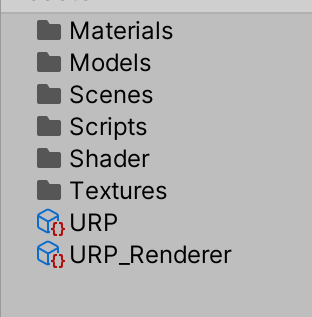
Installing this also installs Shader Graph and a few other things. Then you need to make the render forwarder asset and apply it to your project graphic settings. Then apply those base shaders to your project so things don’t look pink. Tutorials go over this but I kinda want to point out all the weird steps you need to take just to make the project ready to render correctly and to use shader graph. I’ve gotten in the habit of calling my forward rendering asset “URP” and I put it in the root folder because I’m a heathen.
Now the first part of doing the material is: “Get Lighting Vector from Engine Light” and Unity has a nice tutorial to grab the light via their blog Custom Lighting in Shader Graph.
You have to make a custom node in the shader graph, pull in the lighting data from the directional light and THEN you can do the regular steps. What I don’t like with the custom lighting tutorial and nearly every cel shading tutorial uses a ramp texture for the light:
This gets technical but If you want a light ramp as a gradient property and not have to use a texture you can now. In shader graph you can convert the screen color space to HSV and then make a property as a gradient and convert it back to RGB and plug that gradient in instead of a texture. That way you can modify it as a property and not need to photoshop change. I didn’t use this because I’m only looking for 1 shadow not a band of shadows. So it’s either LIT or UNLIT, and I don’t need to make crazy color gradients to get that simple binary effect.
So that’s why after I dot product the lighting vector to normal world vector I would rather use a step + smoothstep to make the “ramp” of the lighting on the surface.
So that last step - ehehe my pun - and some magic of inversing the light and multiplying it with a color to make a shadow color. I can control the lighter color and the darker color in the material editor to be whatever I want. And if I change the direction of the directional light the shadows update:
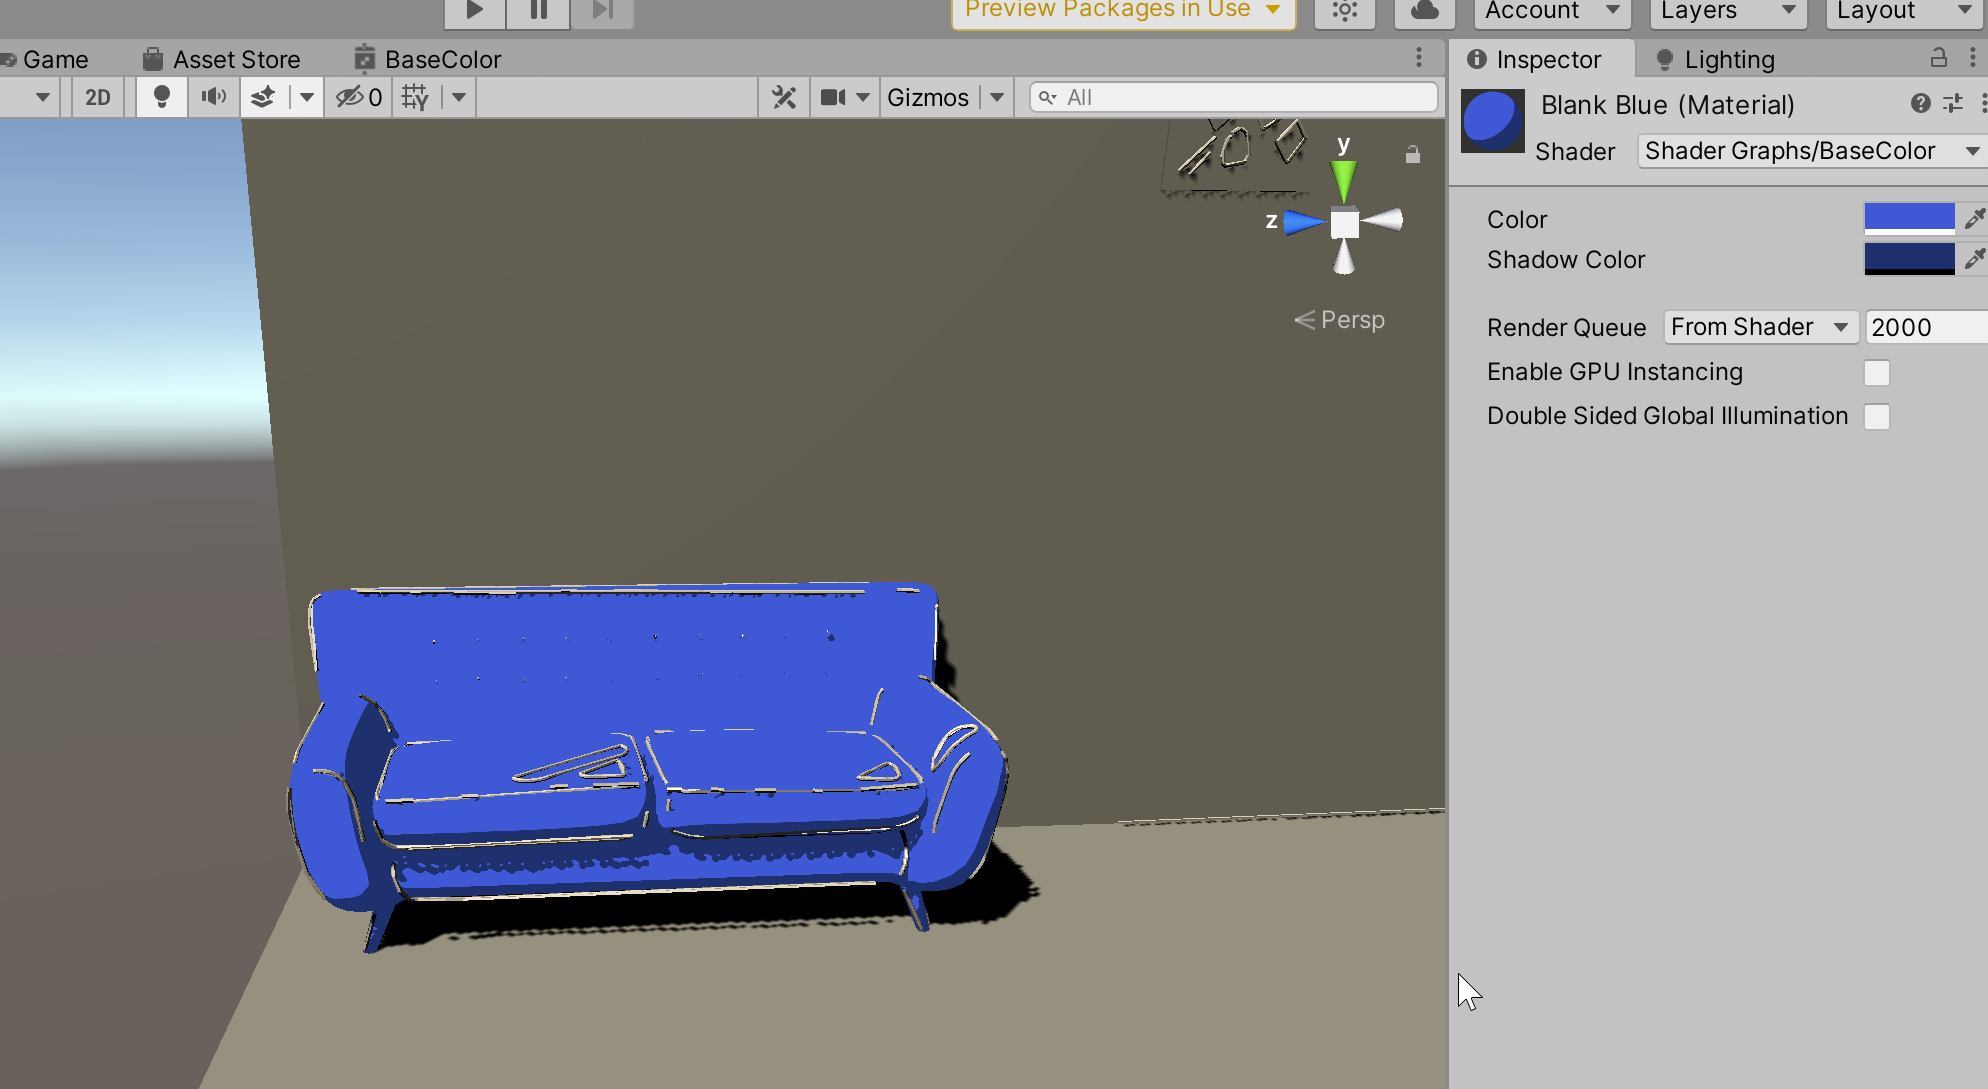
Getting the shadows to cast ON the couch was harder I had to look up some Unity forums and was pointed to putting in these keywords into the material parameters so that my shader could read the engine shadows:
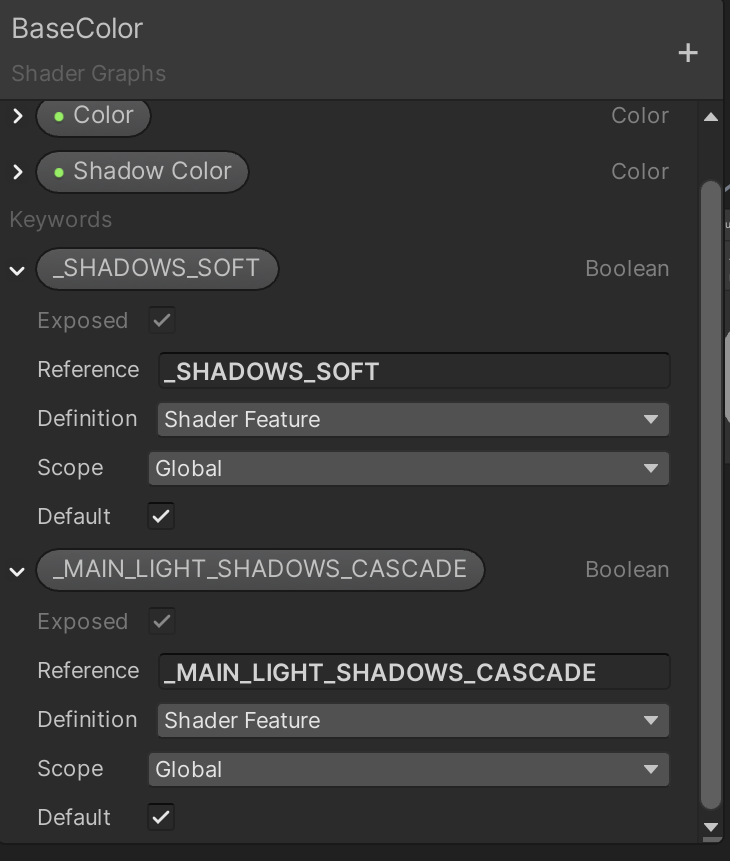
Now I duplicated these materials to be different colors to get that initial art style I wanted:
So I have a Blue Material, a Mint Green Material, and Red Material. I placed those materials strategically on fun color spots throughout the room and things are looking good. Now onto Unreal.
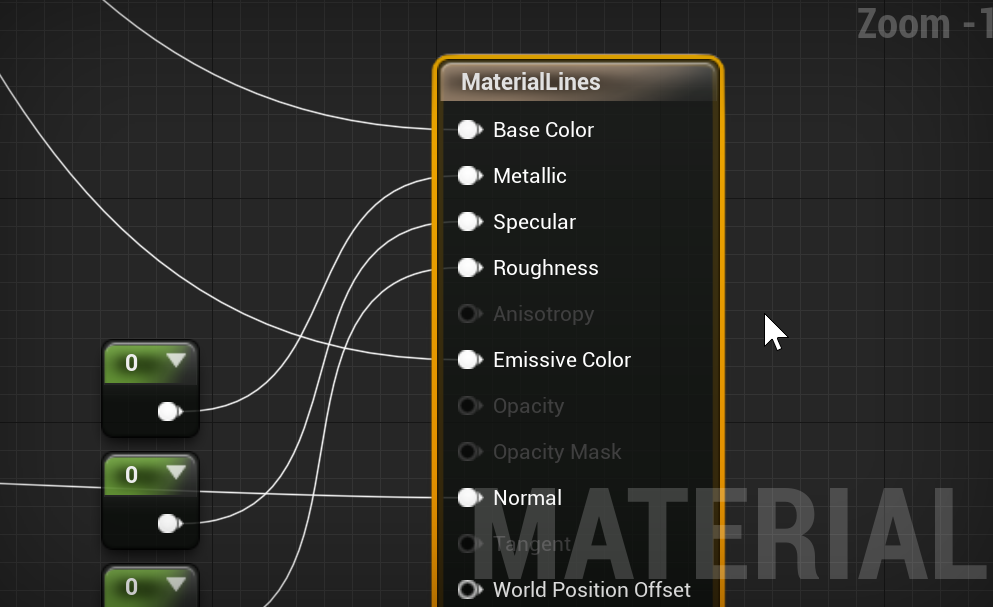
Cel Shading in Unreal:
Turns out nearly every google search of this gives you a post processing effect. I tried looking up “access lighting in material editor” all sorts of other key google phrases because I knew from the graph I did in Unity how to DO the same graph in Unreal I just didn’t know how to access the level lighting.
There was a really round about way of doing this through some really deep google searches and wordpress blogs. AND then I couldn’t figure out how to execute the lighting in the level blueprint without having to hit play. So even when I DID figure out how to call the lighting in the editor I had to always hit play to see anything render correctly. Luckily I was complaining about this in a Discord and someone said “why not use AtmosphericLightVector”
“wut?”
I try out that node in the material editor and it doesn’t update the vector of the shadow:
They commented oh you have to check the atmospheric something or another and gave me a screen shot:
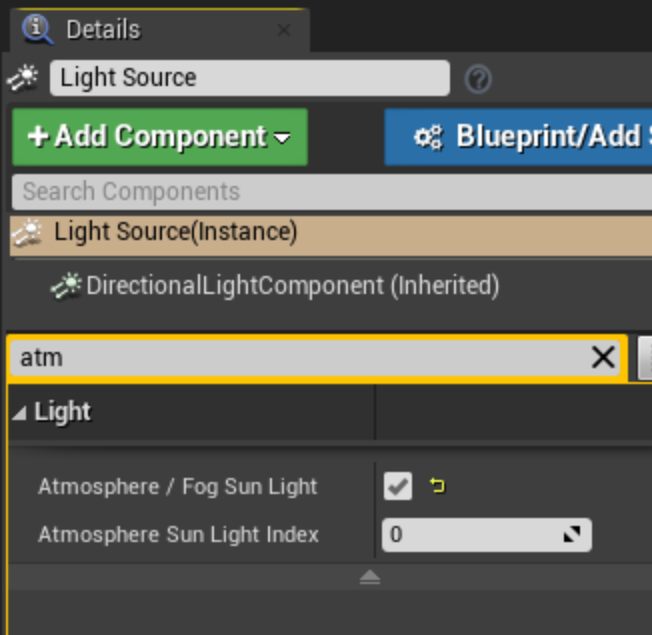
Atmosphere / Fog Sun Light check box
And suddenly EVERYTHING WORKED... I didn’t need to use that weird blueprint running a lighting function only on play and I could see my shader work in the editor!
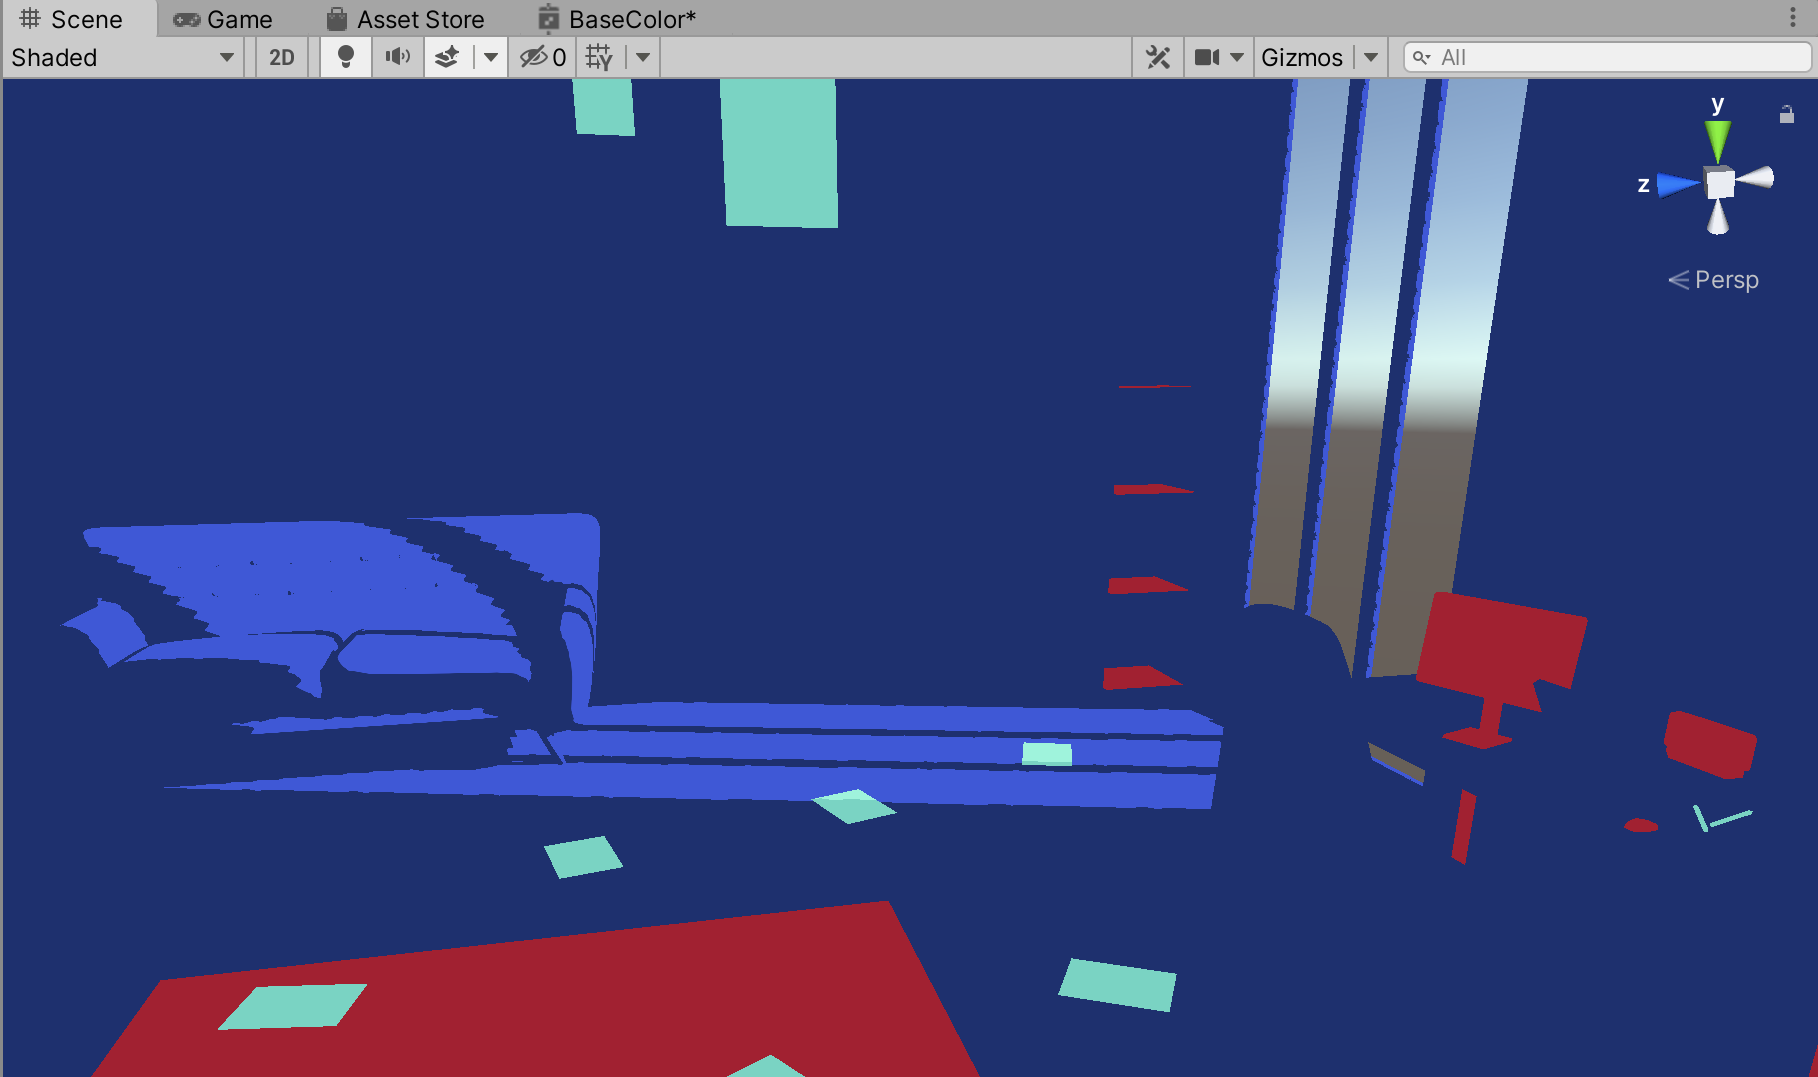
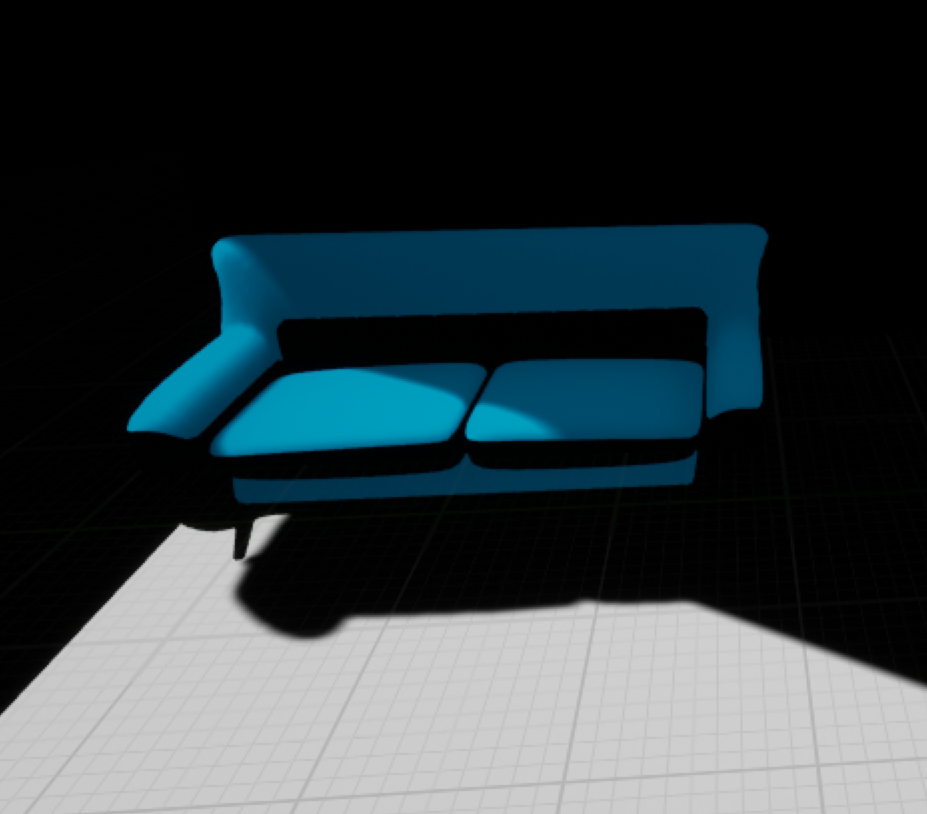
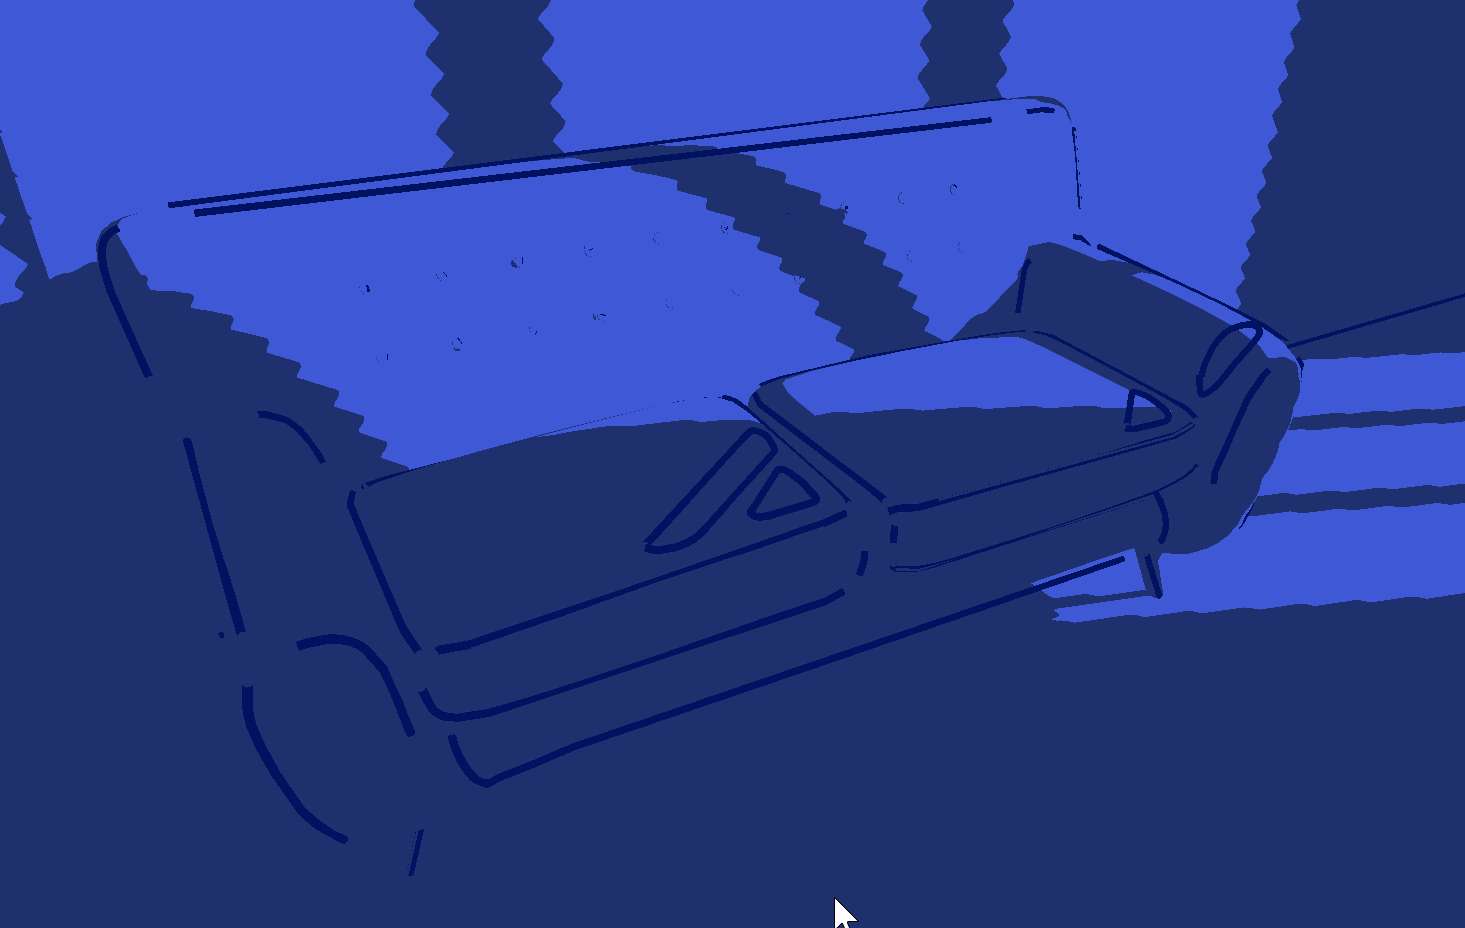
Another weird thing I encountered in Unreal was getting a real flat look, the couch has some mythical light data from who knows where:
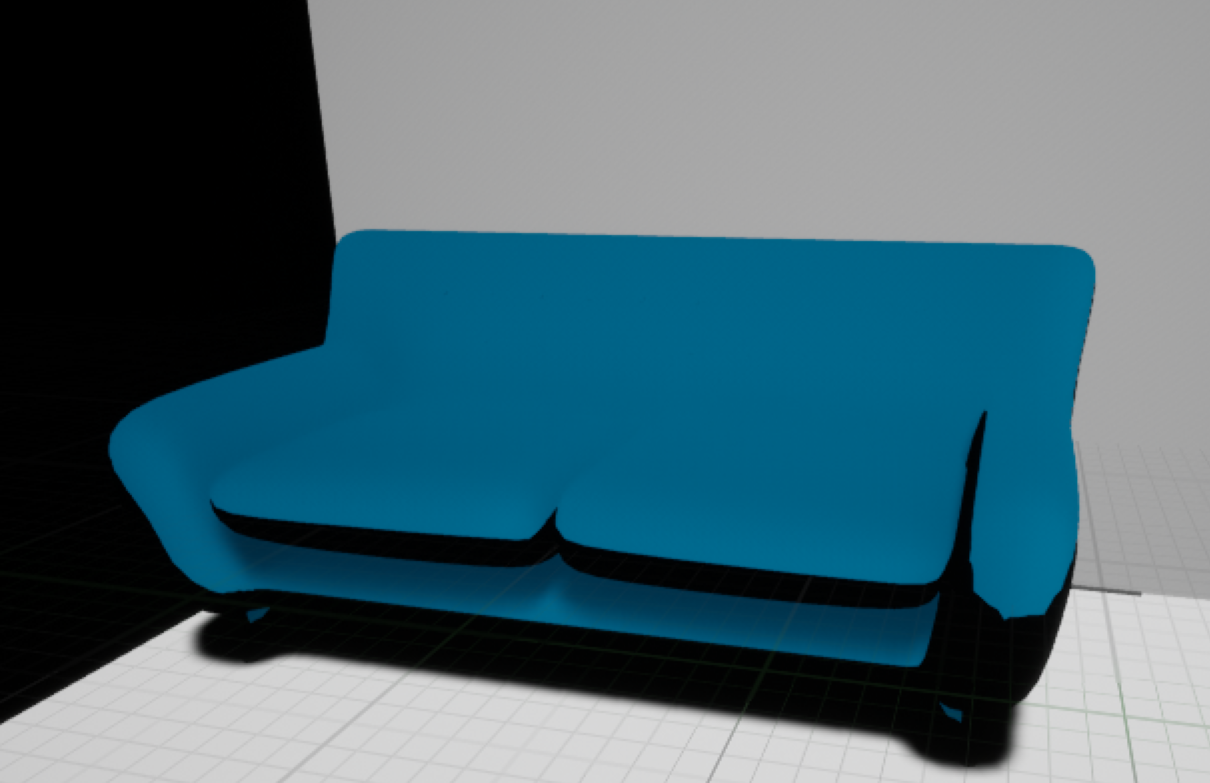
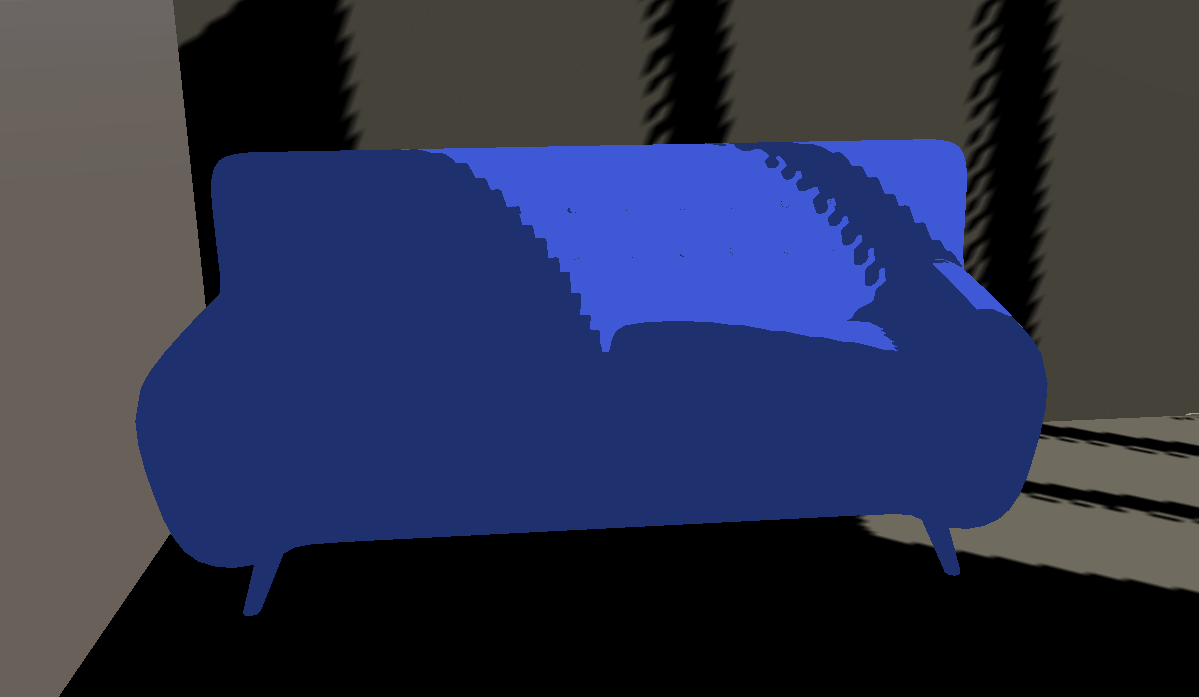 Unity is flat as can be
 Unreal’s Mythical Shadows
I have 1 directional light in the scene... where in the world is this imaginary light giving the couch some extra depth?? I know it’s a surface shader but I didn’t think it would be THIS surface inducing. The little darker blue between the back and pillows. To get around that I implemented some weird normal mapping off a forum post.
It’s not perfect but reversing the normals made it flatter... and the rest of the scene being dark hides this well:
And the last little Unreal detail to figure out was the shadows:
In Unity I was able to get the shadow color to be darker blue, but in default Unreal shadows are a dark abis of no light, like my soul. So to get around this I plugged exactly the same cel shading into the base color AND emissive and for reasons beyond me that worked.
 Showing a dark blue color for the shadows
 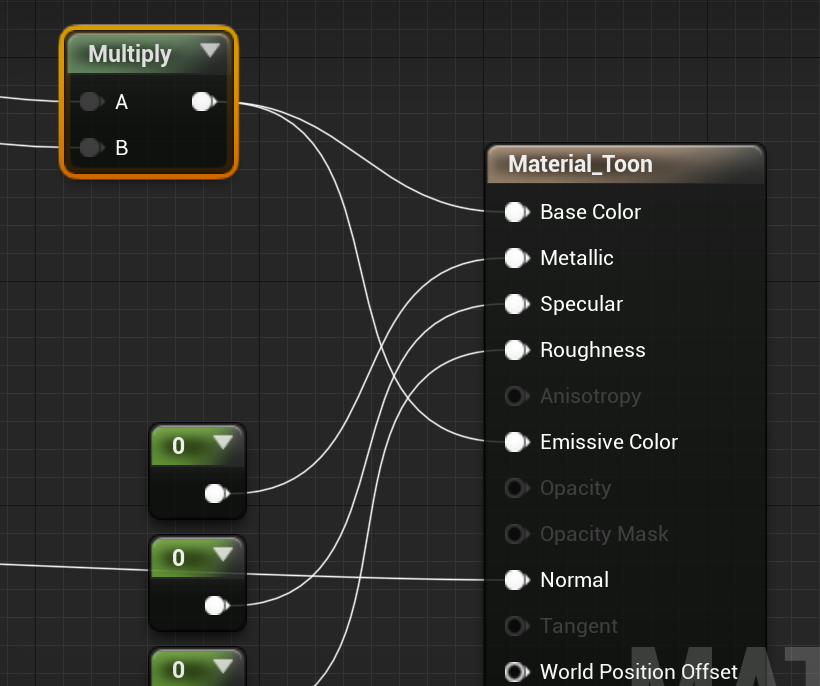 Same Cel Shading in Emissive and Base Color
In Unity I would use an unlit base shader, but changing the material in Unreal to unlit just made it not look dynamic with the light source so the emissive color was the way to go. However because it’s not unlit is also why I had that extra little bit of light definition on my couch earlier, if unlit it’d look flat. To get the lights to have a dynamic additive color I wanted I had sacraficed the unlit material for a surface material. So I kinda created my own problem, but then I solved it! It was a tradeoff I was willing to make, have a little bit of shadow definiton for cool additive lights.
 Unreal Surface w emissive
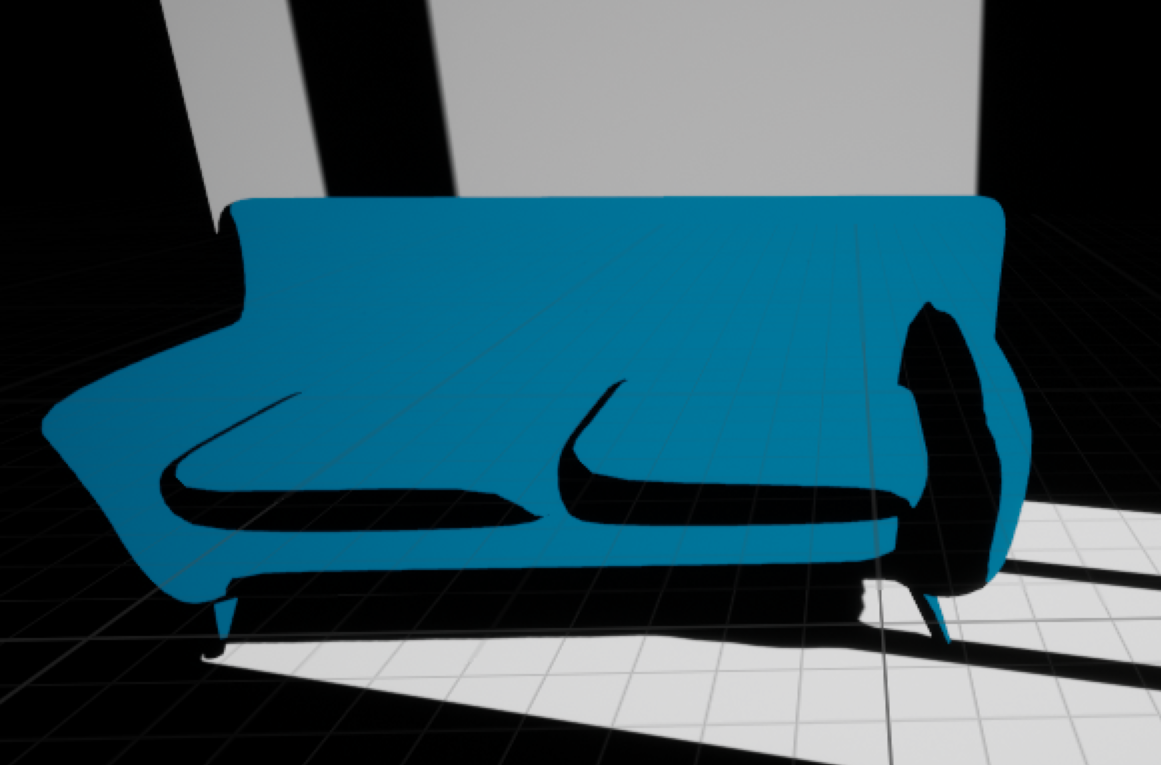 Unreal Unlit
That sums up how I got a general cel shading along with modifying the directional light to have harsher shadows.
Cel Shading Unreal vs Unity:
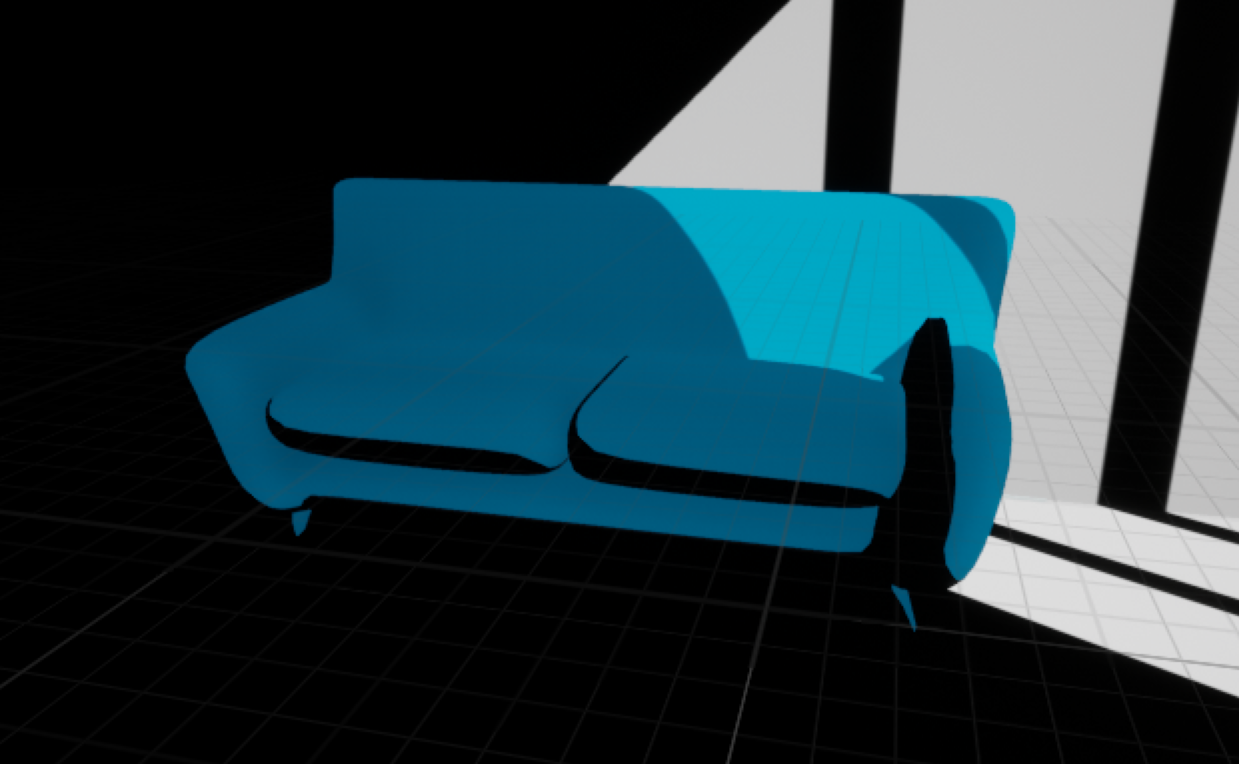
The comparison is pretty stark difference from what I ended up with for Unity and Unreal. The fact that the lighting was so dark in Unreal lead me to keep to one color and put a darker art tone. And the shadows look so much better in Unreal so I utlized them more. Unity I didn’t struggle as much to get the flat lighting and color so I experimented more with different colors and composition, but it doesn’t have any auto smoothing help so shadows have aliasing (those jagged lines of the shadows).
 Unity Light and Quirky
  Unreal Dark & Moody
Now onto outlines which again I ended up taking very different approaches between Unity and Unreal.
FOURTH STEP:
Make me an outline
Outlines are a hot item in tech art. They seem to have gone through a few phases: we have Cull Outlines, Rim Light Outlines, and Post Processing Outlines using scene depth and normals, oh and Edge Detection outlines if you count those. That seems to be the common themes of ALL the outlines I’ve googled for a month or 2 before embarking on this journey. Least all of those outlines for Unity... granted I haven’t looked into Unreal very much for outlines but it seems to have a nice post processing version to use easily. None of them LOOK like the art style because none of them are drawn on the mesh, so my outlines are actual models exported from Blender into the engines and that’s the look I wanted to go forward with. Makes it pretty easy... till you need to rig them... but that’s for another time.
So my outlines will be treated like any other mesh, but since they ARE a mesh I can do some very interesting vertex things to them... Let’s see what I did with it for Unity.
Outlines in Unity:
Putting an unlit material with a color on the lines meshes looks pretty great as a base line:
I even made a dark material color and was playing around if the lines should be light or dark, if they are dark they kinda blend in, but I liked the stark contrast of the light outlines:
Now the extra art style I wanted to animate the lines because they feel dynamic and animating them with vertexes is something I’ve wanted to do and get better at the technique.
The good thing with these meshes for the outlines are they aren’t low poly, lots of verticies to animate, if you have a very low poly mesh this effect would look quite different. I used Assemble With Care’s write up on how they vertex displaced the art style of their game. I liked the animation and I wanted to use that so I used their wobble function and applied it to the outline I made.
Now this is where Unity makes it really easy, there are Shader Graph materials and then you can also code your own material pretty easy without any interchangability.
I threw in their Wobble function:
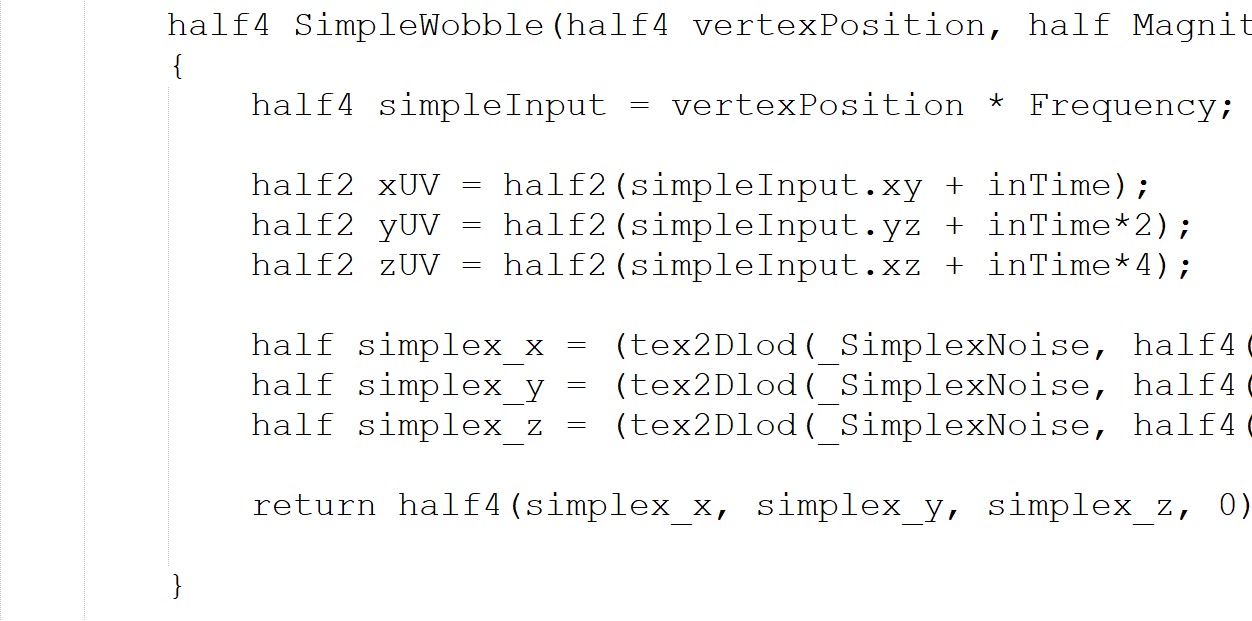
Transformed my vertex displacement to the wobble
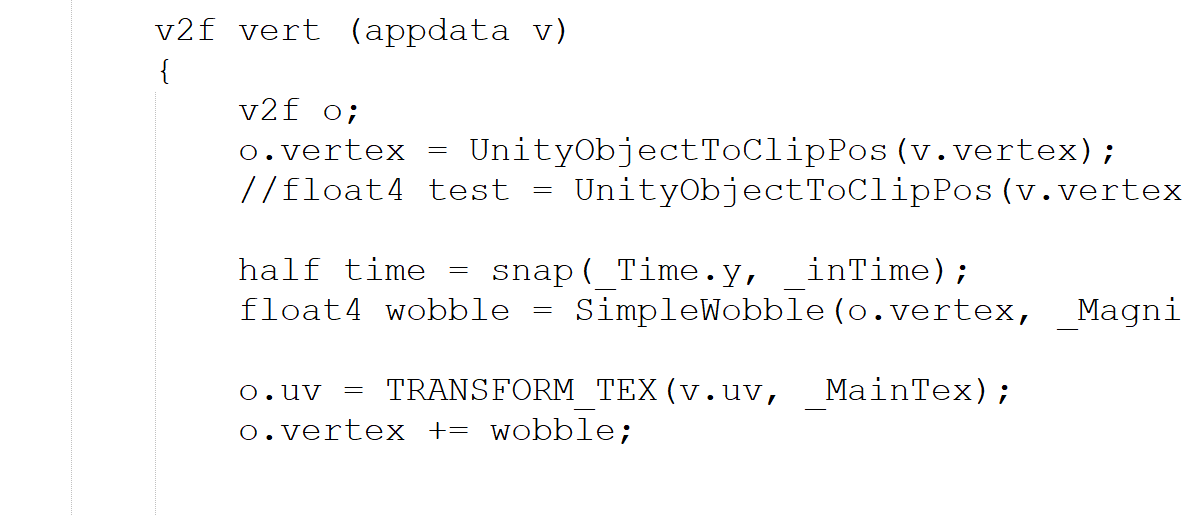
And I got a realy neat effect after fiddling around with my properties:
I also tried to make that entire code shader as a Shader Graph, and I had some success but sometimes it’s just easier to do it in code than always in Shader Graph:
The thing that bothered me about the effect was the masking and showing lines through the mesh. I wanted it to offset and wobble but not draw lines outside of depth rules and I didn’t want a mask effect either. I did a quick duplication of the outline mesh and changed its color to green and made it not animate and had the animating line ontop:
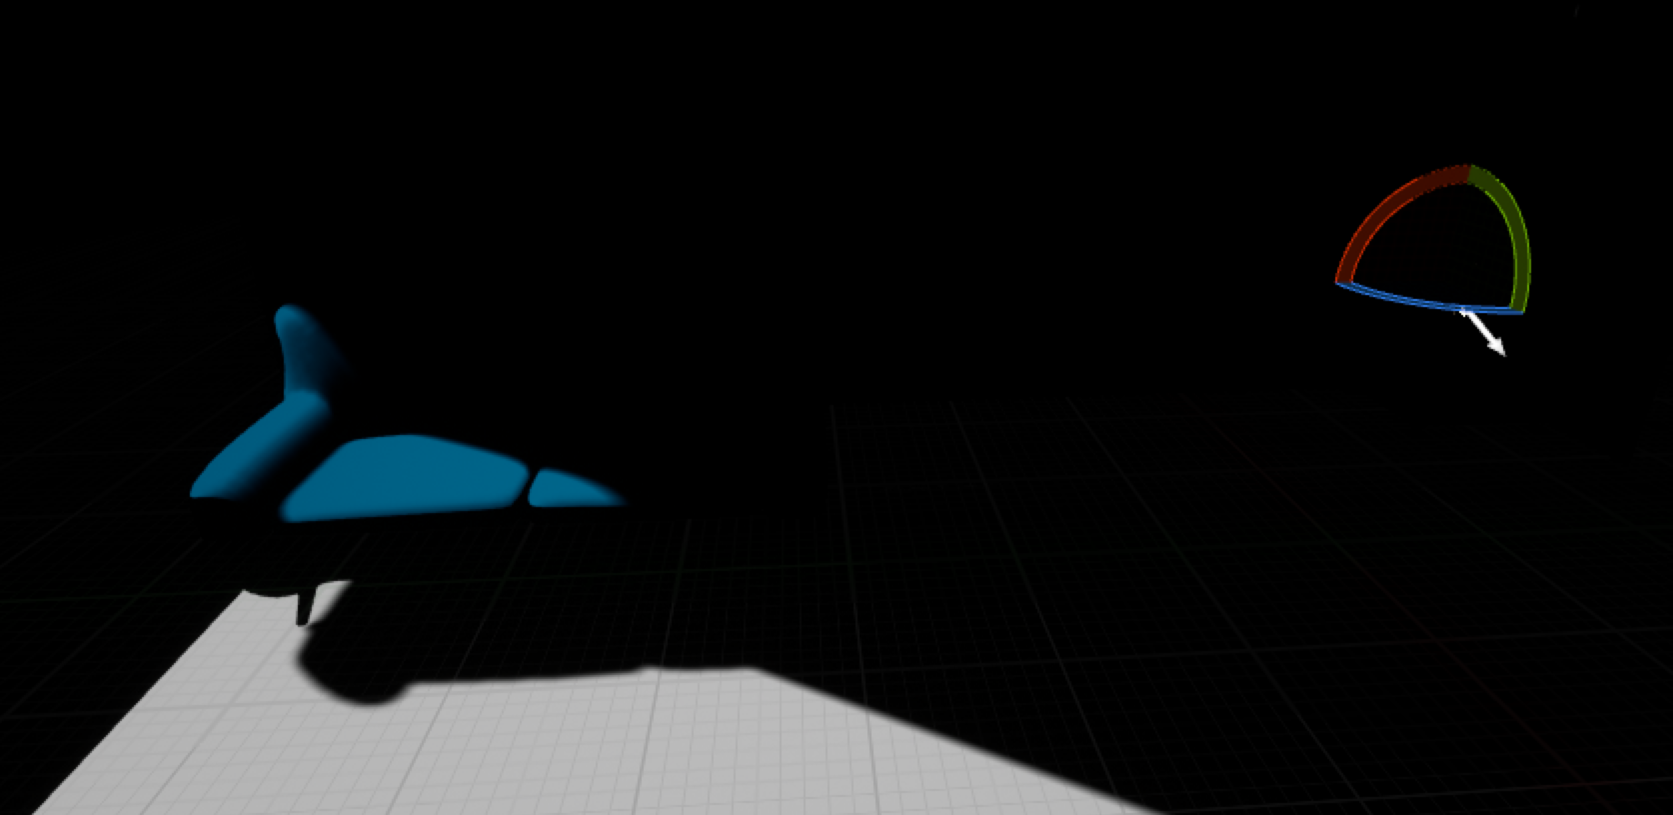
Double the meshes double the problems and again that wasn’t quite the animation I had in mind but it does look cool. I was wondering how could I get the line animations to be camera facing when someone on Discord suggested I tie the vertex distortion to the clip depth of the original vertex position. I tried that and what it looks like is this:
 Normal animation
ClipDepth locked animation
And that seems to have been the solution I was looking for as I put that in my shader code it turned out to be the effect I wanted. And that is as far as I went in Unity till I descided to switch to Unreal for fun.

Outlines in Unreal:
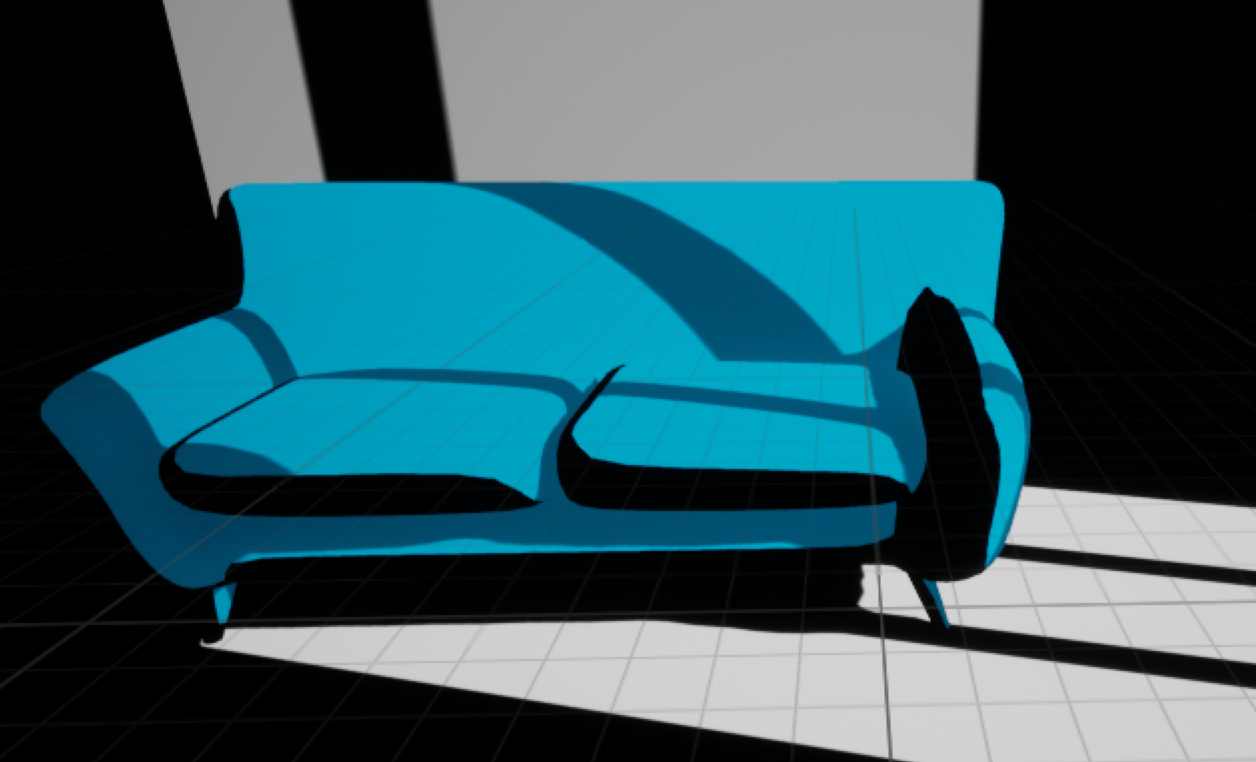
From my learnings earlier of the Unreal’s shadows, I didn’t like the shadow was pure black so I plugged the emissive into the cel shading to get a darker color in shaded parts... but for the outlines the stark contrast between the black shadow and light was really cool so I undid the cel shading in the emissive for the outline material and it made such a cool effect I really didn’t explore more than that.
Same Material as Cel Shading
That looked so good and was simple I have no idea why I decided on a friend’s tweet to try this method with a character rigged. Turns out rigging these outlines is quite difficult to the same bone structure of the character I found on sketchfab. The cel shading worked perfectly on the character I just multiplied the base texture (that I turned grayscale so the colors don’t conflict) with a color and all looked good.
I had to import the outline mesh with a skeleton and the character with a skeleton and of course the animation. I don’t know really anything about character rigging, I know a little bit about imported animations, and nothing about Unreal so it was a lot of googling.
For some reason the animation flips the Y axis for the character mesh but not the outline mesh.
Outlines Unreal vs Unity:
The outlines followed a similar creative process to cel shading where I had less difficulty getting outlines to have a basic color and shadow. So in Unity I spend that extra effort making the outlines vertex displace animate to a noise texture. In Unreal I spent that extra time getting the outlines to animate to a character rigged up.

What are the next steps from here? It could be adding a character in Unity and making those outlines animate. In Unreal maybe adding more color and atmosphere like 4 different colors playing with each other. Or could be something else... like a comic book like effect I’ve been messing with:
Let’s see where I take things in my Tech Art chronicles and journal what works, what doesn’t work, and always experimenting and pushing things forward.