Walking Dead: The Final Seasons
Episodes: 1-4
Season Four of the Walking Dead wanted to get back to it’s roots of the comic and what made season one so great. So from the UI standpoint we went with the comic book style and incorporated that in all the UI in the final season
Year: 2018
Role: UI/UX Lead
Tech: Maya, Photoshop, Illustrator, Telltale Tool, After Effects
Platforms: PS4/XBOX One/PC/Switch
New Gameplay Features:
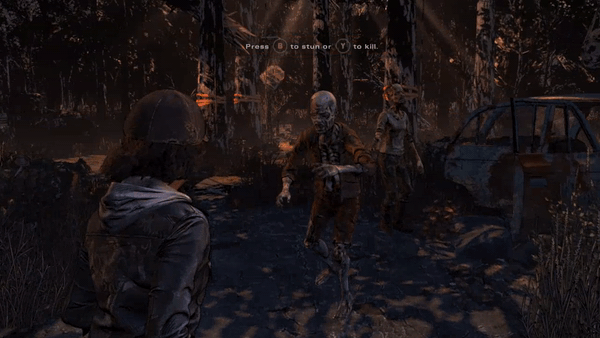
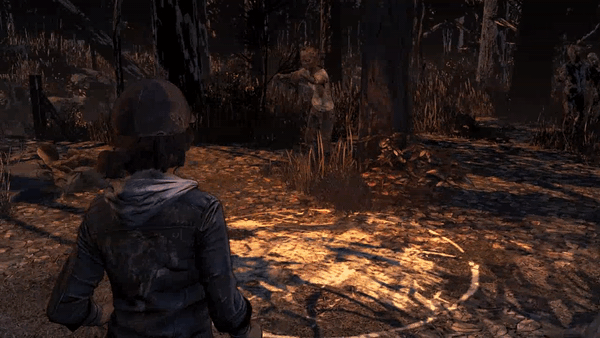
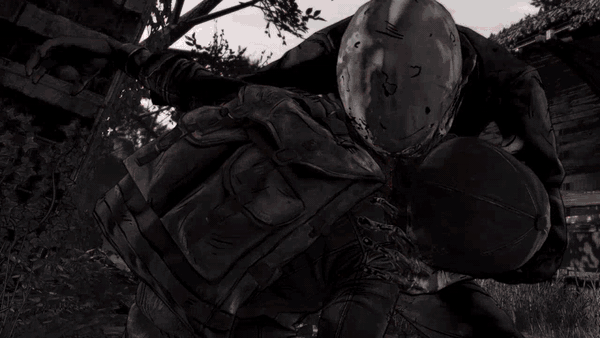
Zombie Combat was introduced in Walking Dead and specifically in episode one we had a trap system as well. The challenge with zombie combat and traps was being very clear to the user what zombie they could attack and when was the trap clear to use. We used the QTE (Quick Time Event) Buttons to appear on the zombie to indicate which zombie you could attack and we used a decal system to change the color of the decal on the traps to indicate when you could kill the zombie.

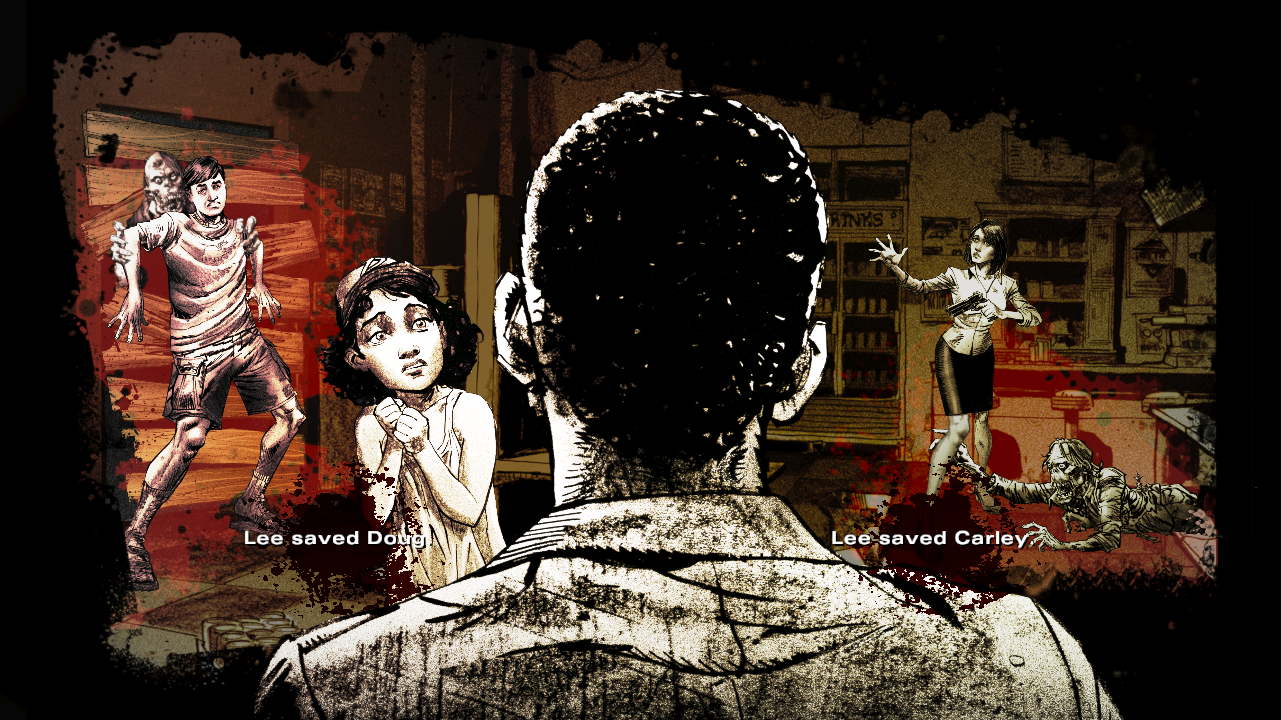
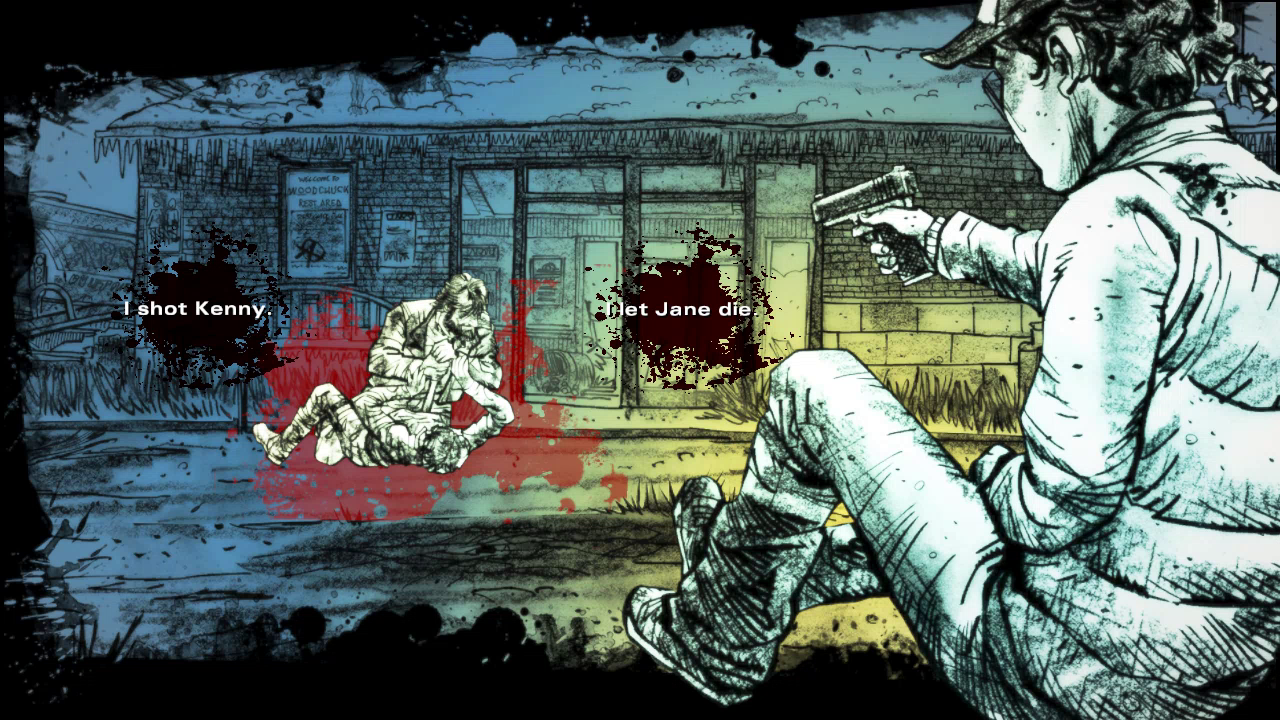
Death Screen was the first screen to get the Walking Dead comic book treatment. We were able to use a few new tech features like “Graphic Black” an ability to draw in more blacks and an on screen gradient to combine them to make the Death Screen appear as if it’s a comic book panel.
Configurator/Choose your Own Story is the Telltale method to choose to recreate your save data. In previous games we put the configurator in the menu and often times asked 10-20 questions. So as the user it can be quite confusing to answer what happened in previous seasons and then enter a main menu. We decided to integrate the configurator into the start of the game, so that it served two purposes both to summarize what has happened in previous seasons and asking to recreate if viable.


New Menu Features:
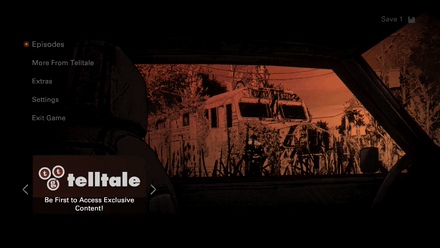
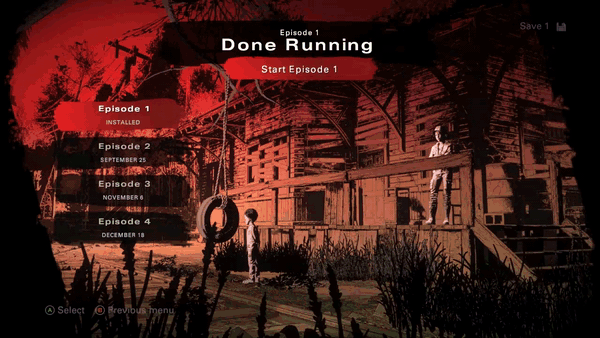
Boot to Play was an idea that started with the desire to get the user into the game as fast as possible. In pervious Telltale menus it could take up to 5-8 button presses from the initial boot screen to get you in game, along with the distractions of 3 different menus. In the final season we consolidated it down to 3 button presses and one menu on users first encounter with the game.

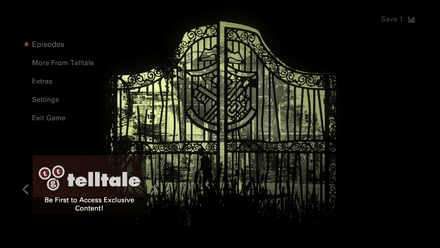
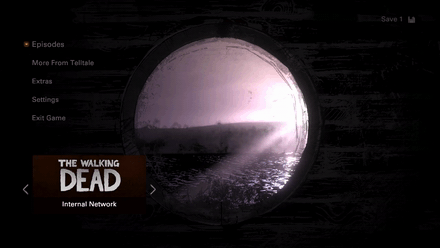
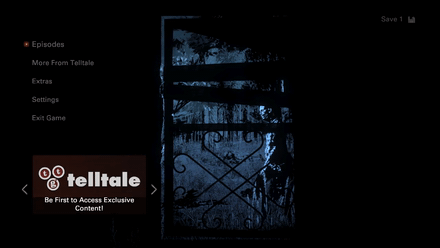
Menu Key Art’s purpose is to lead you into each environment by first looking through a window of some kind and then displaying more of that environment while expanding into the episode’s menu. For example, in the main menu, you’re looking through the car window at the train station and then it reveals more of the train station in the episodes menu.

Each episode installed would show you a new “window” to look through and the colors would match the episode dioramas that are similar scenes to the keyart. See below the School Doors key art lead into the Dorm Room with Clem and AJ with the same colors and style.
![]()
![]()


Menu Dioramas were all themed to locations centered around each episode and the relationship between AJ and Clem in the shot. The environments were a blend of flats and actual models to make sure our scene load was very minimal and we didn’t have to load all those environments and textures. The comic book cover style persisted into the menu and made it look dynamic and unique.
Extras
Collectables Usables are found all throughout each episode and instead of showing a regular POI on the collectable which would be easy to spot instead we created a material that applies a “sheen” on the object to indicate it’s something you can pick up.

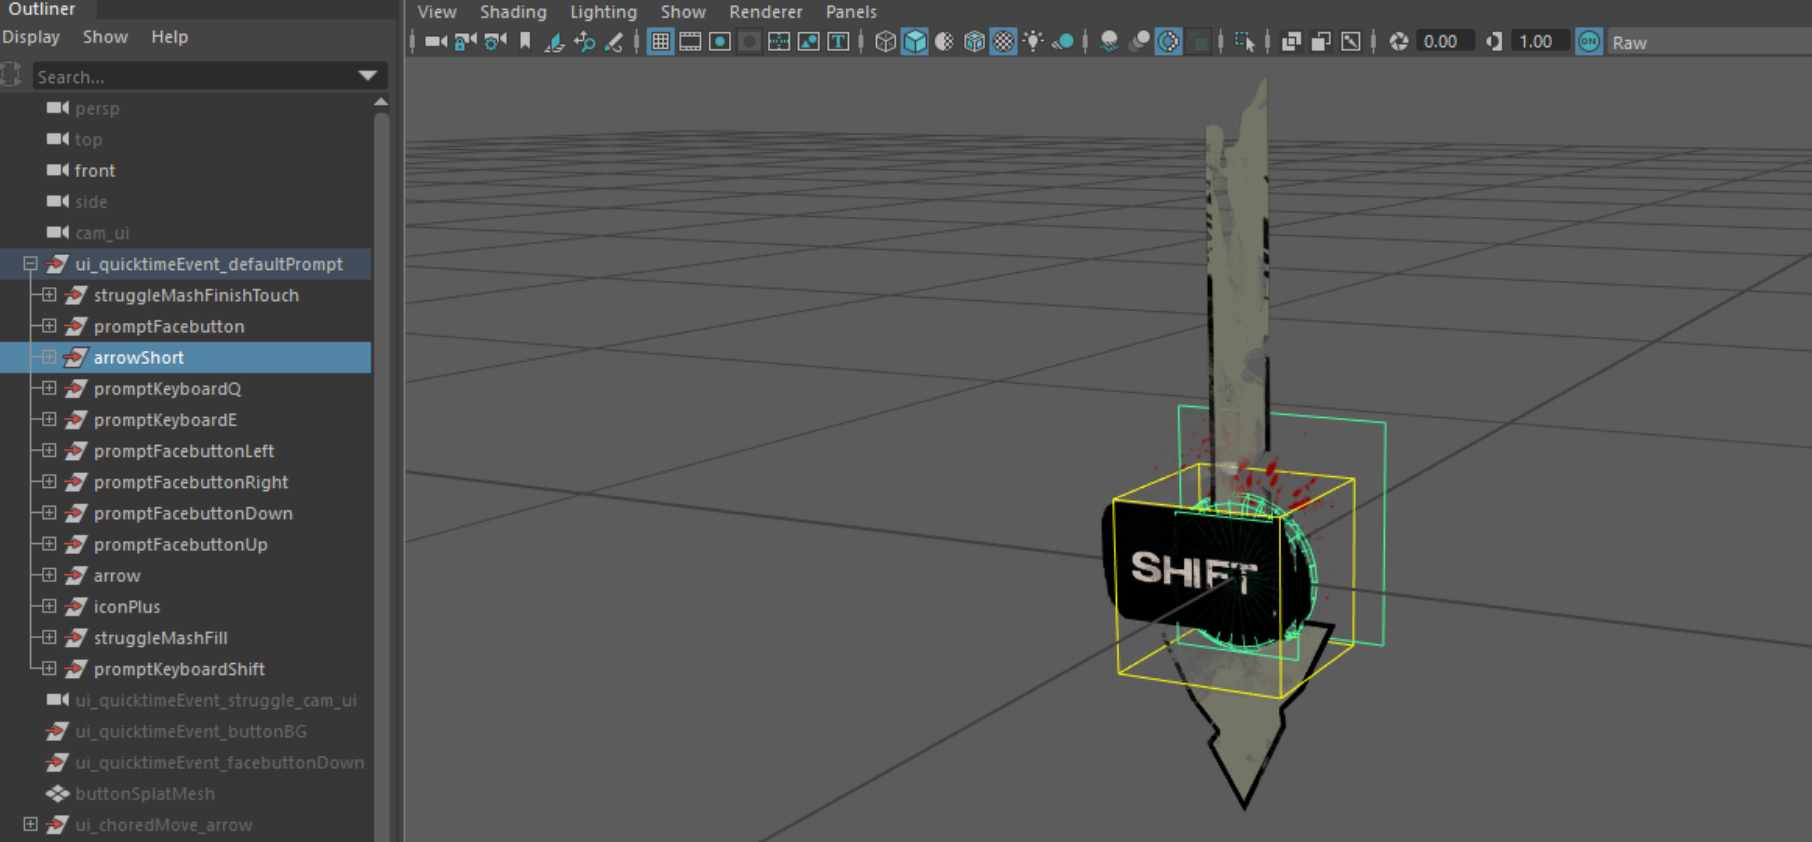
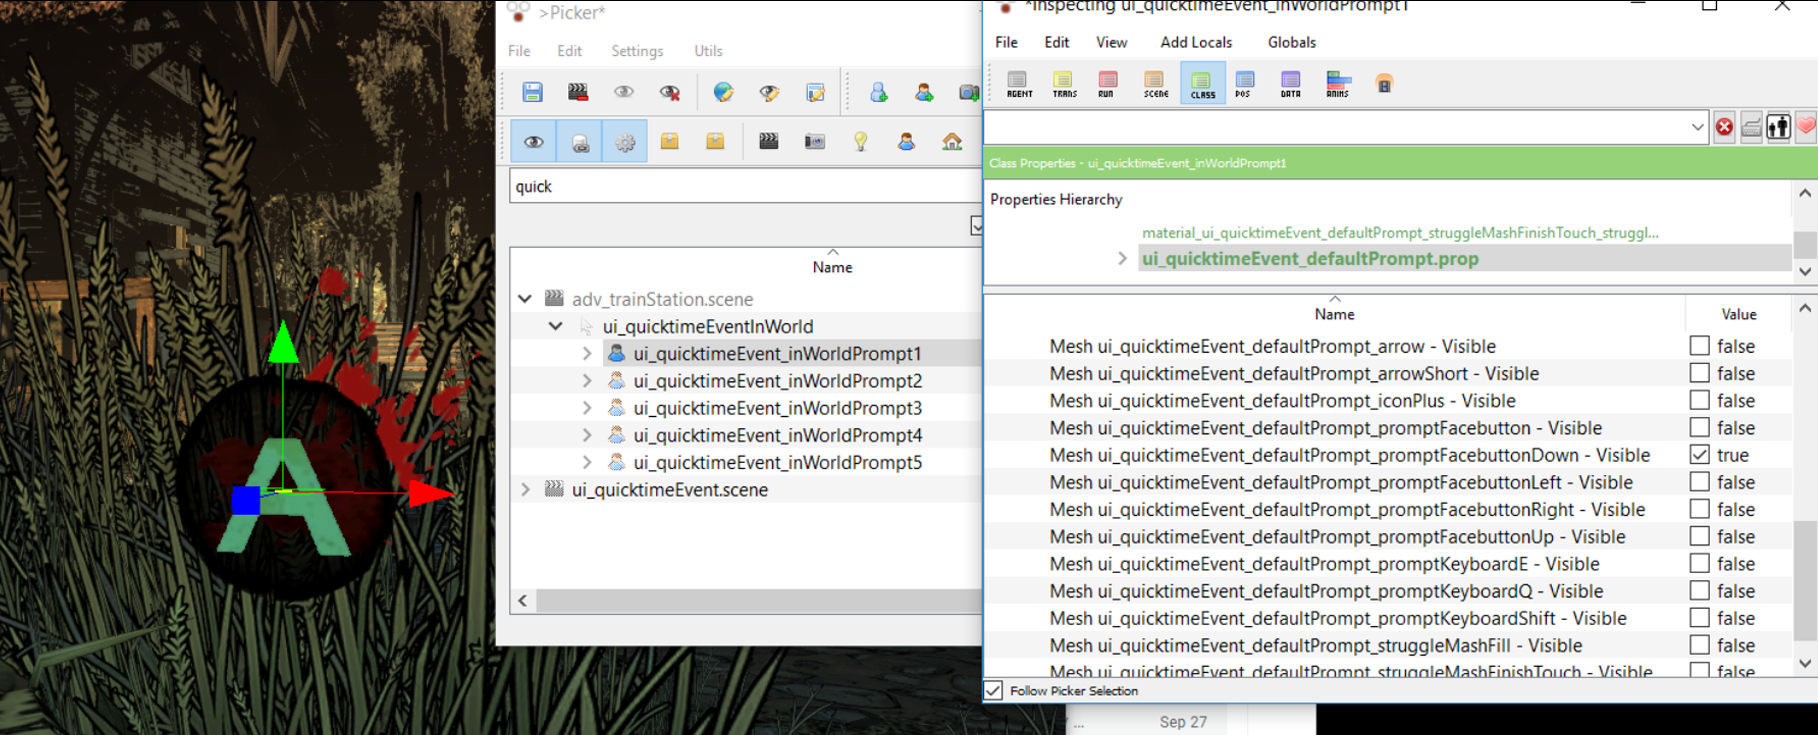
New Maya & Pipeline Process for Walking Dead The Final Season I was able to completely redesign the entire Quick Time Event Prompt. I took all the individual agents we have modeled over the many years and placed them together in as submeshes of the same agent. Therefore in the Telltale engine you didn’t have to load 20+ agents in every scene, you only needed to load 5 agents (because we could have a max of 5 buttons up on screen at once). It made it easier for the UI artists and the Cinematic artists to animate the buttons in various fight sequences. Rather than searching for the exact button you needed for a fight scene and making sure you animated that agent, the artist only needed to animate prompt1. In the case of two buttons up at the same time it was prompt1 and prompt2.


Success Button Press Animation
Failed Button Press Animation
There were some other fun considerations like making sure the animations that played on the agent could be broad that one animation would apply on every type of button possible. It was a balance of animating certain material properties cleverly while not affecting others. I also made sure the model no longer included the physical model letter “A” and it was replaced with a texture that way we could easily localize the button to any platform by replacing a texture and not have to model out an entirely new button say for Nintendo Switch.